
The Setup Wizard
What each step of the Round Trip setup wizard asks for, what it saves, and where to change it later. Setup opens automatically after installation in a new project.
On this page
The Round Trip setup wizard opens automatically after installation in a new project. Every choice can be changed later. You can also open it at any time from Tools > Round Trip > Setup Wizard….
Six steps, one screen each. Next and Back move between them; nothing is written to the project until Save & build index on the Review step, except the source folders, which are saved as you add them.
Follow the six setup screens
Select a screenshot to enlarge it.
1. Welcome
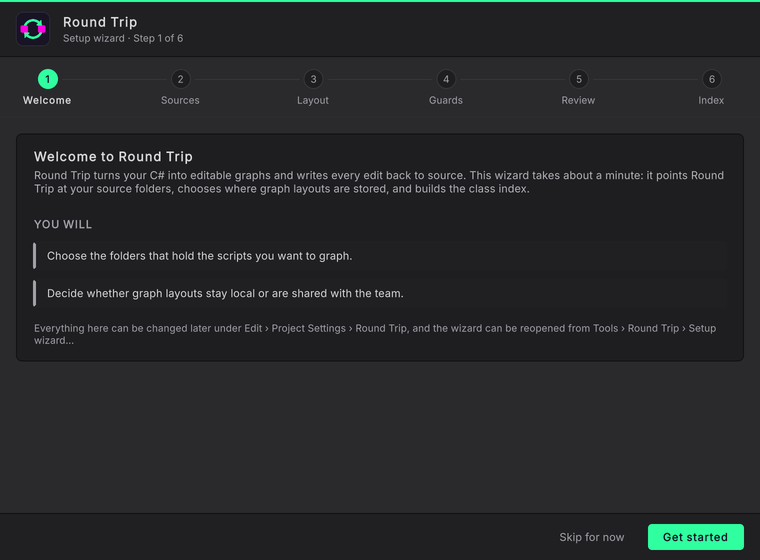
Section titled “1. Welcome”The first screen says what the wizard is about to do: point Round Trip at your source folders, choose where canvas layouts are stored, and build the class index.
Press Get started to begin. Skip for now closes the wizard without configuring source folders. Reopen it from Tools > Round Trip > Setup Wizard… when you are ready; skipping does not cause it to appear again on every editor restart.
2. Sources
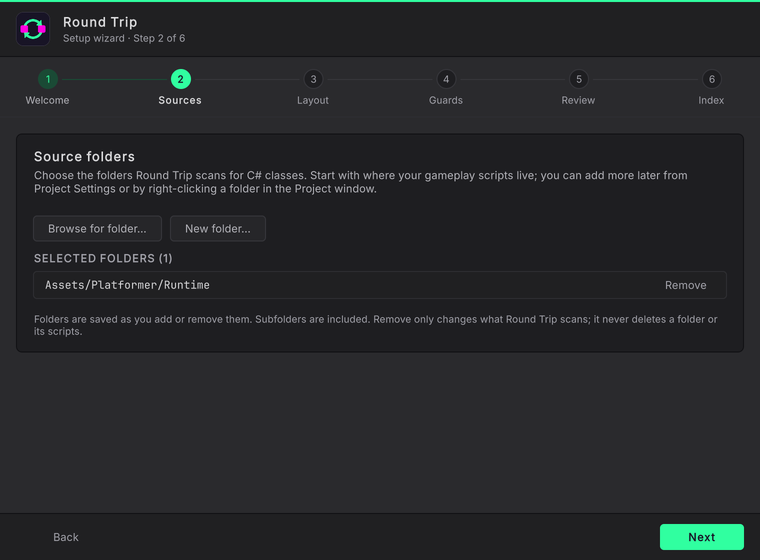
Section titled “2. Sources”Choose the folders Round Trip scans for C# classes. Only classes under these folders appear in the Explorer; everything else in the project is left alone.
On first setup, the wizard selects any existing Assets/Scripts, Assets/_Project/Scripts, Assets/_Project/Runtime and Assets/_Project/Editor folders. These are conveniences, not a required project structure. Missing folders are not created automatically, and an existing configuration is left alone.
Press Browse for folder… to select another folder, including one you just created in Finder or Explorer before Unity imports it. Subfolders are included; selecting a parent replaces any separately selected children.
Need a folder first? Press New folder…. The parent starts at Assets/_Project when it exists, otherwise Assets. Change the parent or the suggested Scripts name, then choose Create and select. New folders are created inside this project’s Assets folder through Unity. If the folder already exists, the action becomes Use existing folder rather than creating a numbered duplicate. Cancel creates nothing.
Folders are saved as you add or remove them. Remove only changes what Round Trip scans; it never deletes folders or scripts. Removed defaults stay removed when you revisit or reopen the wizard, including after a script reload. Next stays disabled until at least one folder is selected. Empty folders are valid: a quiet inline note replaces the warning dialog, so you can continue before writing any scripts.
Start small. You can add more folders later from Project Settings > Round Trip or by right-clicking a folder in the Project window and choosing Round Trip > Add Folder to Round Trip.
3. Layout
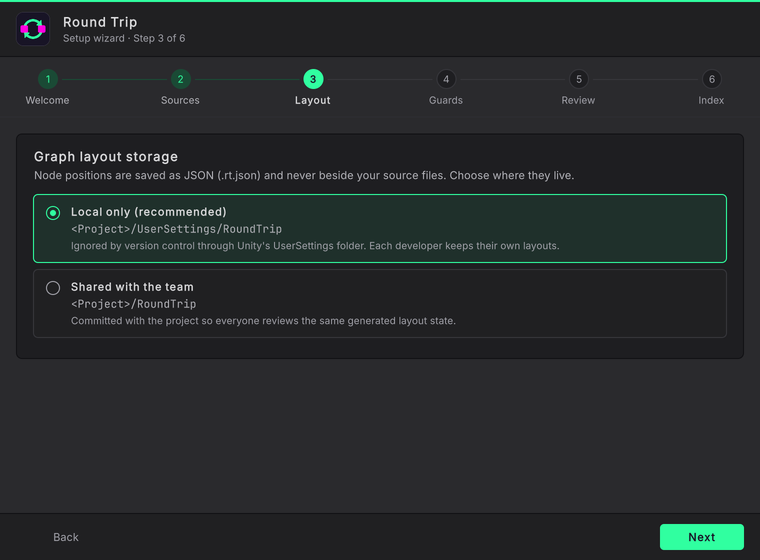
Section titled “3. Layout”The diagram’s node positions are saved in .rt.json layout and configuration files, never beside your source. This step chooses where.
The default, Local only, writes them under <Project>/UserSettings/RoundTrip. Unity’s version-control conventions ignore that folder, so each developer keeps their own layouts; it is the right choice for most teams. Shared with the team writes them under <Project>/RoundTrip instead, so the files are committed and everyone reviews the same layout. Choose it only when you want layout changes to show up in pull requests.
If the project still has layout files from an earlier Round Trip in Assets/_Project/.roundtrip/layouts, the step says so; that location is no longer used. Layout and configuration files covers both scopes in depth.
4. Guards
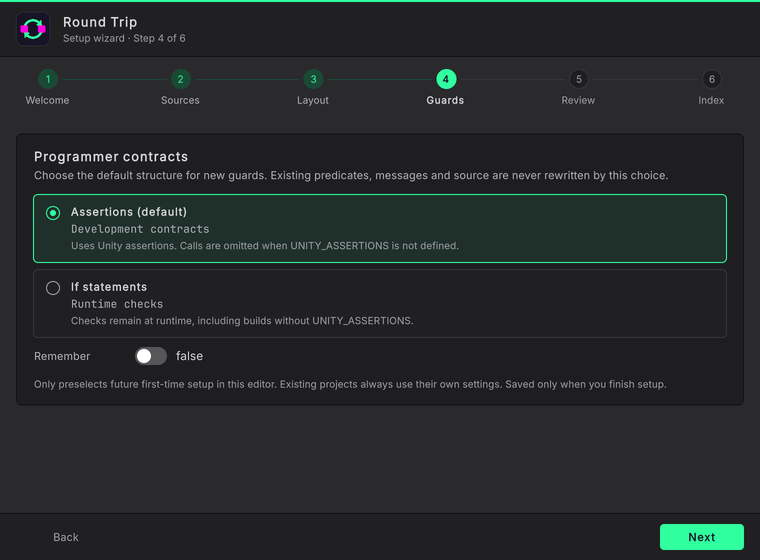
Section titled “4. Guards”Choose the default structure for new programmer contracts. Assertions use Unity assertions, whose calls are omitted without UNITY_ASSERTIONS. If statements stay in runtime builds. This choice does not rewrite existing predicates, messages, or source.
Remember preselects the choice for future first-time setup in this editor. Existing projects keep their own settings, and the preference is saved only when you finish setup.
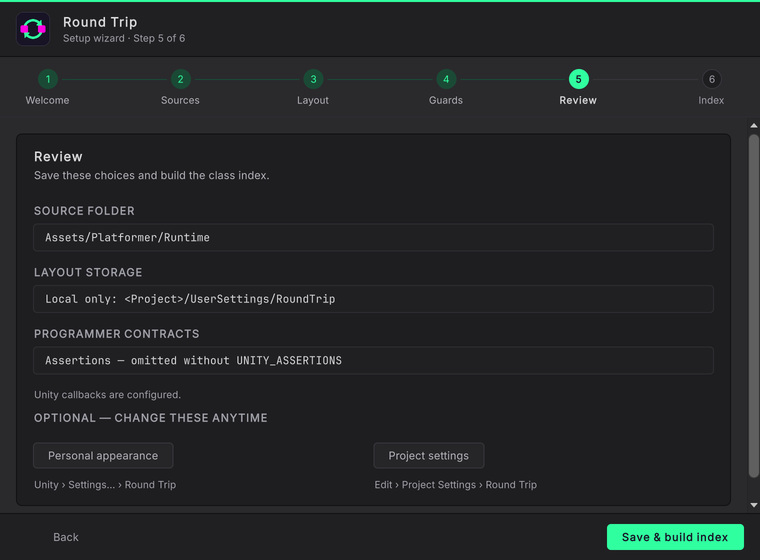
5. Review
Section titled “5. Review”Everything the wizard is about to write, in one place: the source folders, layout storage scope, programmer-contract structure, and what will happen to the Unity lifecycle catalog.
Round Trip recognizes Awake, Start, Update and the rest of Unity’s lifecycle callbacks through definitions stored in project settings. If the project does not have the current catalog, saving adds it; definitions you have customized are kept. If the catalog is already complete, the step says so and saving changes nothing there.
Back returns to any earlier step. Save & build index writes the project settings and starts the index.
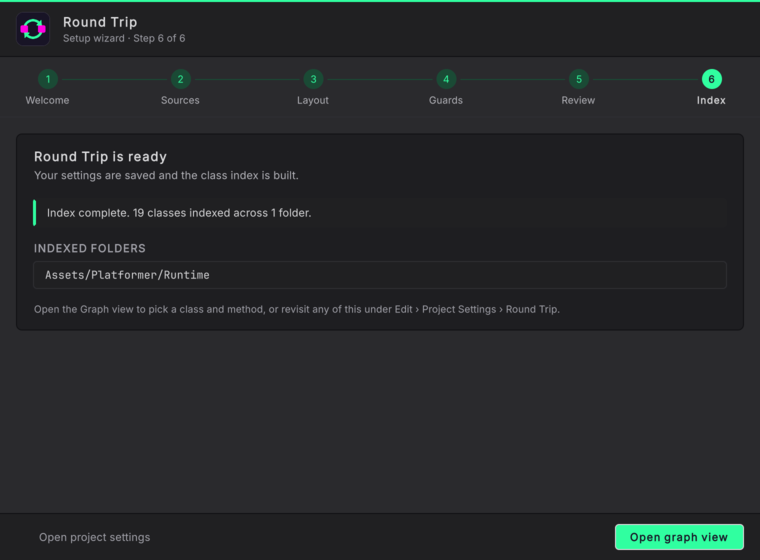
6. Index
Section titled “6. Index”Round Trip scans the chosen folders and reports how many classes it found. Large projects can take a minute; the window stays responsive and shows Indexing project… until it is done.
Press Open graph view to open the Round Trip graphs window with the indexed classes in the Explorer, ready for you to pick a class and a method. Open project settings goes to the page where all of this lives, if you want to adjust something first.
If something is off
Section titled “If something is off”| Symptom | What to check |
|---|---|
| The wizard opens every time you choose Graph view. | The project has no source folders. Add one on the Sources step, or under Project Settings > Round Trip. |
| The Explorer is empty after the index. | The folders you chose hold no .cs files, or the classes are in a folder you did not add. Reopen the wizard or add the folder from the Project window’s context menu. |
| A teammate sees different node positions. | Layout storage is Local only, which is the default. Switch to Shared with the team on the Layout step if you want one layout for everyone. |
- Install: where the wizard fits in the install.
- The window: the parts of the Round Trip graphs window the wizard opens.
- Settings and preferences: every project setting and preference, and which file each one lives in.