
The window
Learn every part of the Round Trip graphs window, the top rail button by button, the Explorer rail, the canvas and its menus, and the right rail.
On this page
One window does all of it. Round Trip graphs opens from Tools > Round Trip > Graph view and keeps the class on the left, the method in the middle and the facts on the right. Every button on it is named below, with the tooltip you will see in Unity.
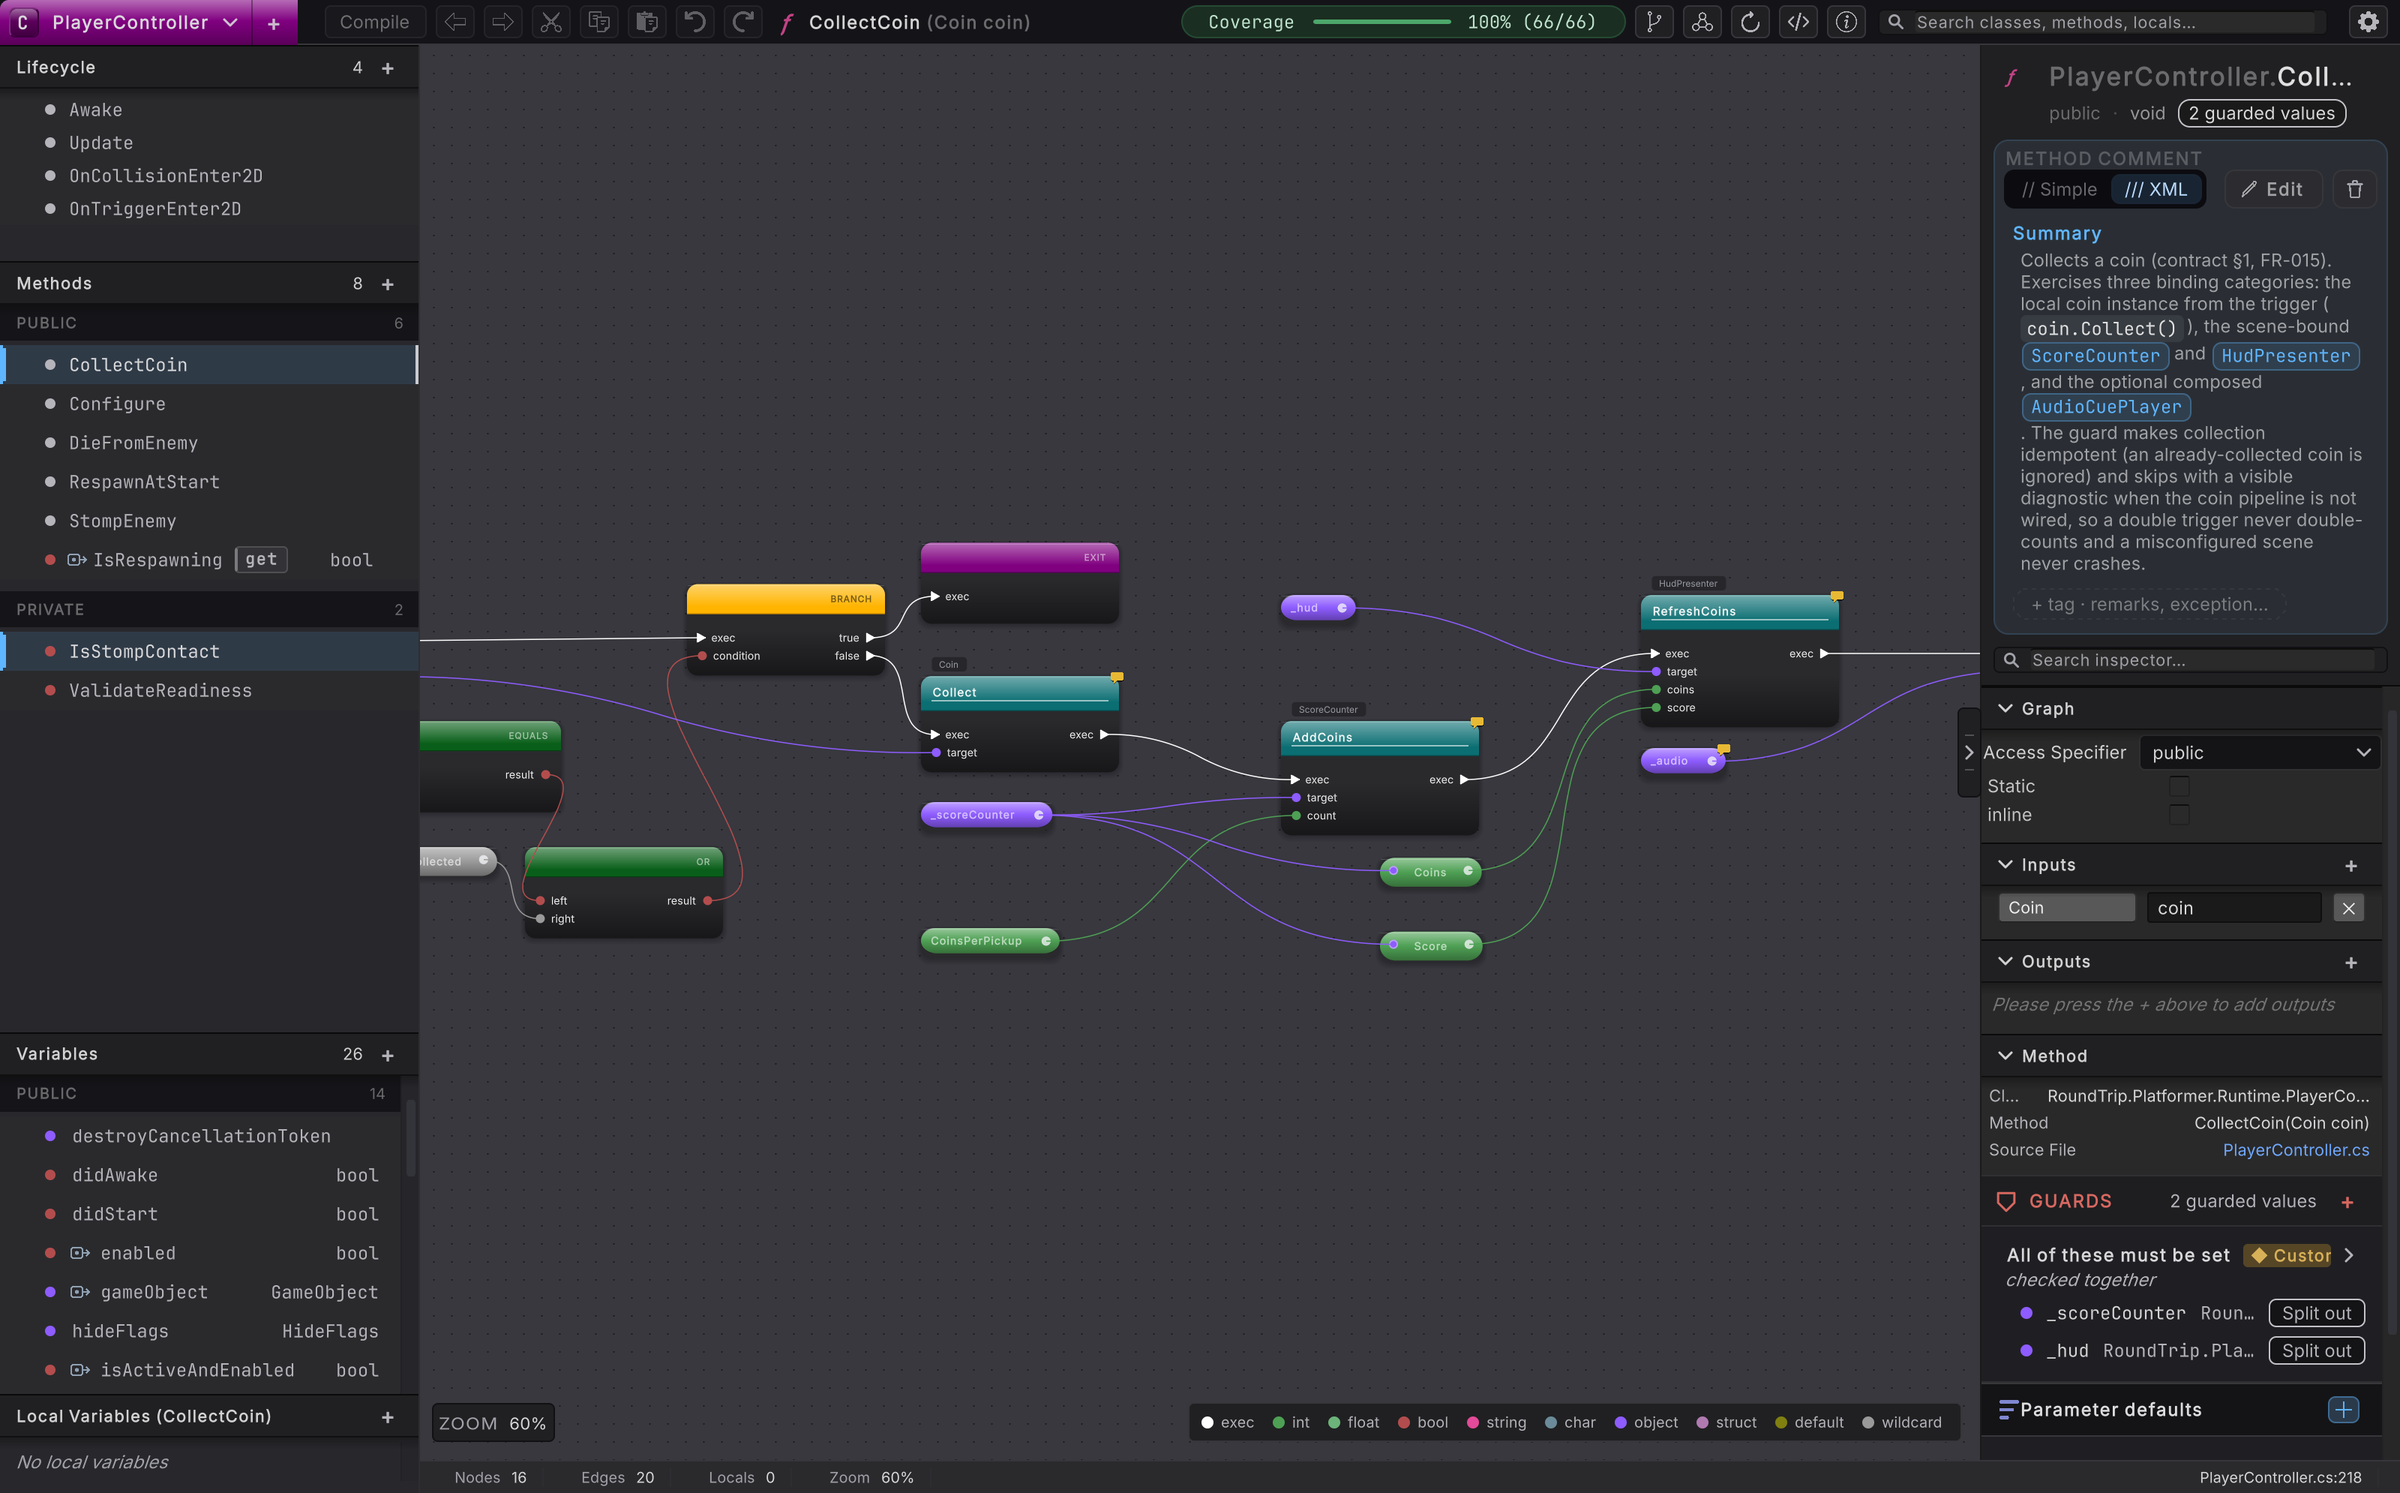
The map
Section titled “The map”Point at a number, or at a region of the picture, to hold it. Each entry links to the section that explains it.
- 1Class chip and + the pinned class; click it for the class picker, + for a new class
- 2Compile writes every pending draft to C#, one recompile
- 3Back and Forward move through the methods you have opened, browser style
- 4Active method the ƒ title names the open method; double-click it to jump to its source
- 5History and clipboard Undo and Redo, followed by Cut, Copy and Paste, with a gap between the groups
- 6Align and Auto layout line selected nodes up on the primary node, or reset the whole diagram to automatic layout
- 7Changes, Reload, Source, Info four icon buttons that act on the class or the open method
- 8Search and Settings global search across classes, methods and locals; the gear opens Preferences
- 9Explorer rail Lifecycle, Methods, Variables and Local Variables for the pinned class
- 10Canvas the method body as nodes, pins and wires on the dotted grid
- 11Zoom, legend and status bar the zoom pill, the pin color key and the counts for the open diagram
- 12Identity header and comment what is selected, its access and return type, and its source comment
- 13Inspector Signature, Access, Static, Inline body, Inputs, Outputs, Guards and Parameter defaults for the selection
Top rail
Section titled “Top rail”The strip across the top is split in two. The left cluster is about the class you have pinned, the method you have open and the edits you are making. The right cluster is about the whole diagram, the class as a whole and the window itself. Each group of buttons has a gap before it.
| # | Control | Tooltip in Unity | What it does |
|---|---|---|---|
| 1 | Class chip | Switch class: ⌘O. (Switch class: Ctrl+O. on Windows and Linux) | Shows the pinned class with its kind glyph. Click to open the class picker (also Cmd/Ctrl+O). Right-click for Copy class name, Copy full name (the name with its namespace) and Open source. |
| 2 | + | Add a new class. | Opens the New class window. See New class and method. |
| 3 | Compile | Compile and save., or Nothing to save. | Saves every pending canvas edit into the real script files in your project in one go, then reloads the canvas from them. Disabled until there is something to save (also Cmd/Ctrl+S). |
| 4, 5 | Back, Forward | Back., Forward. | Move through the methods you have opened, browser style. |
| 6 | ƒ title | Double-click to open source. | Names the open method and its inputs. Double-click opens the script in your code editor. |
| 7, 8 | Undo, Redo | Undo., Redo. | Step through the open method’s canvas edits in this session. The tooltip adds the name of the action it will undo. The history clears when Compile saves the edits, when you open another method, and when the window closes, so Undo is not a backup. |
| 9, 10, 11 | Cut, Copy, Paste | Cut., Copy., Paste. | Act on the selected nodes (also Cmd/Ctrl+X, C, V). |
| 12 | Align | Align the selected nodes. | Opens the ALIGN SELECTED NODES list: six commands that line the selected nodes up on the primary one. See Align nodes. |
| 13 | Auto layout | Reset the active graph to automatic layout. | Lays the nodes out again on the grid after you confirm Reset to Default Layout?. A read whose consumers sit far apart gets a pill of its own beside each distant group, unless Split long read wires is off under READ PILLS in Preferences > Round Trip. See Layout, wire knots, and comments. |
| 14 | Changes | Show modified classes. | Lists the classes that differ from version control; it reads No version control detected. when there is none. See Changes and history. |
| 15 | Reload | Re-run the Round Trip parse, adapter, and render pipeline for the active method. | Reads the script again and redraws the open method. |
| 16 | Source | Open the active class source. | Opens the pinned class’s script in your code editor. |
| 17 | Info | Show class details in the inspector. | Puts the class itself in the right rail. |
| 18 | Search | Search classes, methods, locals… | Searches every folder you included (also Cmd/Ctrl+P). See Classes and members. |
| 19 | Settings | Open Round Trip preferences. | Opens Preferences > Round Trip, where your own canvas and toolbar choices live, the grid among them (personal, never project-wide). See Settings and preferences. |
An indicator appears between Info and the search box when the open method holds something the canvas cannot draw; its tooltip reads This method contains C# constructs that cannot be fully visualized. What it does not do yet lists those shapes.
A Coverage pill can sit just before Align. It reads how much of the class the canvas can show, as a percentage and a count, and its popover lists classes under NEEDS ATTENTION and FULLY SUPPORTED; click one to open it. The pill is off by default. Turn it on with Show coverage under TOOLBAR in Preferences > Round Trip.


Explorer rail
Section titled “Explorer rail”The left rail is the table of contents for the pinned class. Each section shows its count and a + that adds a member of that kind.
- Lifecycle puts Unity’s event methods, such as Awake, Update, and OnTriggerEnter2D, above the general method list. These are usually the most useful starting points when reading a script, so they have their own section instead of getting buried among helper methods. They are still methods in the same script; only their place in the rail changes. Click a row to open its canvas, or + to add one. Lifecycle methods explains the moments and walks through a working example.
- Methods contains the other tasks the class can do when called, grouped under PUBLIC, PRIVATE, and INTERNAL. A caller can be another method, another script, or an event connected in Unity’s Inspector. Properties appear here only when they have behavior to inspect, with get or set chips beside their types. Its + opens the New method window.
- Variables is the normal home for the values a class keeps, including properties that simply expose a stored value. The class’s own variables are grouped under PUBLIC, PRIVATE and INTERNAL, and everything it inherits, such as Unity’s
transformandgameObject, follows under INHERITED; the count beside Variables is only the class’s own. A property wears the property glyph before its name, and an inherited member carries the tooltip Inherited from followed by the class it comes from. Its + (Add a variable to this class.) starts a new variable row. - Local variables belongs to the open method and reads No local variables until the method declares one.
Read the Explorer one section at a time
Select a screenshot to enlarge it.
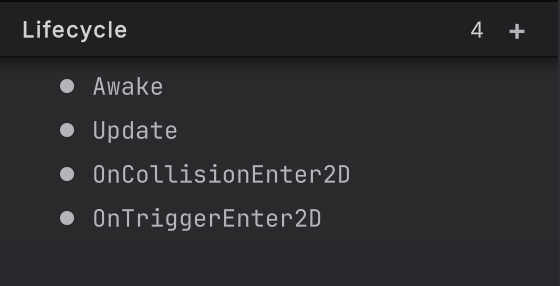
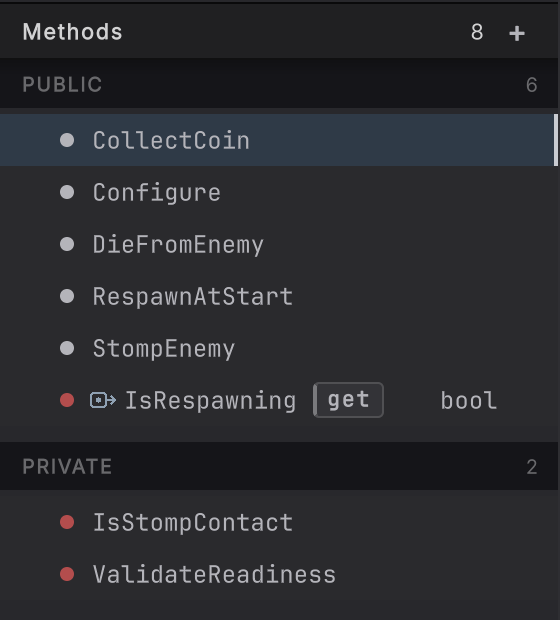
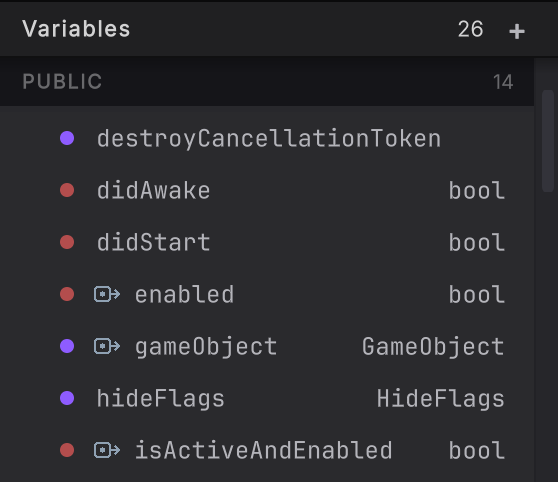
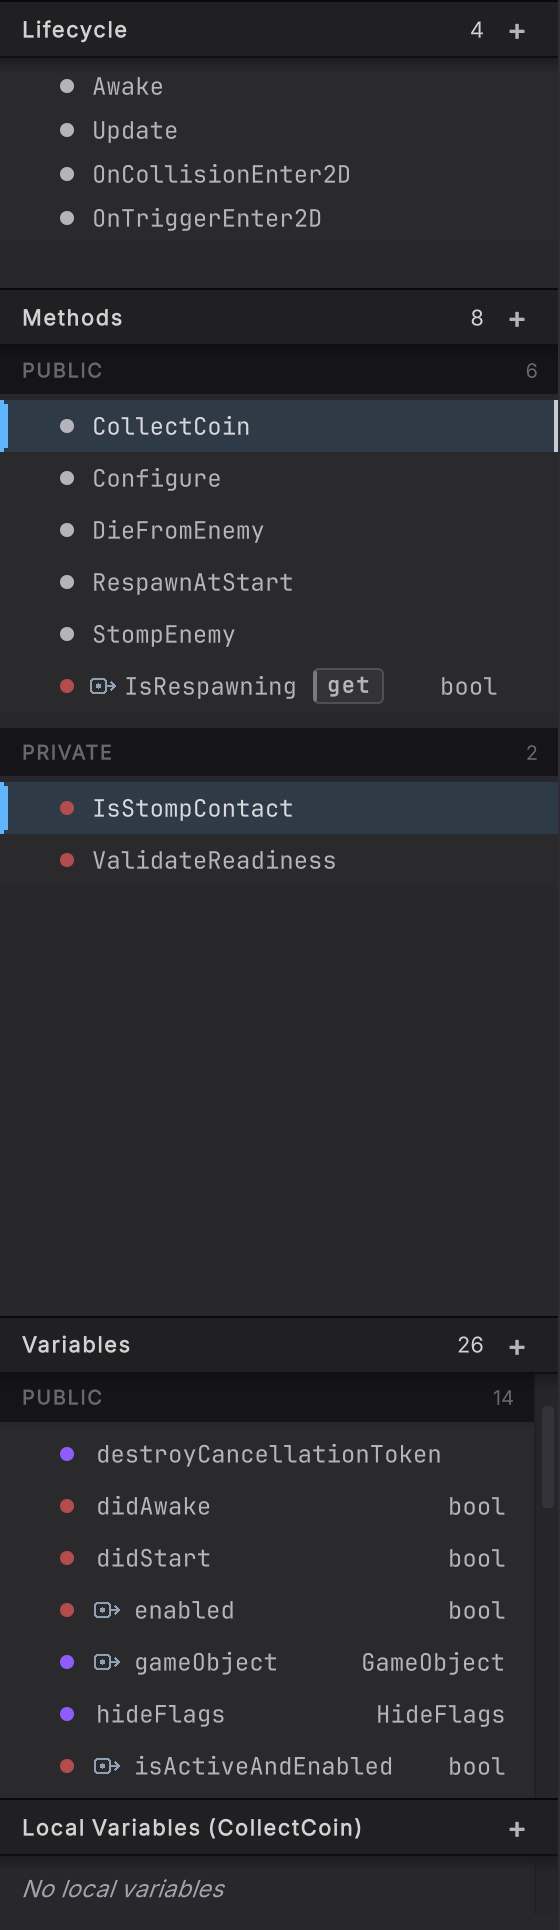
Click a method row to open it on the canvas. Drag a variable row onto empty canvas and choose get or set from the menu that appears; the pill or node lands where you let go. The handle between the rail and the canvas drags to resize it.
Go deeper in Explorer and Variables.
Canvas
Section titled “Canvas”The center is the method body: nodes do work, pills read values, white wires carry execution and colored wires carry typed values. Nodes, pins, and wires explains how to read them; this section covers moving around the canvas.
| Gesture | What happens |
|---|---|
| Middle-drag, right-drag or Alt+left-drag empty canvas | Pan. A right-drag that travels past a few pixels pans instead of opening the menu, and an Alt+left-drag keeps the selection. |
| Scroll wheel | Zoom around the pointer, between 25% and 200%. |
| Click the ZOOM pill | Opens the zoom popover: a slider, 50%, 100%, 150% and 200% presets, Fit to frame the whole diagram, and a reset. |
| Drag empty canvas | Draws a selection box around every node it touches. The node nearest where you started is the primary, with the cyan ring. |
| Shift-click or Cmd/Ctrl-click a node | Adds it to the selection, or removes it. The node added last is the primary. |
| Drag a node, or a selection | Moves it. With Snap to grid on, the default, it settles on the nearest grid dots. |
| Right-click empty canvas | Opens the All actions menu. The node you choose lands near the click. |
| Drag from a pin to another pin | Draws a wire: white between exec pins, colored by type between data pins. |
| Drag from a white exec pin and let go on empty canvas | Opens the same menu, offering only nodes that run. The node lands where you let go, already wired to the pin you dragged from; one undo removes both. See Drag a wire into empty canvas. |
| Drag from a colored output pin and let go on empty canvas | For a value whose type has members, opens a menu of those members with get and set buttons on variables, while clicking a method’s row calls it; the pill or call you pick lands wired to that pin. When the pin belongs to a node that runs and nothing follows it on the white wire yet, a call that runs is also wired after it; one undo removes both. |
| Right-click a node | Context actions for that node, such as Split pins on a shared read, Edit catch clauses, Edit branch arms, Edit switch cases, Edit constructor arguments, and the six align commands when several nodes are selected. |
| Right-click a pin | Pin actions: Split struct pin and Recombine on a struct, Split into own pill and Recombine on a shared read. |
| Right-click a wire, or Alt-click it | Break link removes the wire. |
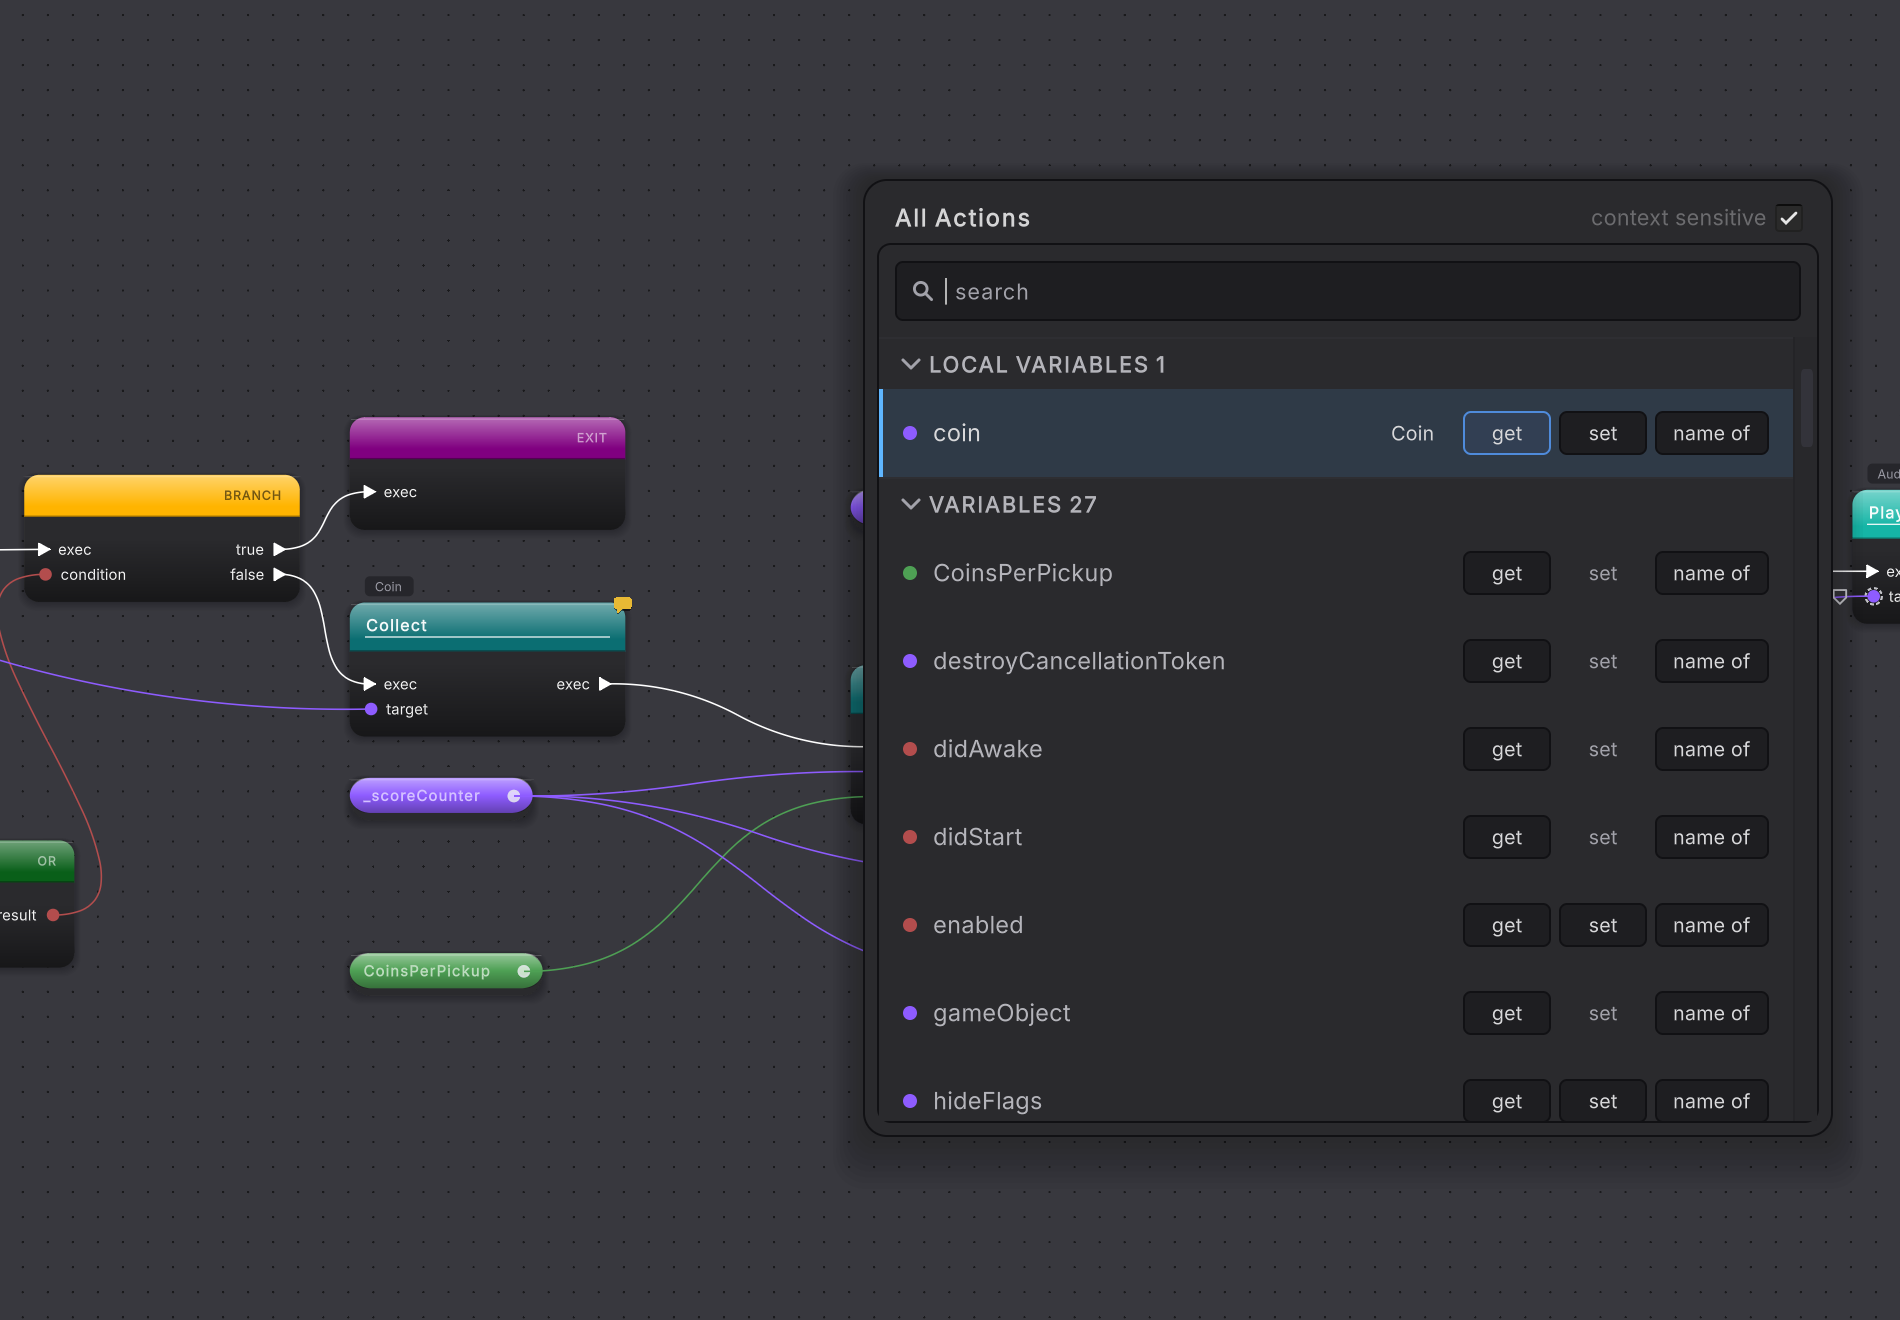
Along the bottom edge, the ZOOM pill sits at the left, the pin color key at the right, and the status bar under both counts what the open diagram holds: its nodes, its wire connections and its locals. It also shows the zoom level, with the method’s file and line at the far right. The viewport you leave behind is saved with the method, so it reopens where you left it.
Right rail
Section titled “Right rail”The right rail answers “what is this?” for whatever is selected: the method when nothing else is, otherwise the node.
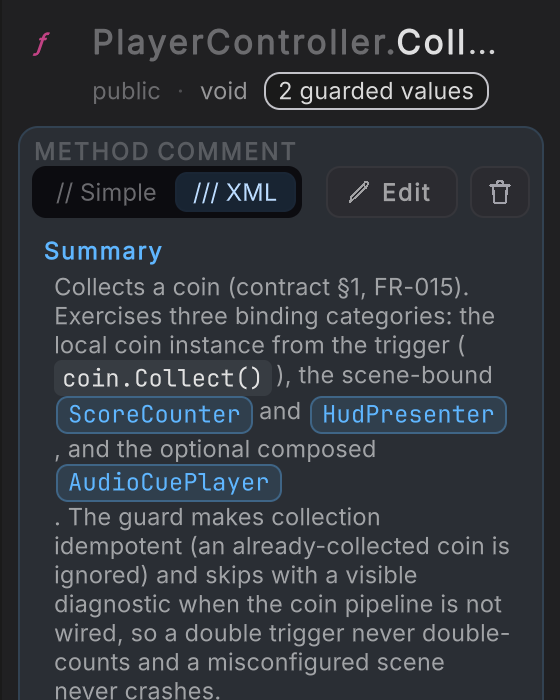
- The identity header shows the selected name with its access and return type, and a count of guarded values. Press F2 on an eligible name to rename it; Enter commits and Escape cancels.
- The method comment card shows the source comment with a // Simple or /// XML toggle, Edit, and delete.
- The inspector search filters the rows beneath it.
- The method sections are Signature (the method’s line of C#, then its Access and Static settings), Inputs, Outputs and GUARDS. Each + is an edit: add an input, add a guard. Selecting a node swaps these for that node’s own details.
Go deeper in Identity and inspector and Guards.
Guards keep prerequisite checks and null handling in the right rail so repeated comparisons and early exits do not crowd the canvas. The checks still run and remain in C#. Select the method for its requirements, or a guarded node for that node’s missing-value behavior. Guards explains both; Guard rules sets the shared defaults in Project Settings.
When you have edited something
Section titled “When you have edited something”Placing or wiring a node, or any other edit to what the method does, makes a draft. A purple banner at the top of the right rail reads Previewing your changes. with an Undo link and a count of what is not in the script yet, and Compile lights up in the top rail. Nothing reaches your script until you press Compile; then the canvas reloads from the saved script.
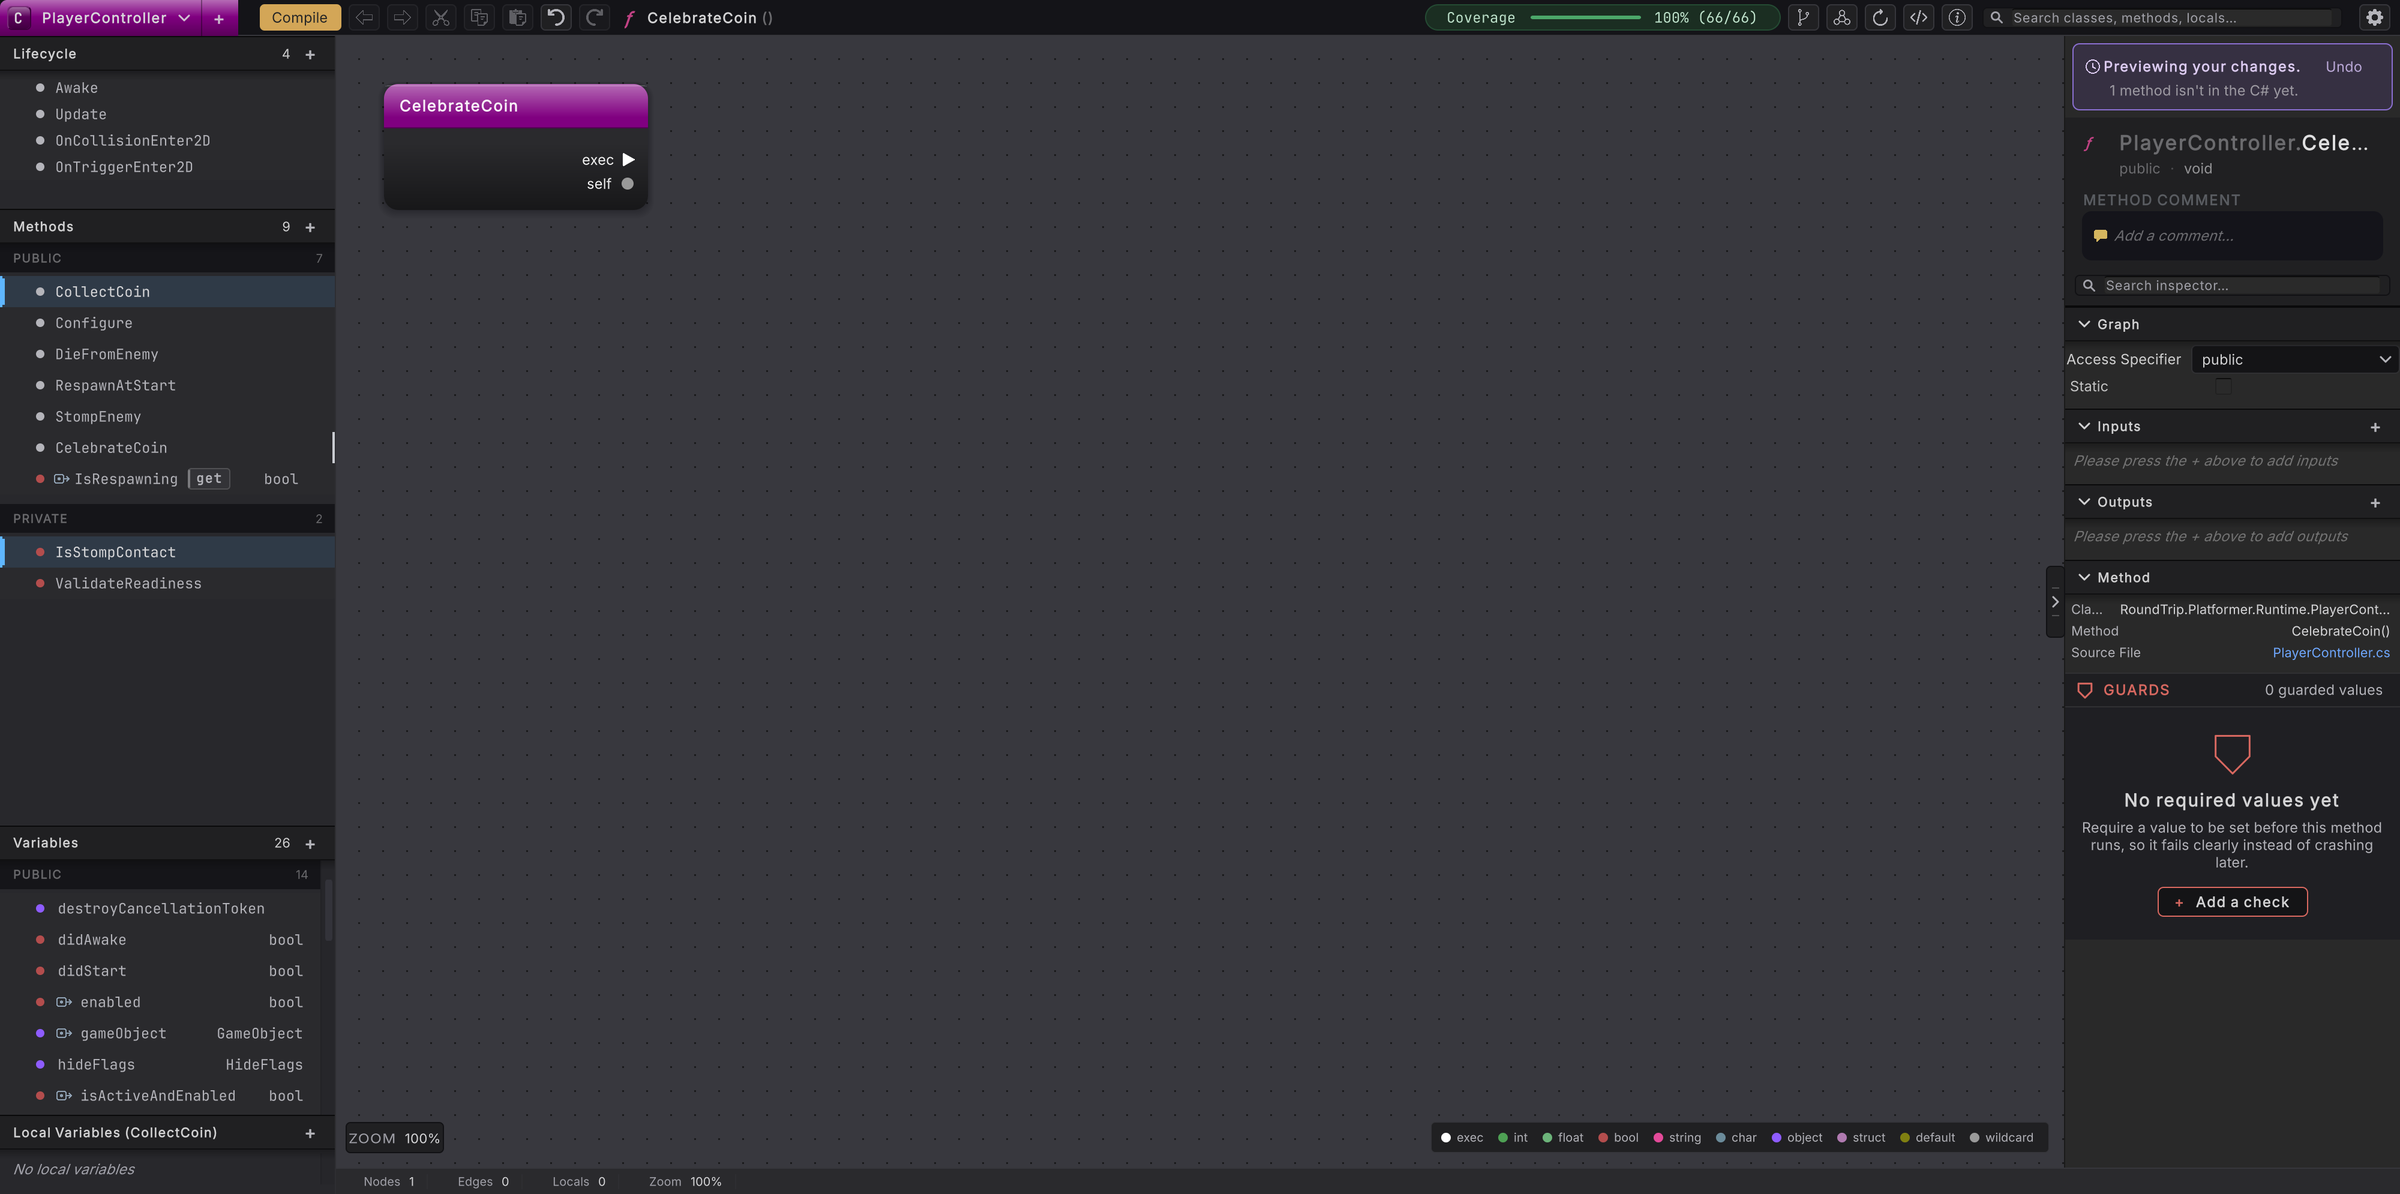
Preview and Compile walks through what Compile saves and what it refuses.
- What you get: the areas of the product, one level up from the buttons.
- Your first class: build a method on this window from an empty class.
- Shortcuts: every key and gesture in one table.