
Scan a list
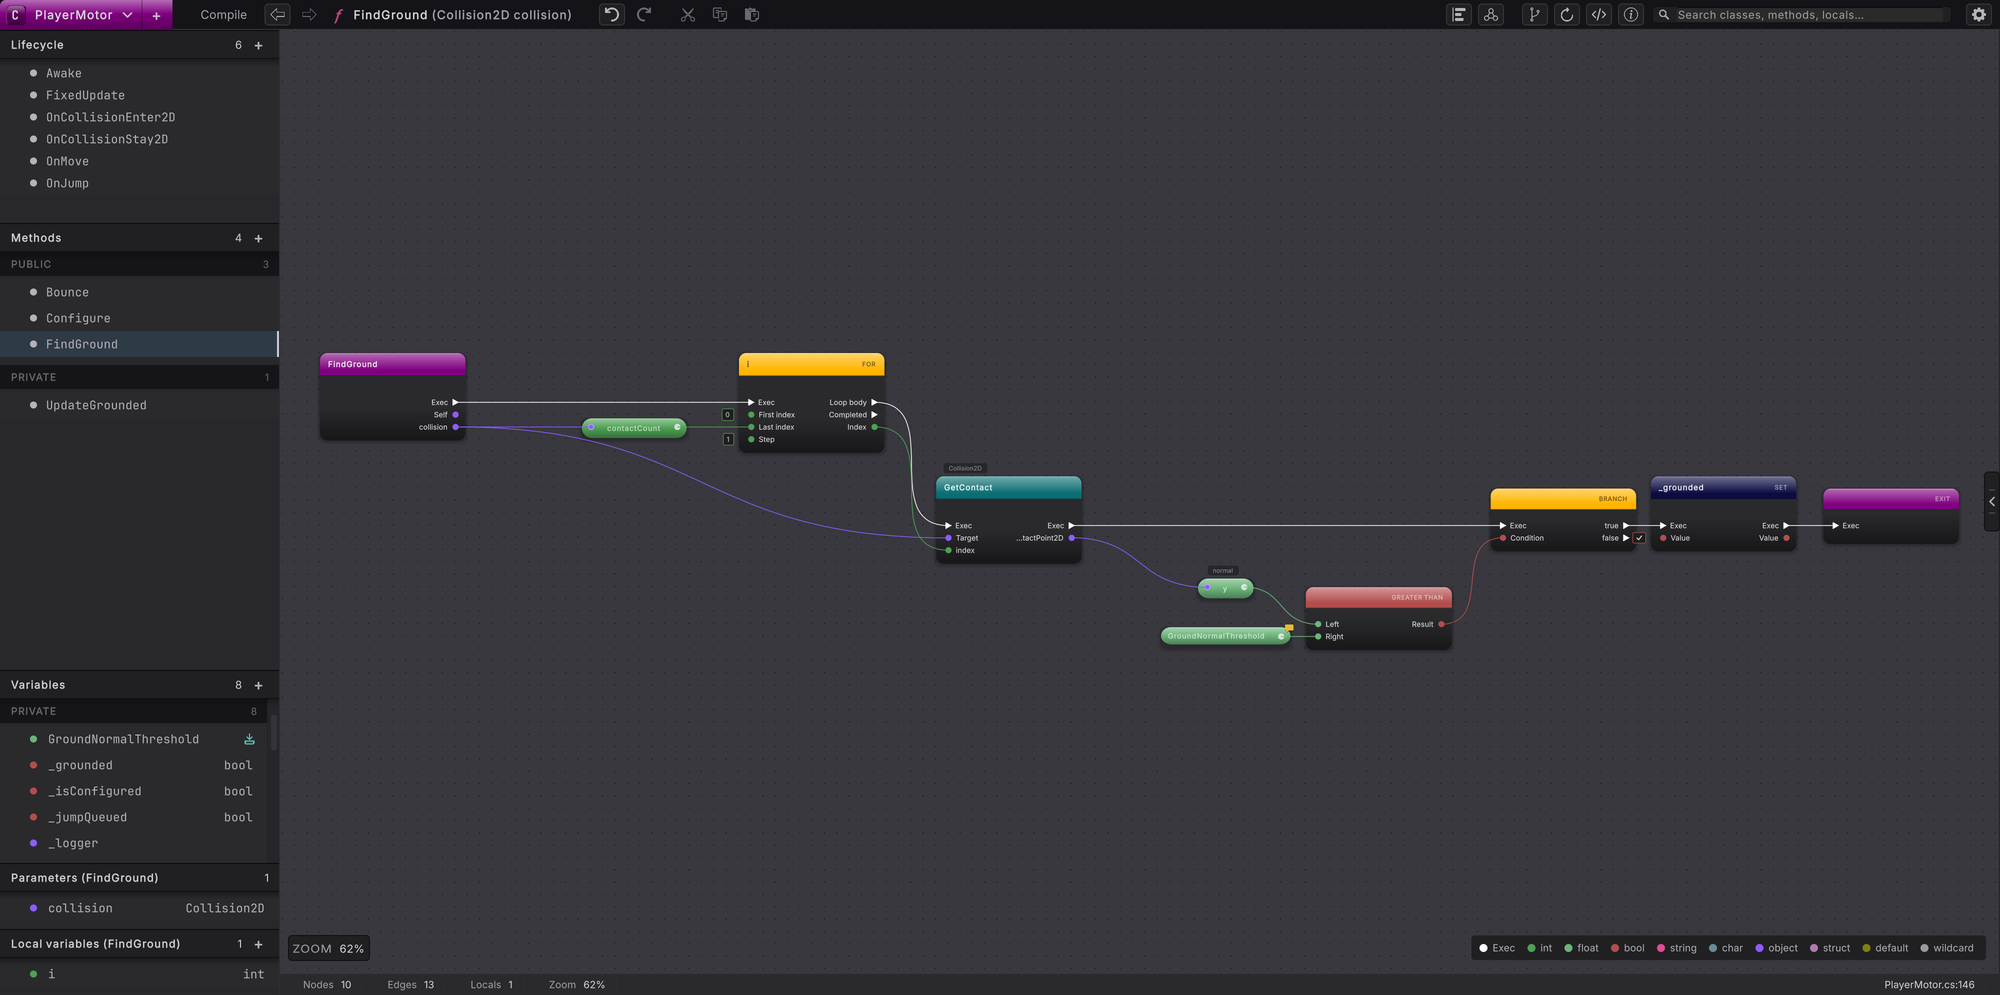
Build a for loop on the canvas that checks each collision contact and stops at the first one that faces up.
On this page
A scan visits the items of a collection one at a time and stops at the first one that matches. On the canvas it is a yellow FOR node whose Loop body output runs a check on each item, with a magenta EXIT node on the route that finds a match. In the Platformer sample, a collision can touch the player at several points, and the motor scans those contact points until one faces up steeply enough to count as ground.
This page builds that shape from an empty canvas. It uses the sample’s PlayerMotor class so every name on the nodes is real. In your own project, build the same shape in any class that looks for a first match, once its folder is indexed.
This uses the simple From to view: count from 0 up to, but not including, contactCount. Keep Inclusive off because a collection’s last position is one less than its count. You do not need the advanced C-Style controls for this scan; the loop guide explains why both views exist.
In the sample
Section titled “In the sample”When the player lands on a corner, the first contact point can face sideways while another faces up. Reading only the first contact misses the floor. The motor checks each contact, and stops as soon as one proves the player is standing on something.
When this applies
Section titled “When this applies”- A collision, overlap or raycast returns several hits and you need the first one that qualifies.
- You are looking for one item in a list, such as the first enemy in range or the first free spawn point.
- Once you have found it, checking the rest would only waste the frame.
Scan the collision contacts
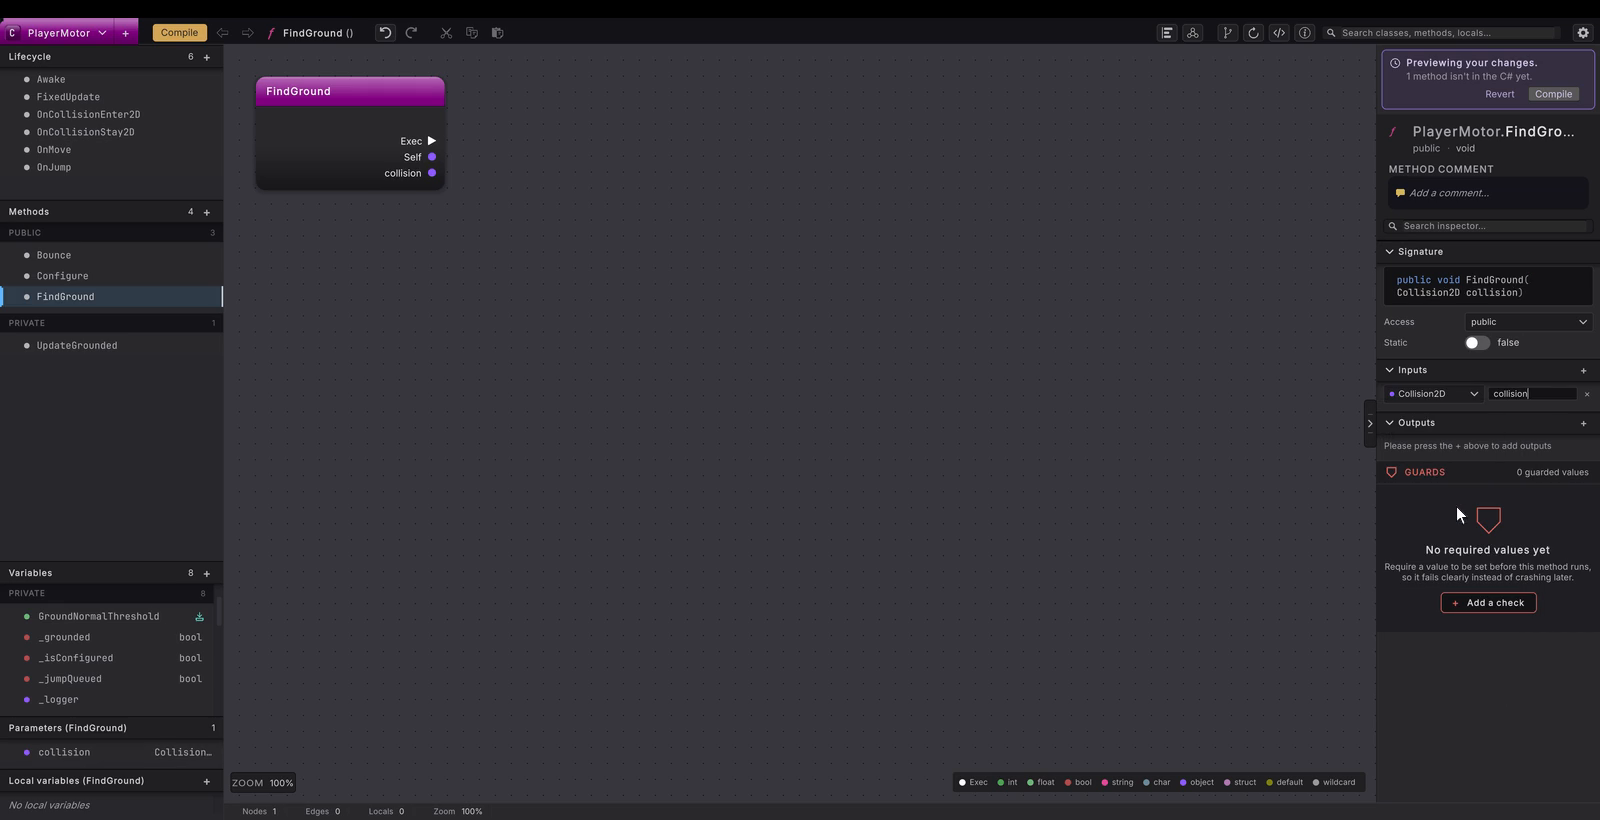
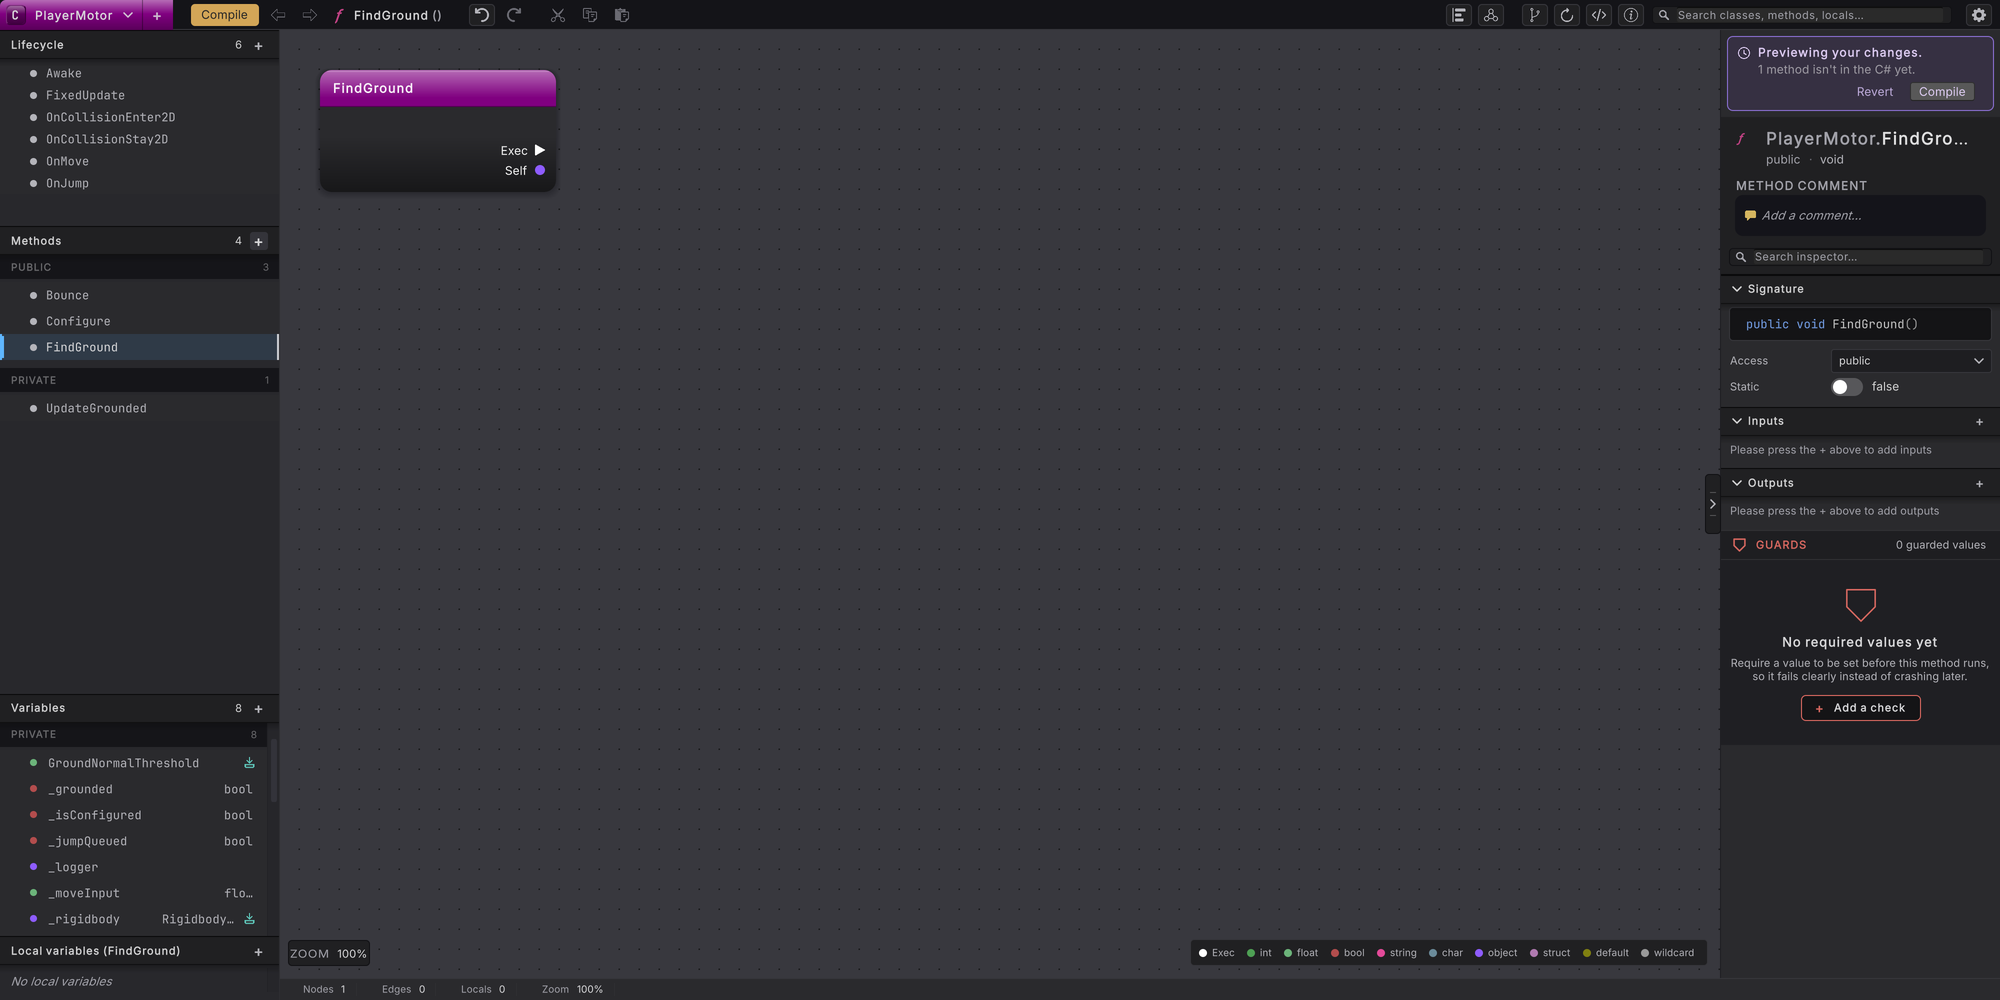
Create FindGround
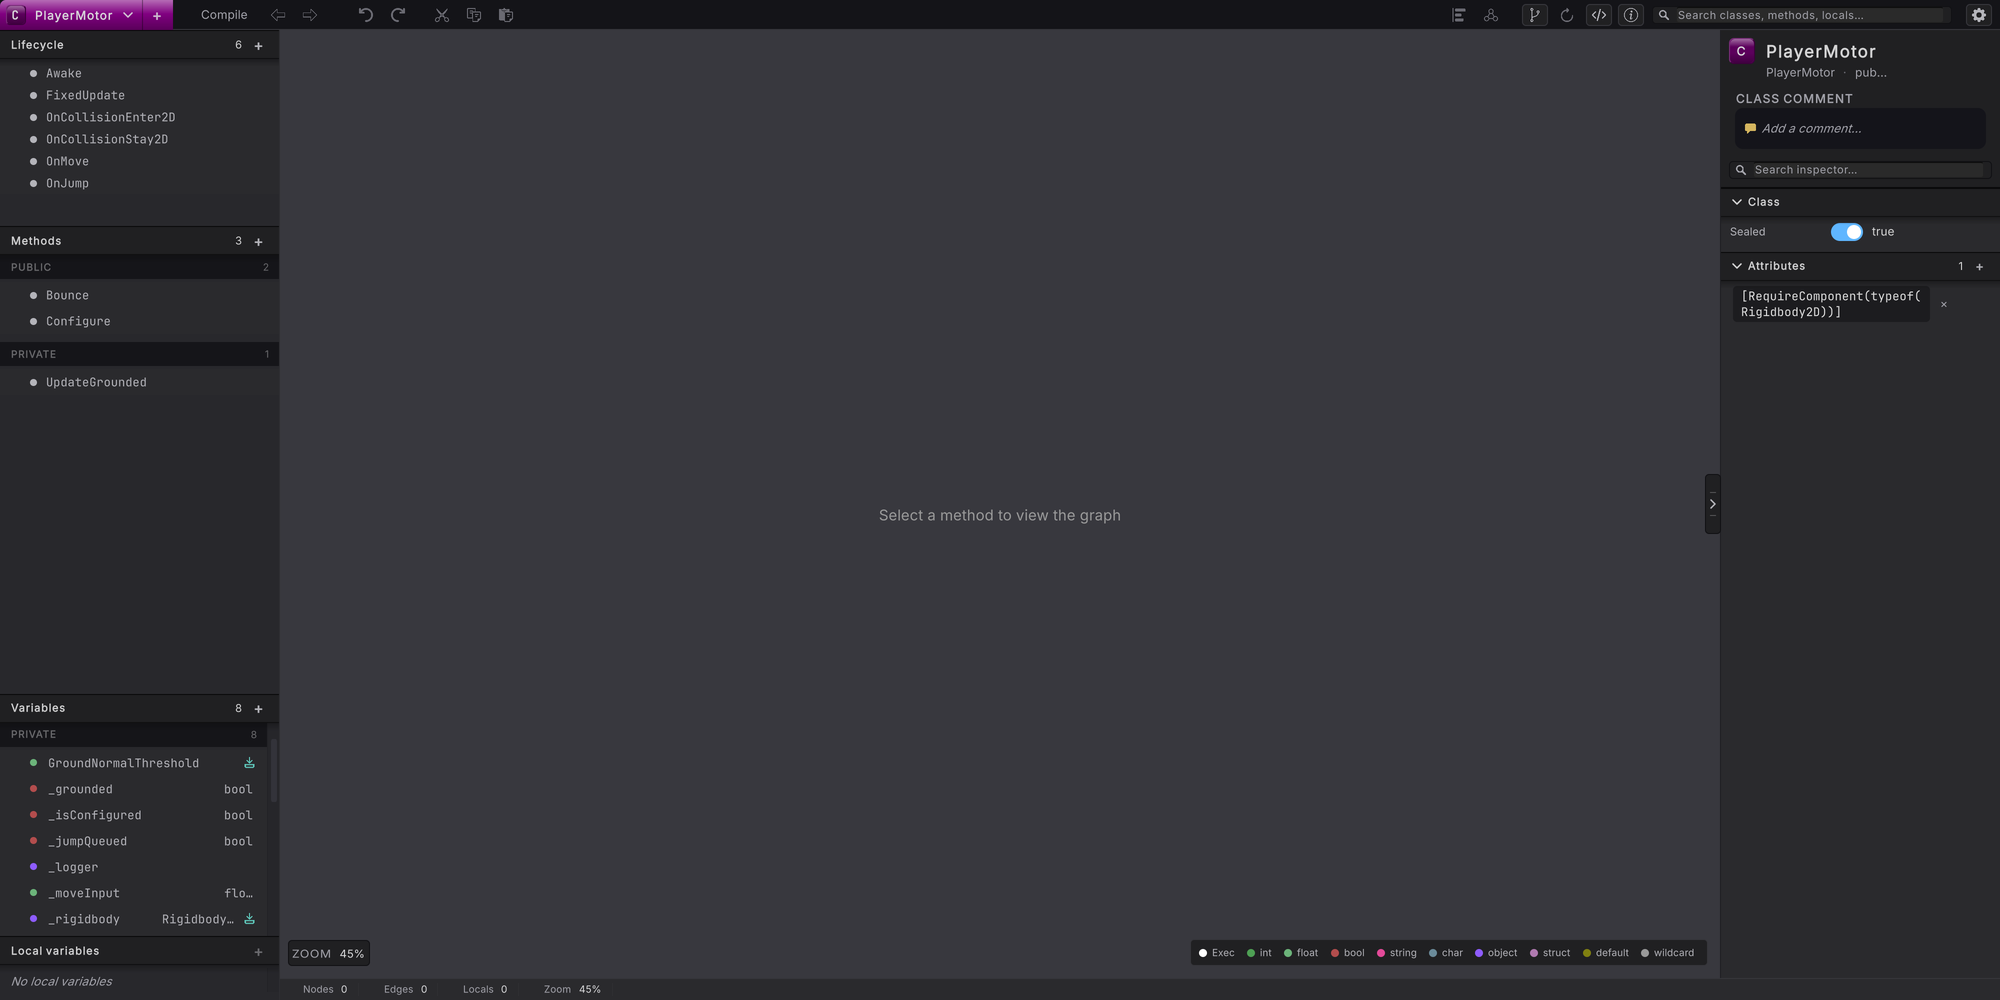
Open Tools > Round Trip > Graph view, press Cmd/Ctrl+O and choose PlayerMotor. Press the + on the Methods section of the left rail, type
FindGroundin the name box and press Enter. In the right rail’s Inputs card, press +, choose Collision2D as the type and typecollisionas the name. The magenta entry node titled FindGround now has an Exec pin and a purple collision pin.Place the loop
Right-click blank canvas and pick for under flow control. A yellow node titled i with FOR in its header appears. On its left are Exec, first index holding
0, last index holding10and step holding1; on its right are Loop body, Completed and a green index output. Wire the entry node’s Exec into the loop’s Exec.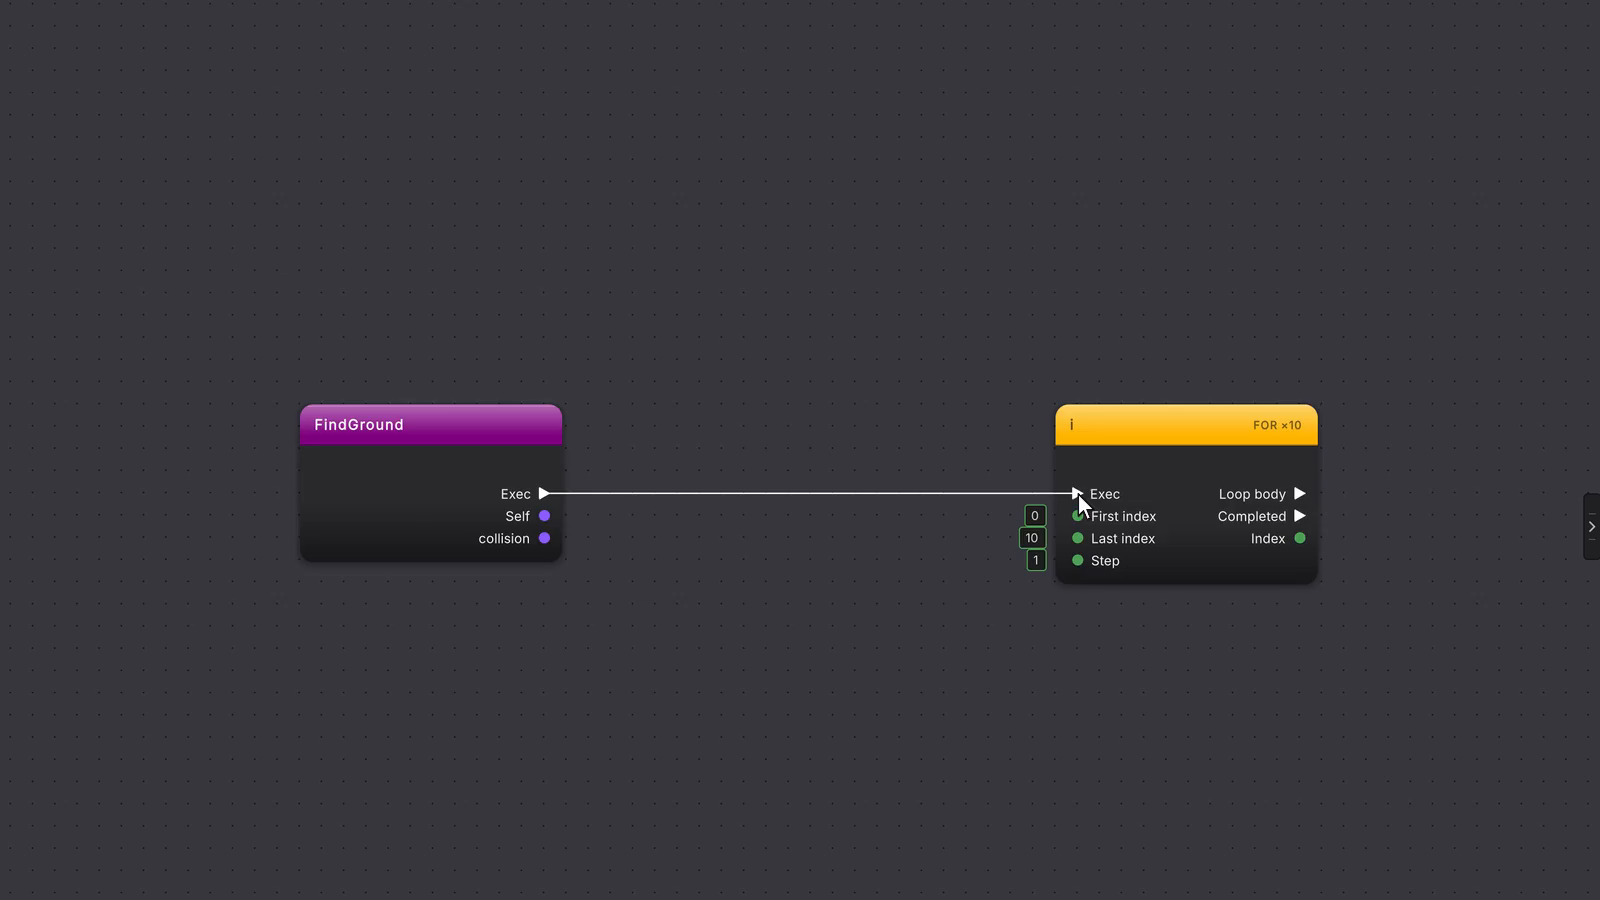 5 stepsFull size ↗
Count the contacts
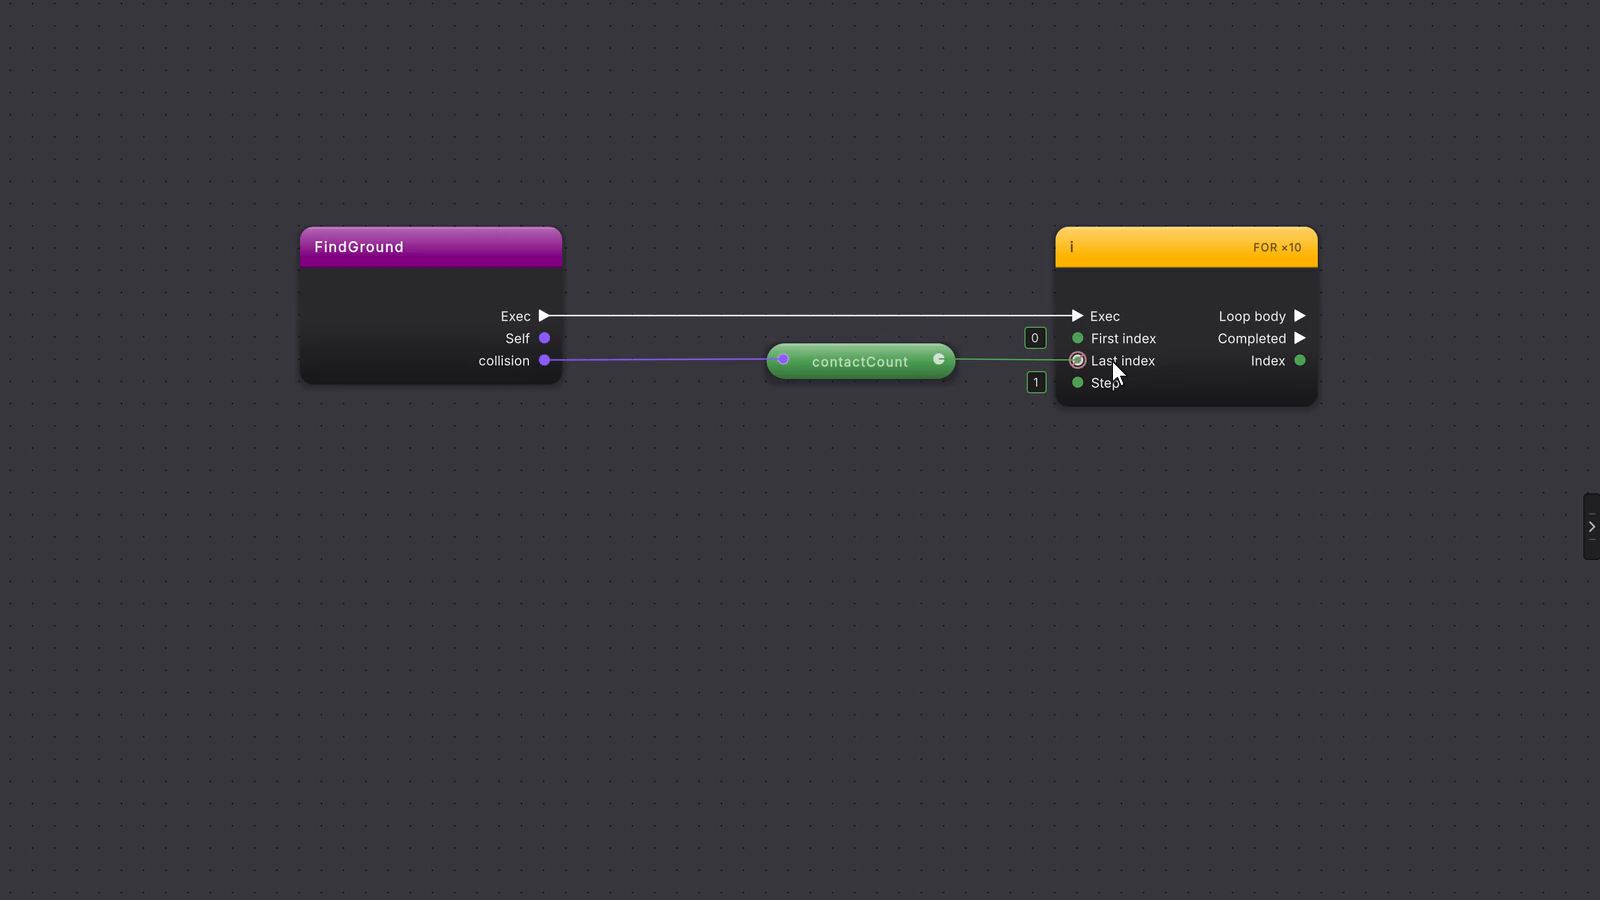
Count the contacts. Drag from the entry node’s collision pin and let go on empty canvas. A menu headed by the collision lists its variables and methods; press get on contactCount. Drag the green contactCount pill onto last index.
 6 stepsFull size ↗
Read a contact
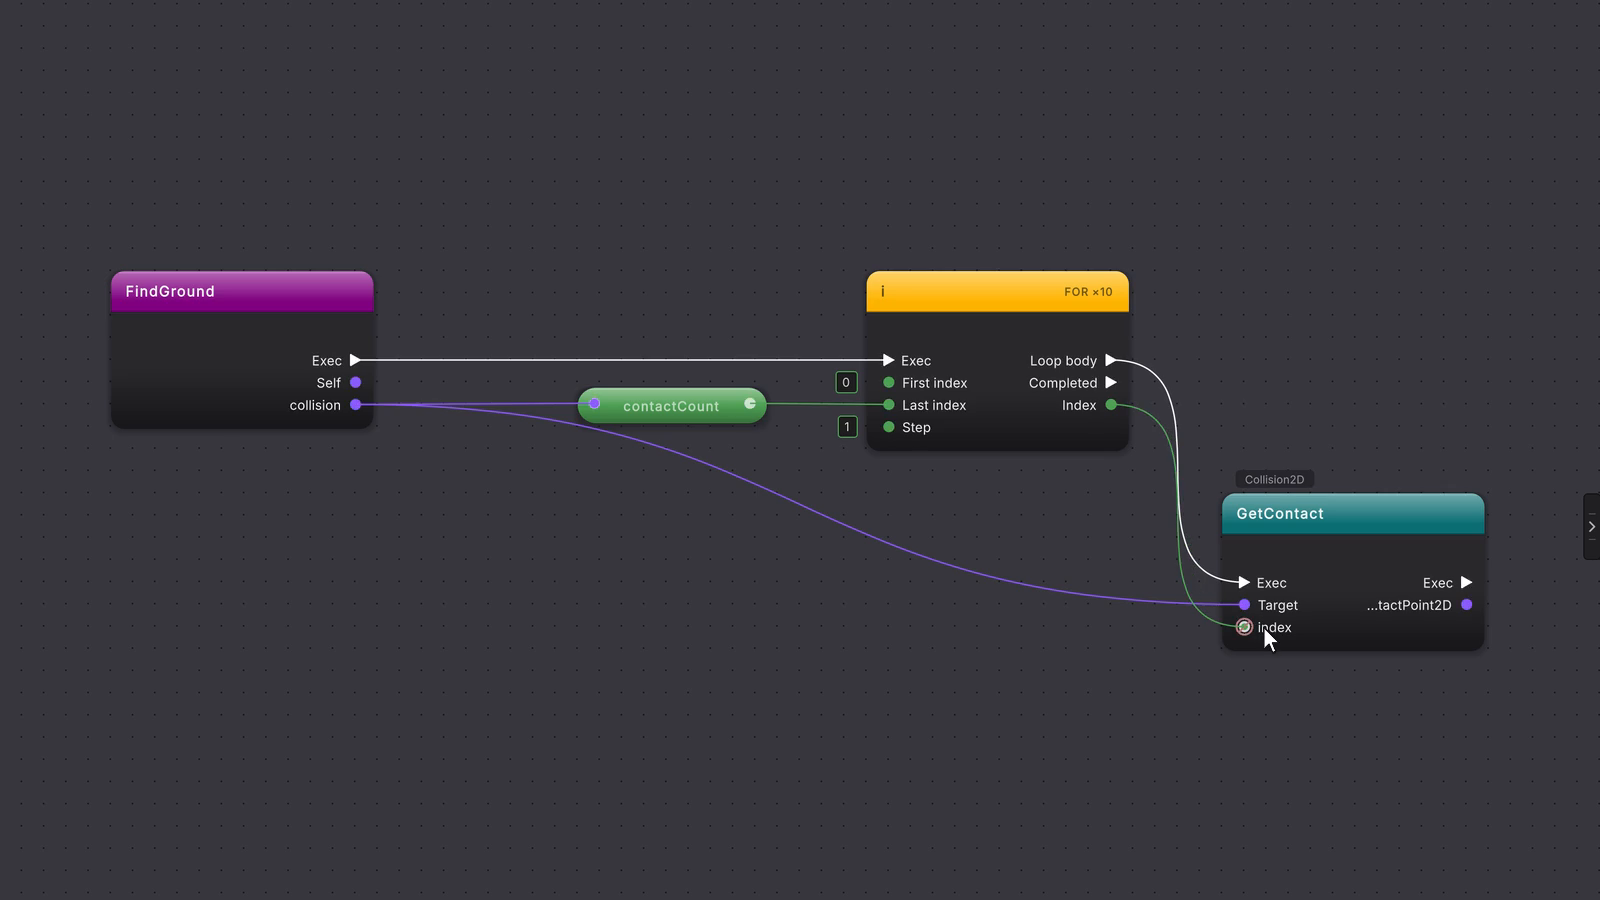
Read one contact per pass. Drag from the collision pin again and click GetContact. A teal node titled GetContact appears with its Target already wired, an index pin, and a contact output on the right. Wire Loop body into its Exec, and the loop’s green index output into its index pin.
 8 stepsFull size ↗
Read its normal
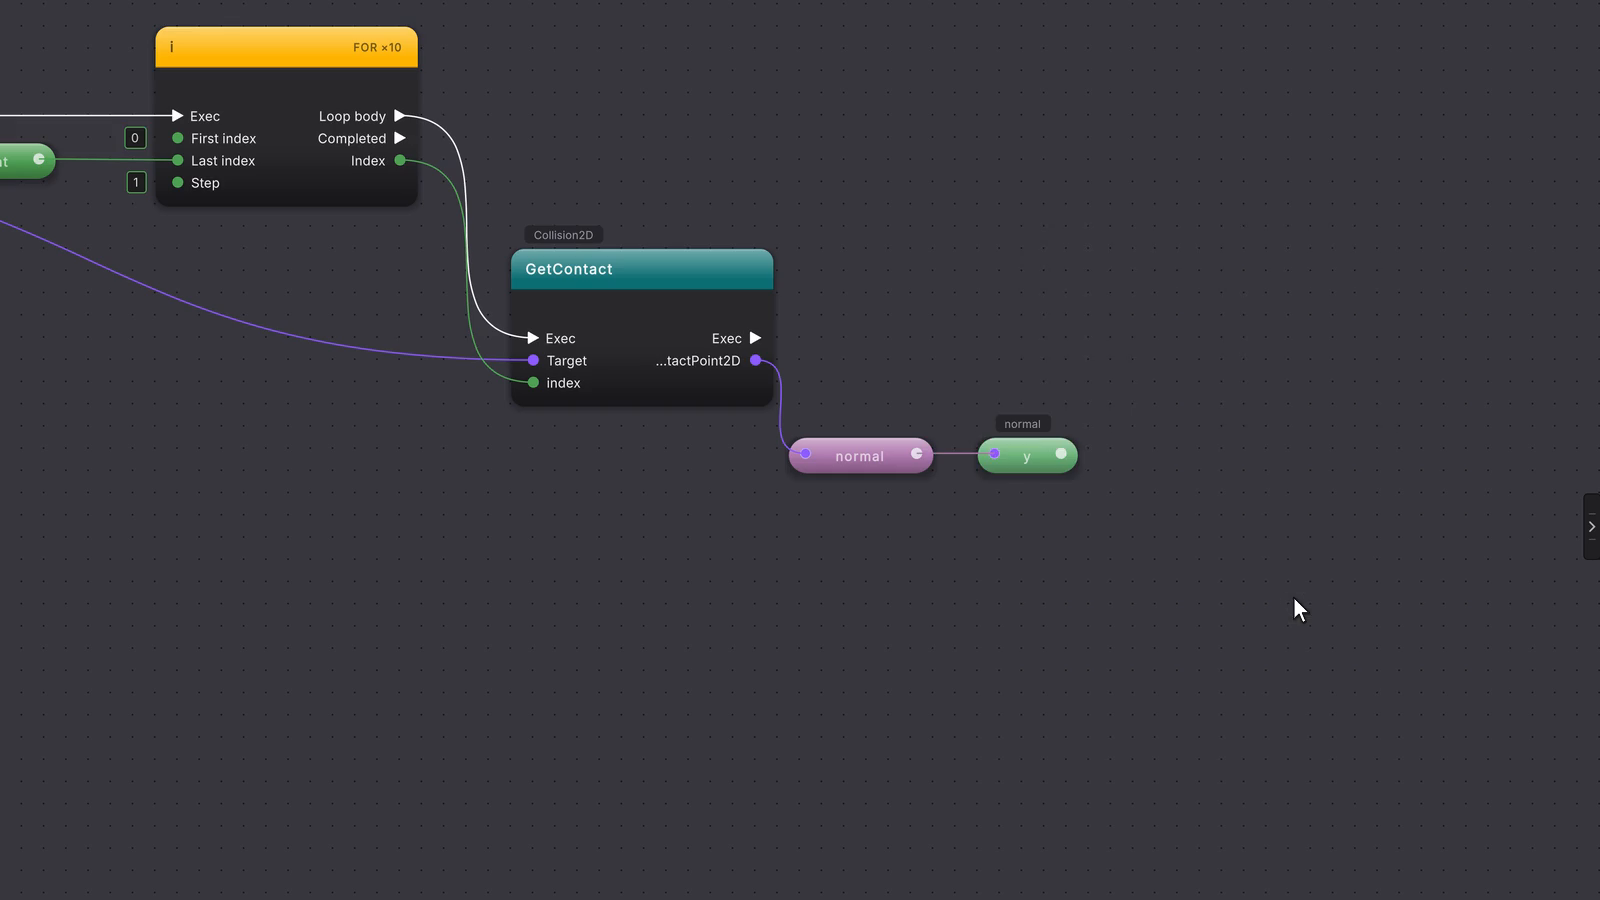
Read how much the contact faces up. Drag from the GetContact node’s contact output and press get on normal. Drag from the new pill and press get on y. A green y pill appears, the number you compare.
 7 stepsFull size ↗
Compare with the threshold
Compare. Right-click and type
Greater Than, then pick the Greater than row. Wire the y pill into Left. Right-click, find GroundNormalThreshold (type its name if needed), press get, and wire that pill into Right.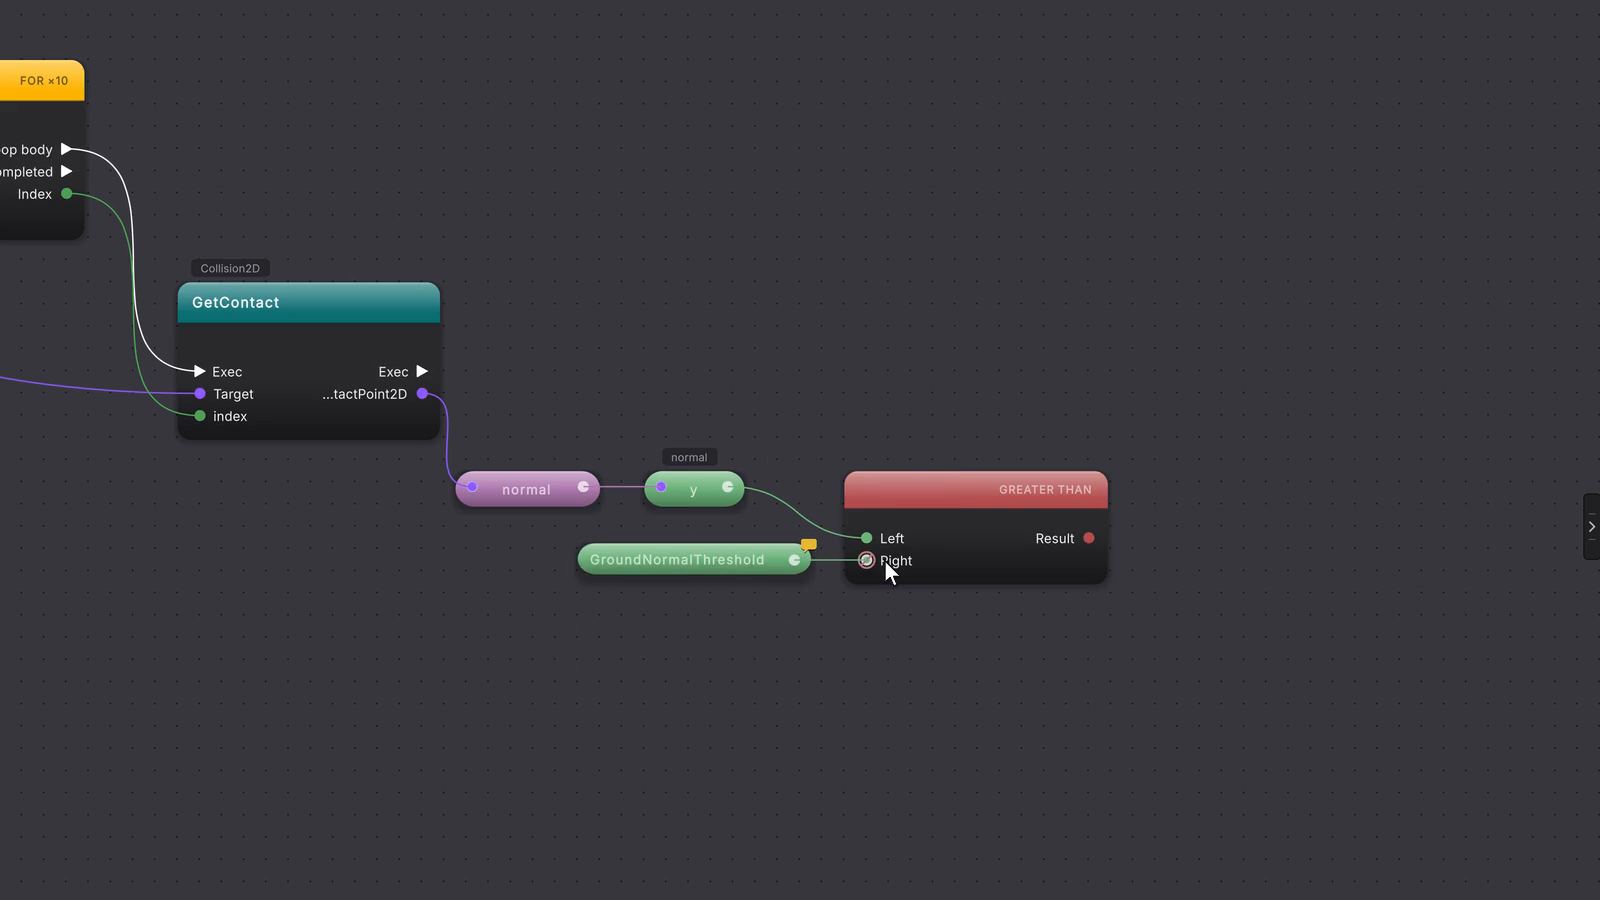 9 stepsFull size ↗
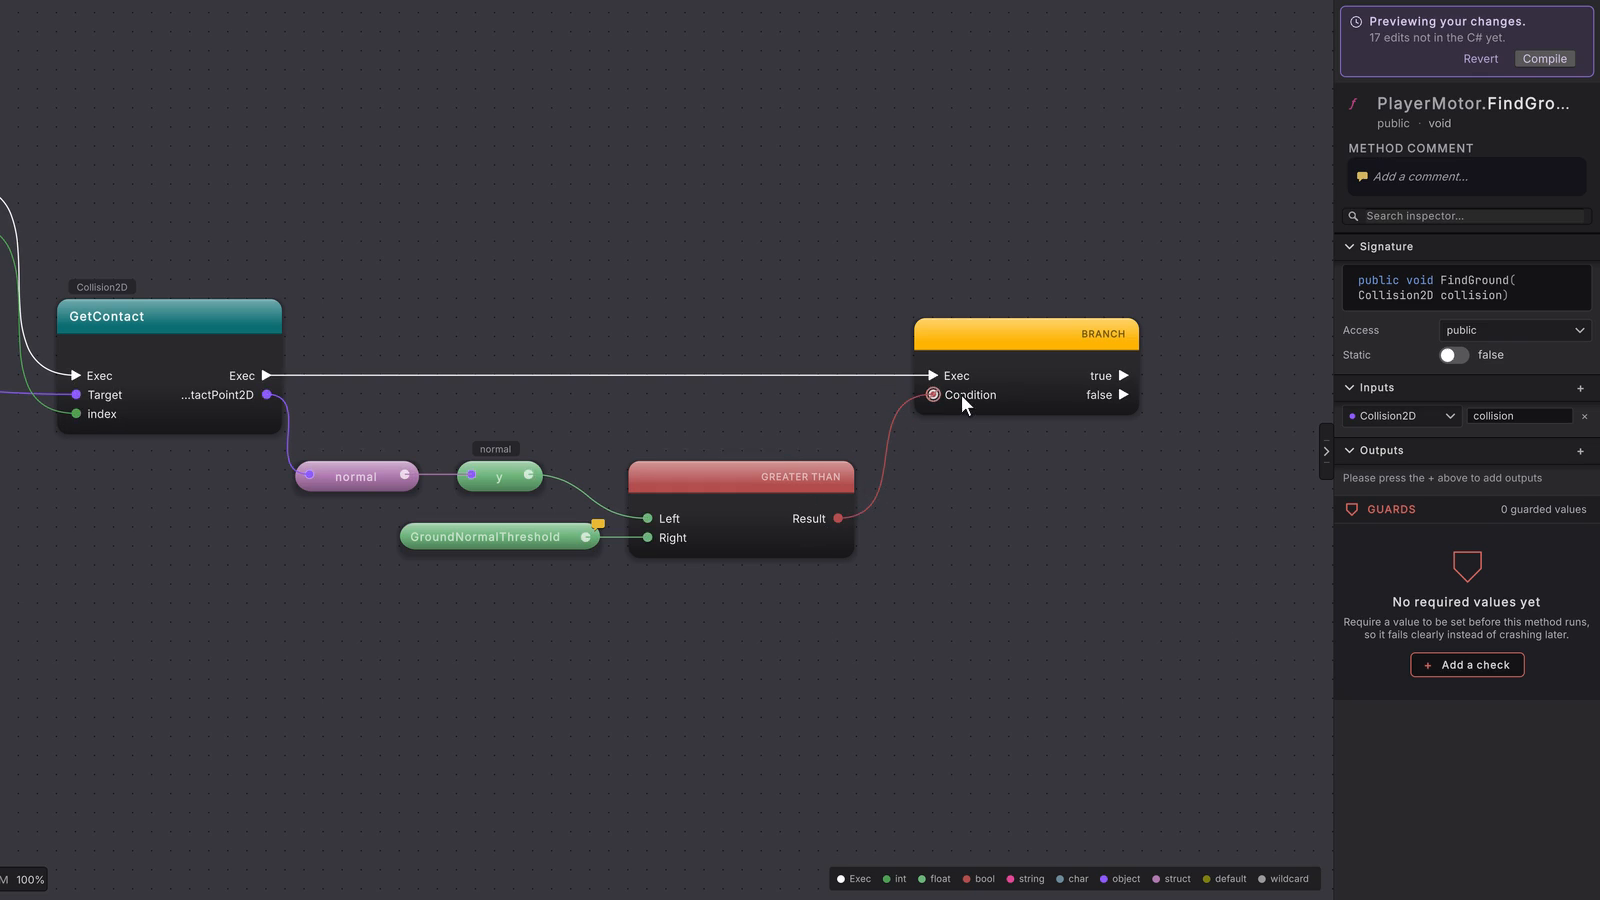
Branch on the result
Decide. Place a branch, wire the GetContact node’s Exec output into it, and wire the Greater than node’s red Result into Condition.
 7 stepsFull size ↗
Stop on a match
Stop at the first match. Right-click, type
_grounded, and press set. Tick its Value box. Wire the branch’s true output into it. Place a return and wire the SET node’s Exec output into the magenta EXIT node. Leave the branch’s false output empty: that pass ends there and the loop moves on to the next contact.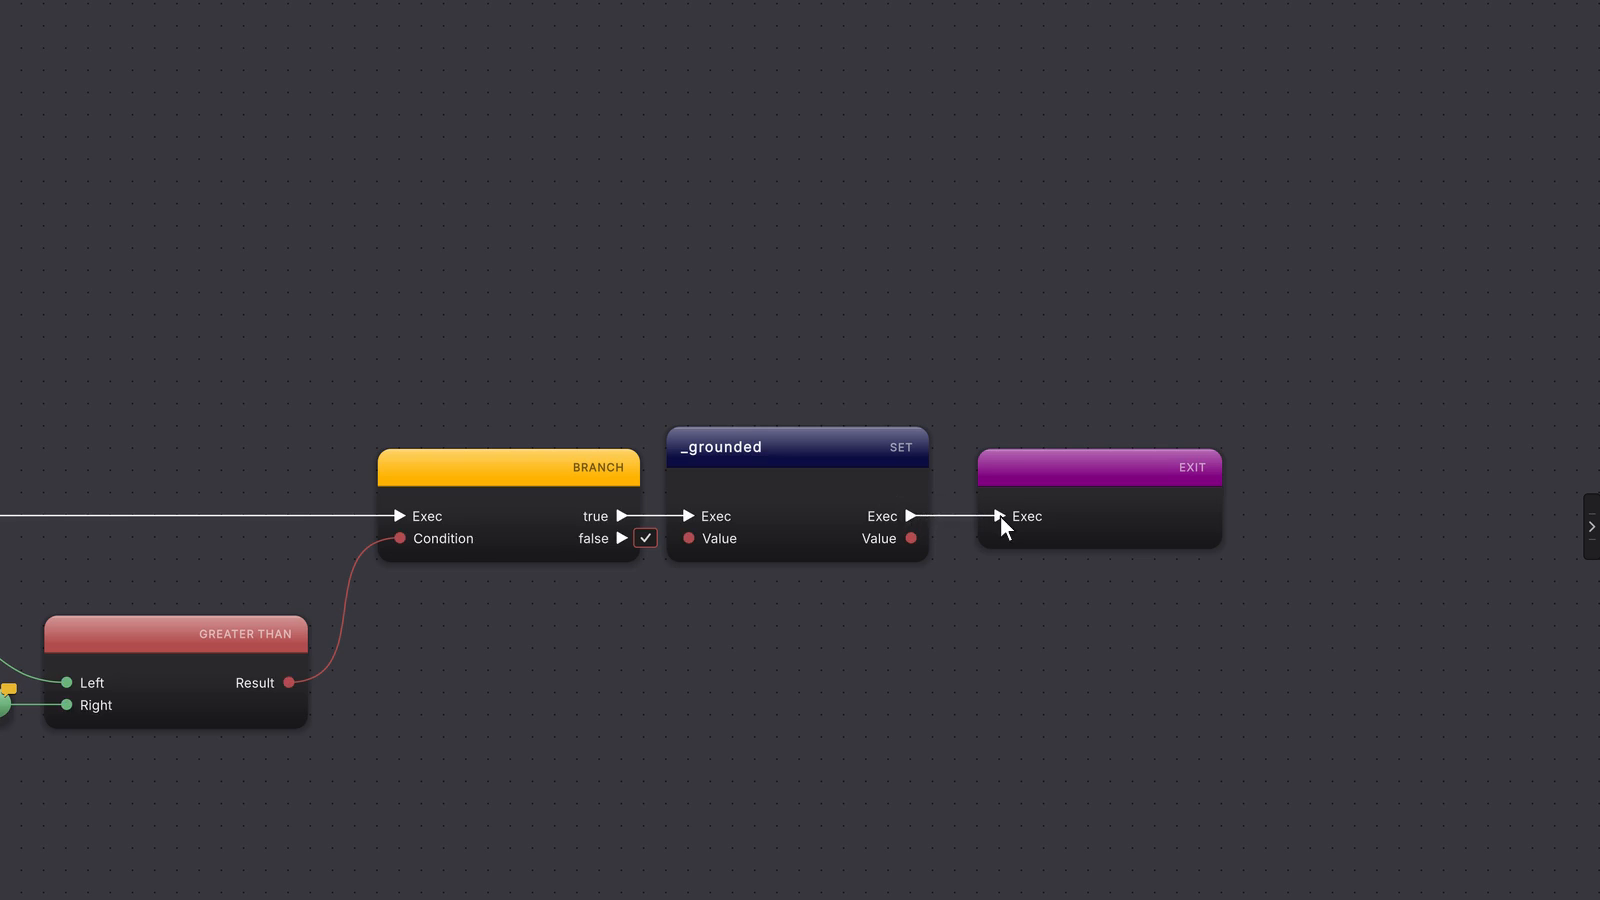 11 stepsFull size ↗
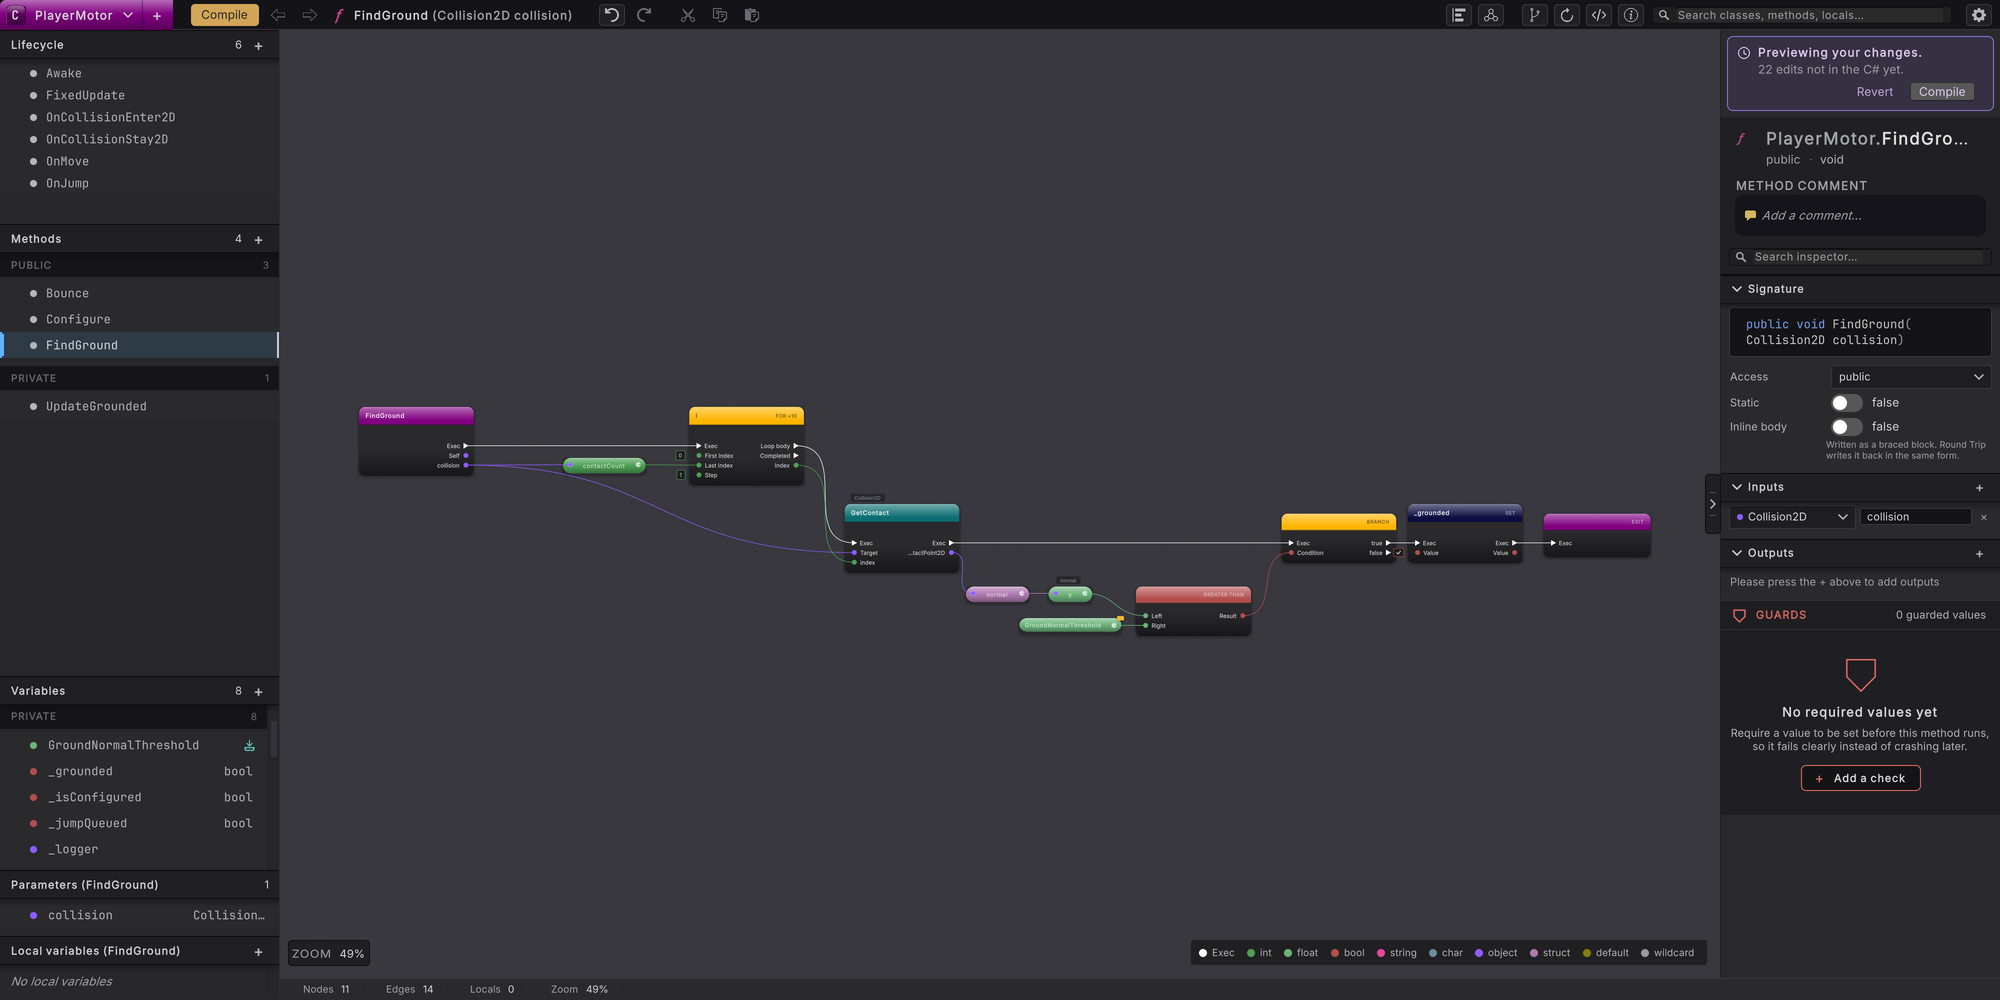
Compile and reload
Press Compile in the toolbar.
What it writes
Section titled “What it writes”If you also work in C#, this is the sample’s UpdateGrounded, the finished shape the steps build toward. Your FindGround writes the same loop.
The return ends the method immediately. If no contact passes the threshold, the loop completes without setting _grounded.
Filter a list with LINQ
Section titled “Filter a list with LINQ”Sometimes you want every item that matches: how many coins the player has picked up, or which enemies are still standing. A Where node keeps the items that pass a test, and a Count node counts them, with no loop to wire. These steps build that on the sample’s ScoreCounter class, counting the collected coins in a list and writing the number to the Console.
Filter collected coins
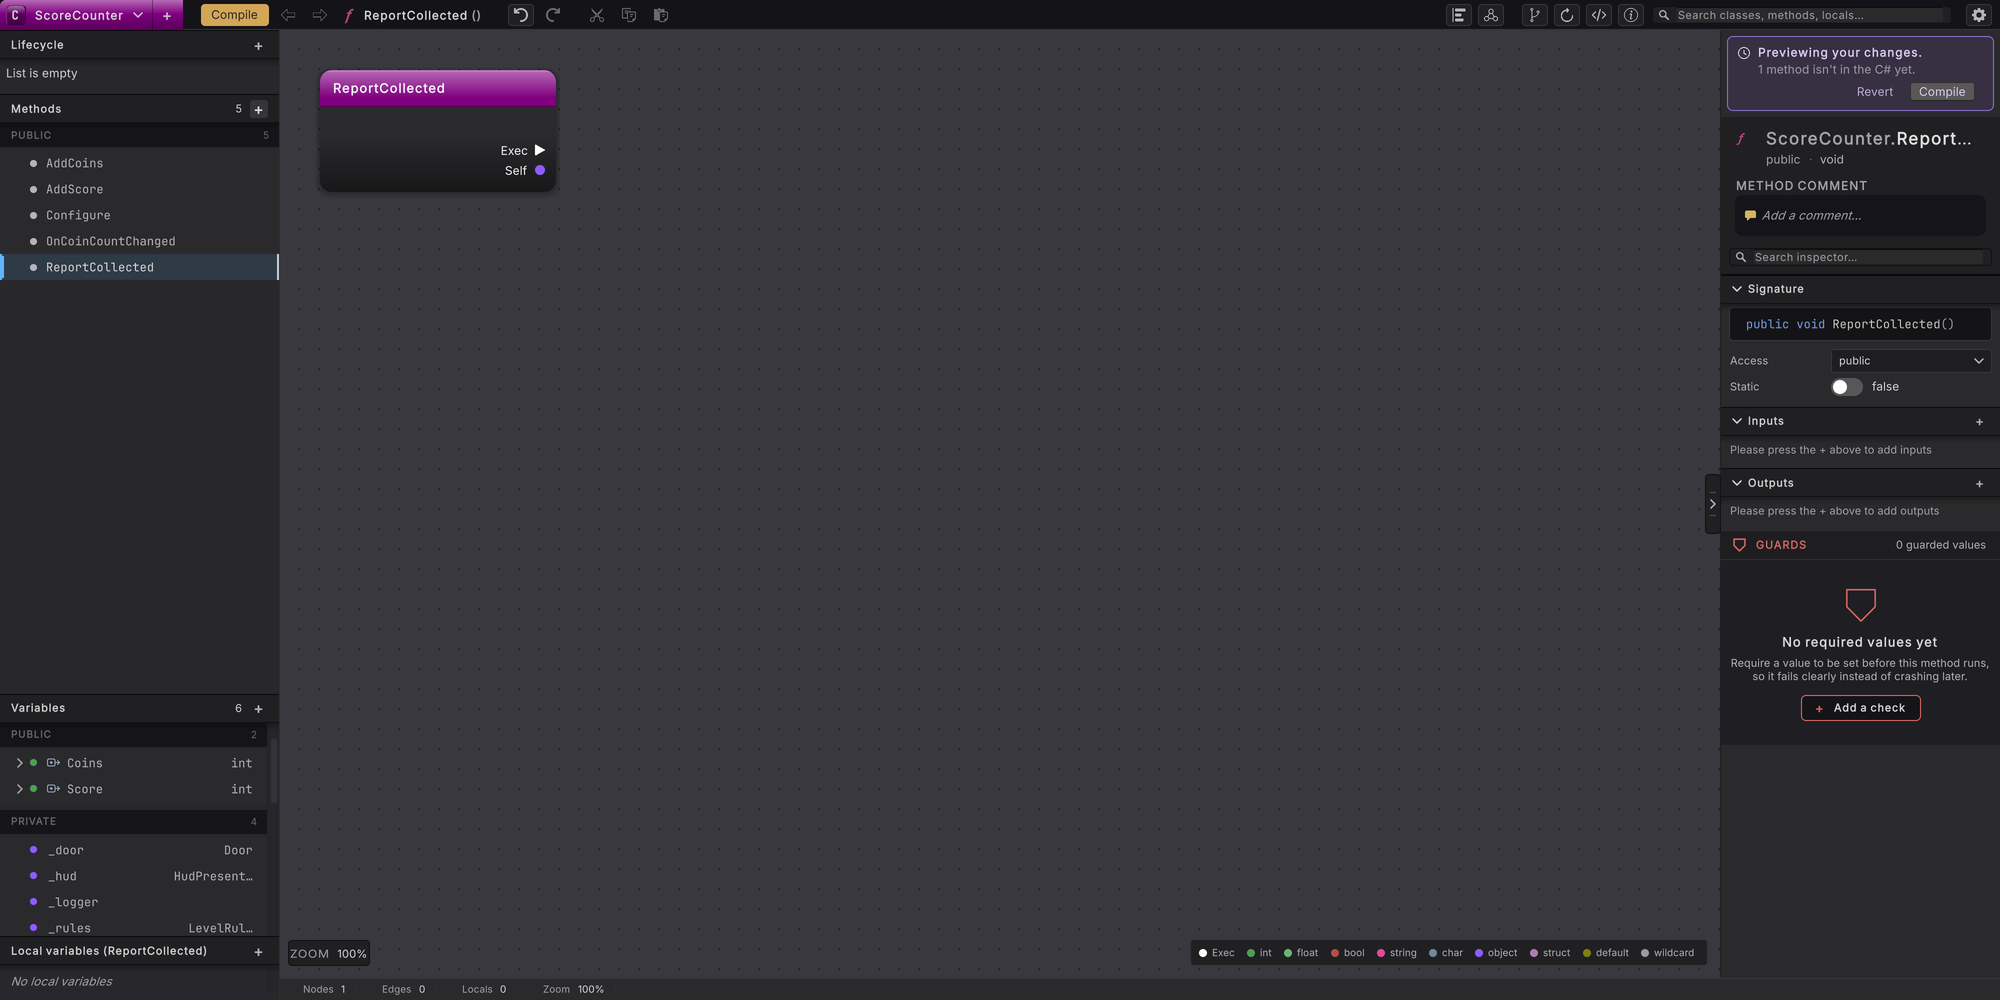
Create ReportCollected
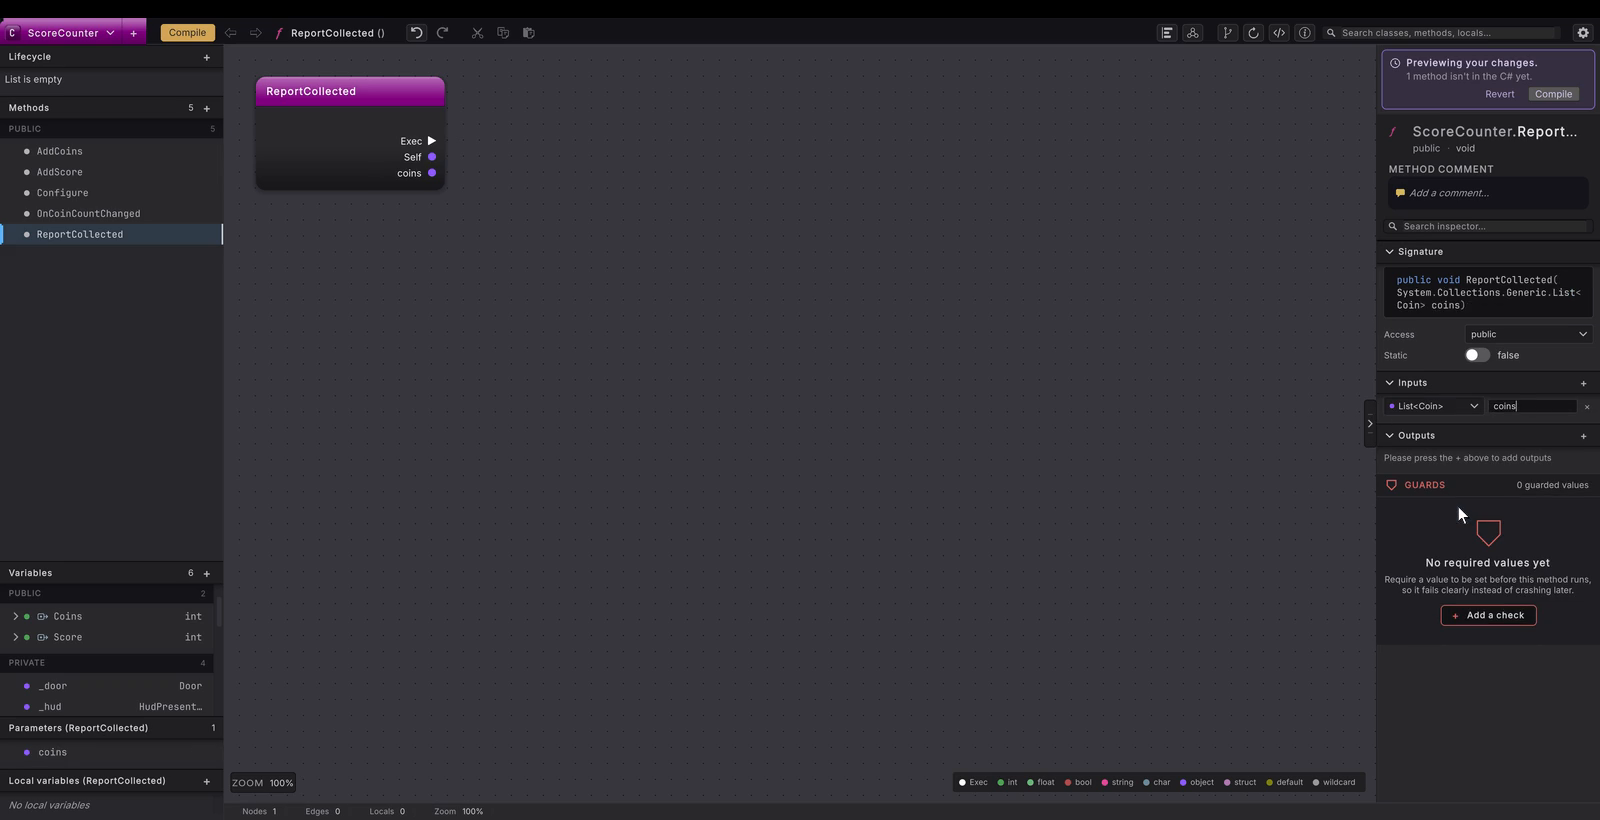
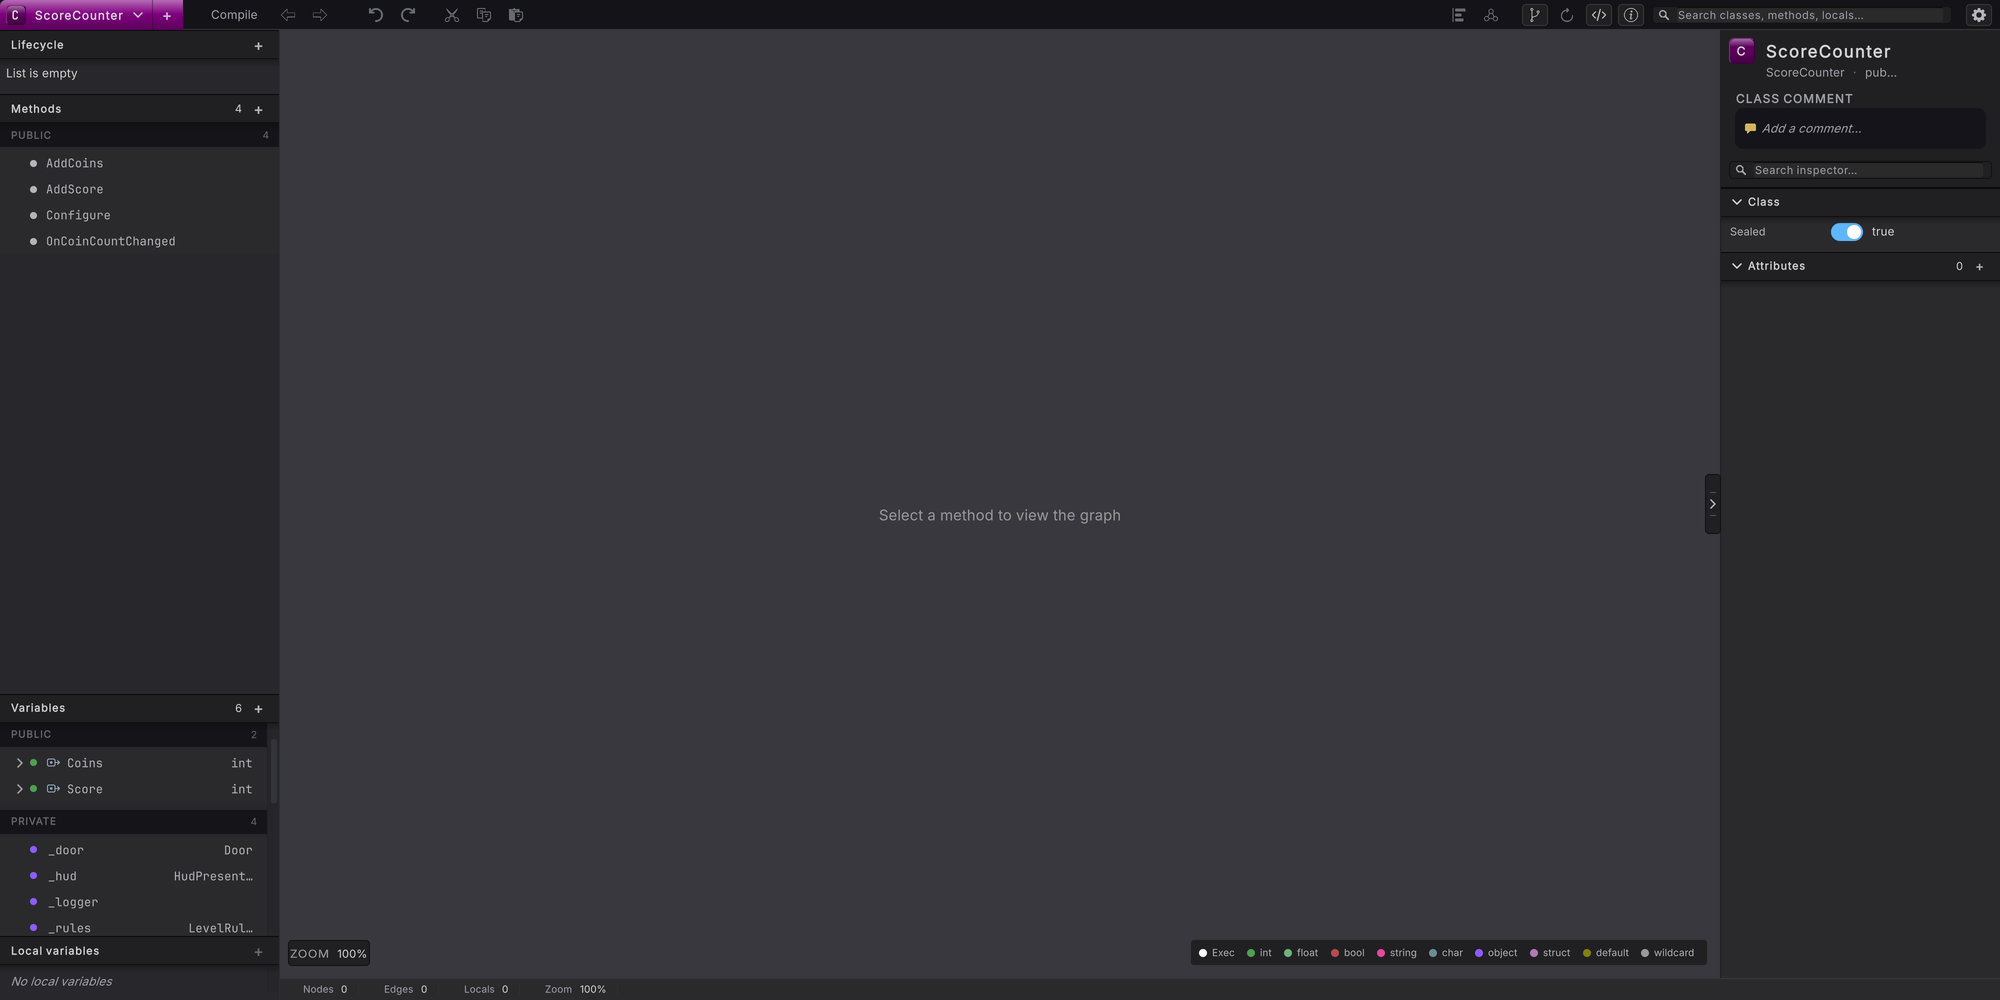
Press Cmd/Ctrl+O and choose ScoreCounter. Press the + on the Methods section of the left rail. The new method’s row opens as a name box: type
ReportCollectedand press Enter. In the right rail’s Inputs card, press +. The new row reads int and newParam. Press int, typeListand pick List<T>, then typeCoinand pick Coin, so the row reads List<Coin>. Typecoinsover newParam.Add the log
Right-click blank canvas to the right of the entry node and pick Log in the LOGGING group. A dark teal Log node appears. Drag the entry node’s white Exec pin into its Exec. Leave its message pin empty for now: the Count node feeds it in step 6.
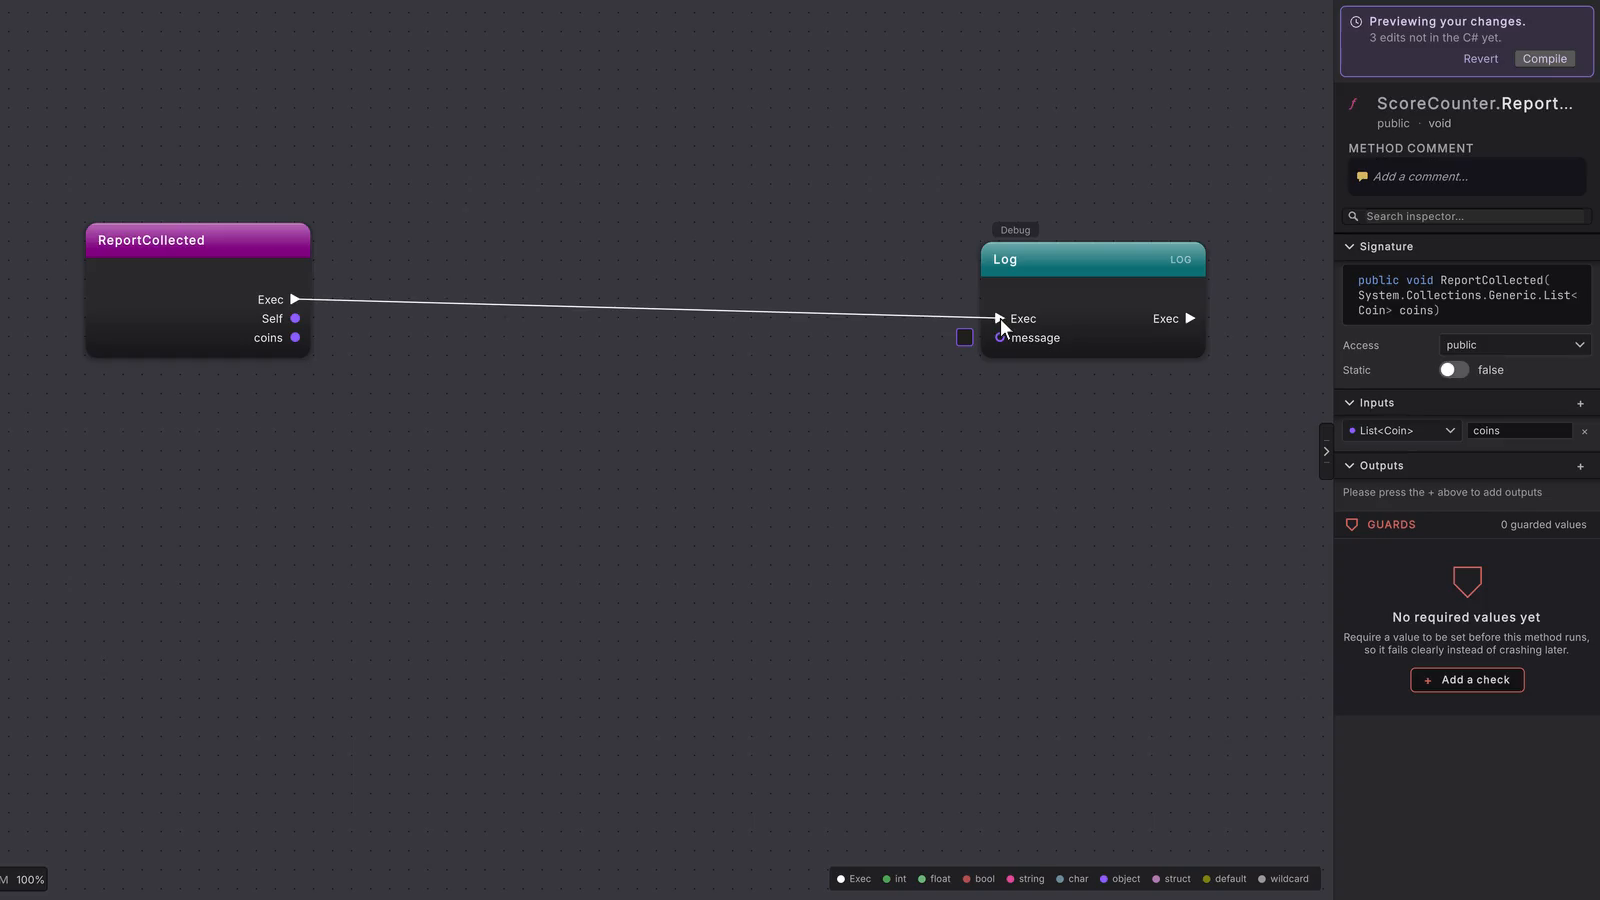 5 stepsFull size ↗
Place Where
Right-click blank canvas below the entry node and scroll to the LINQ group, or type
Wherein search. Every row in the group is marked Q. Pick Where. A green node titled Where appears with LINQ on the right of its header, source and Condition on its left, and Result and item on its right.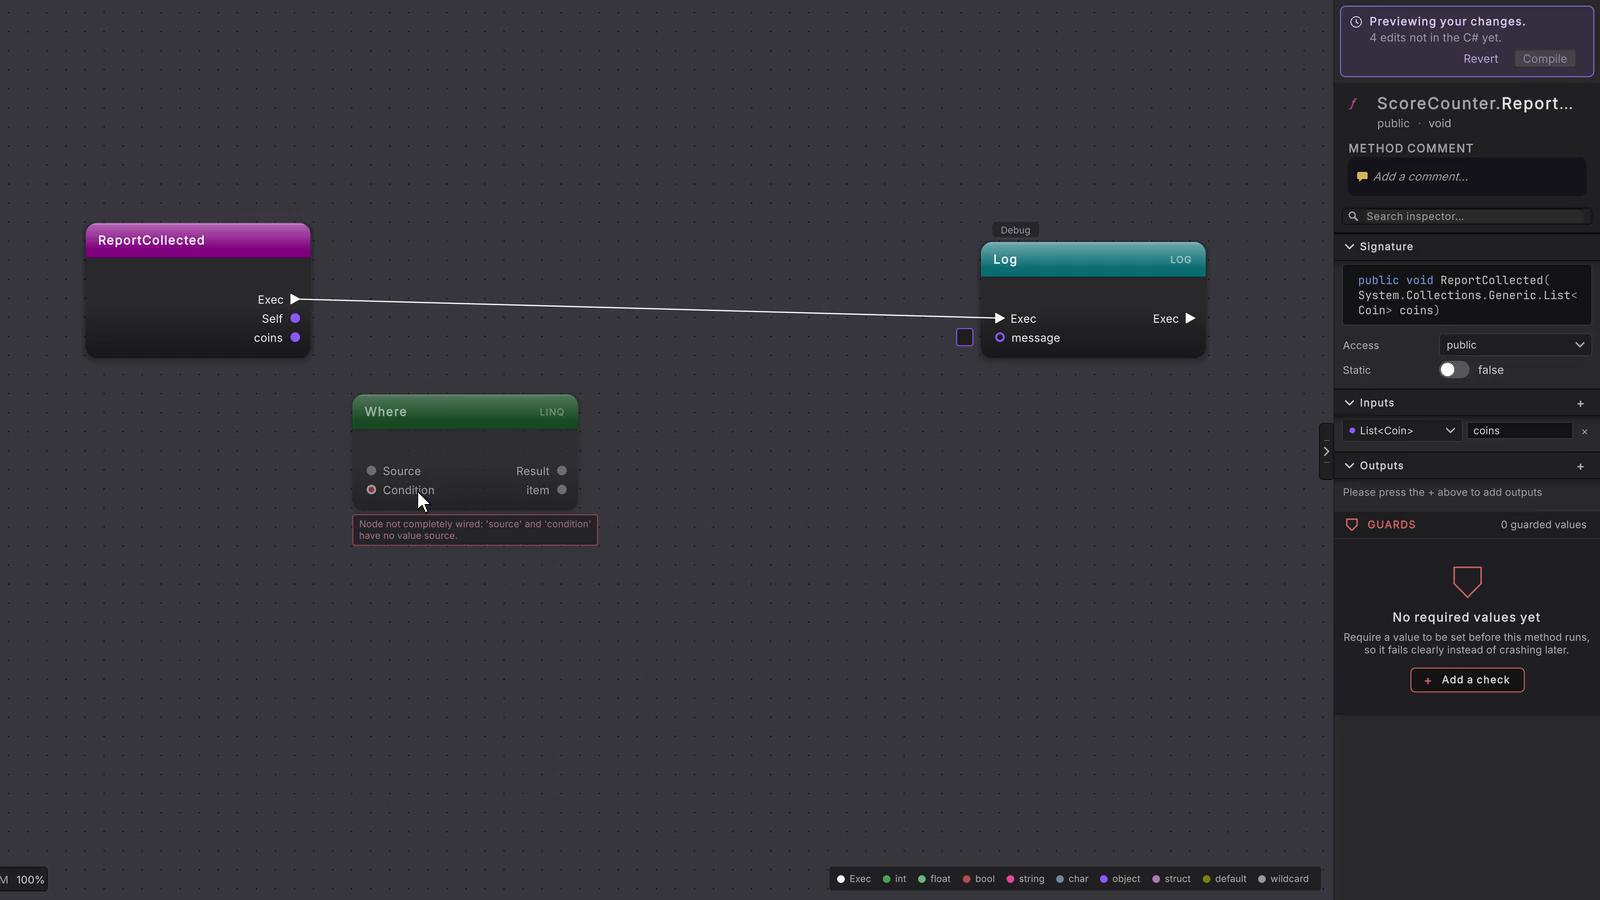 3 stepsFull size ↗
Feed the collection
Drag the entry node’s purple coins pin into the Where node’s source pin. item now stands for one coin, and Result for the coins that pass.
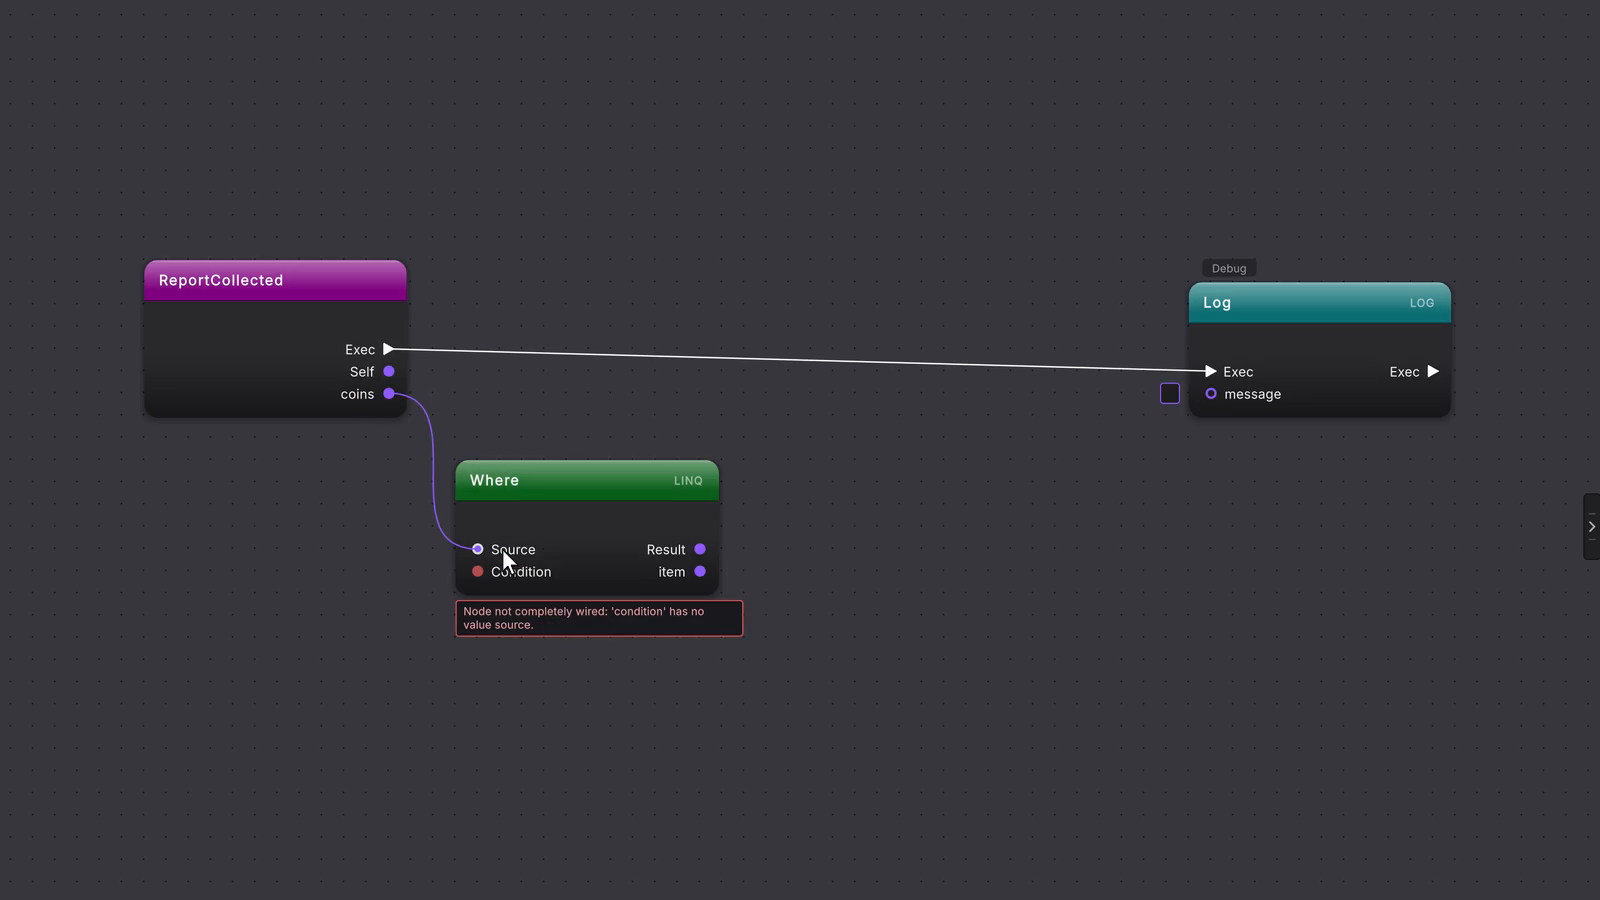 3 stepsFull size ↗
Test each coin
Drag from the item pin and let go on empty canvas. A menu headed item lists the coin’s variables; type
IsColand press get on IsCollected. A red IsCollected pill appears, already wired from item. Drag its output into the Where node’s red Condition pin.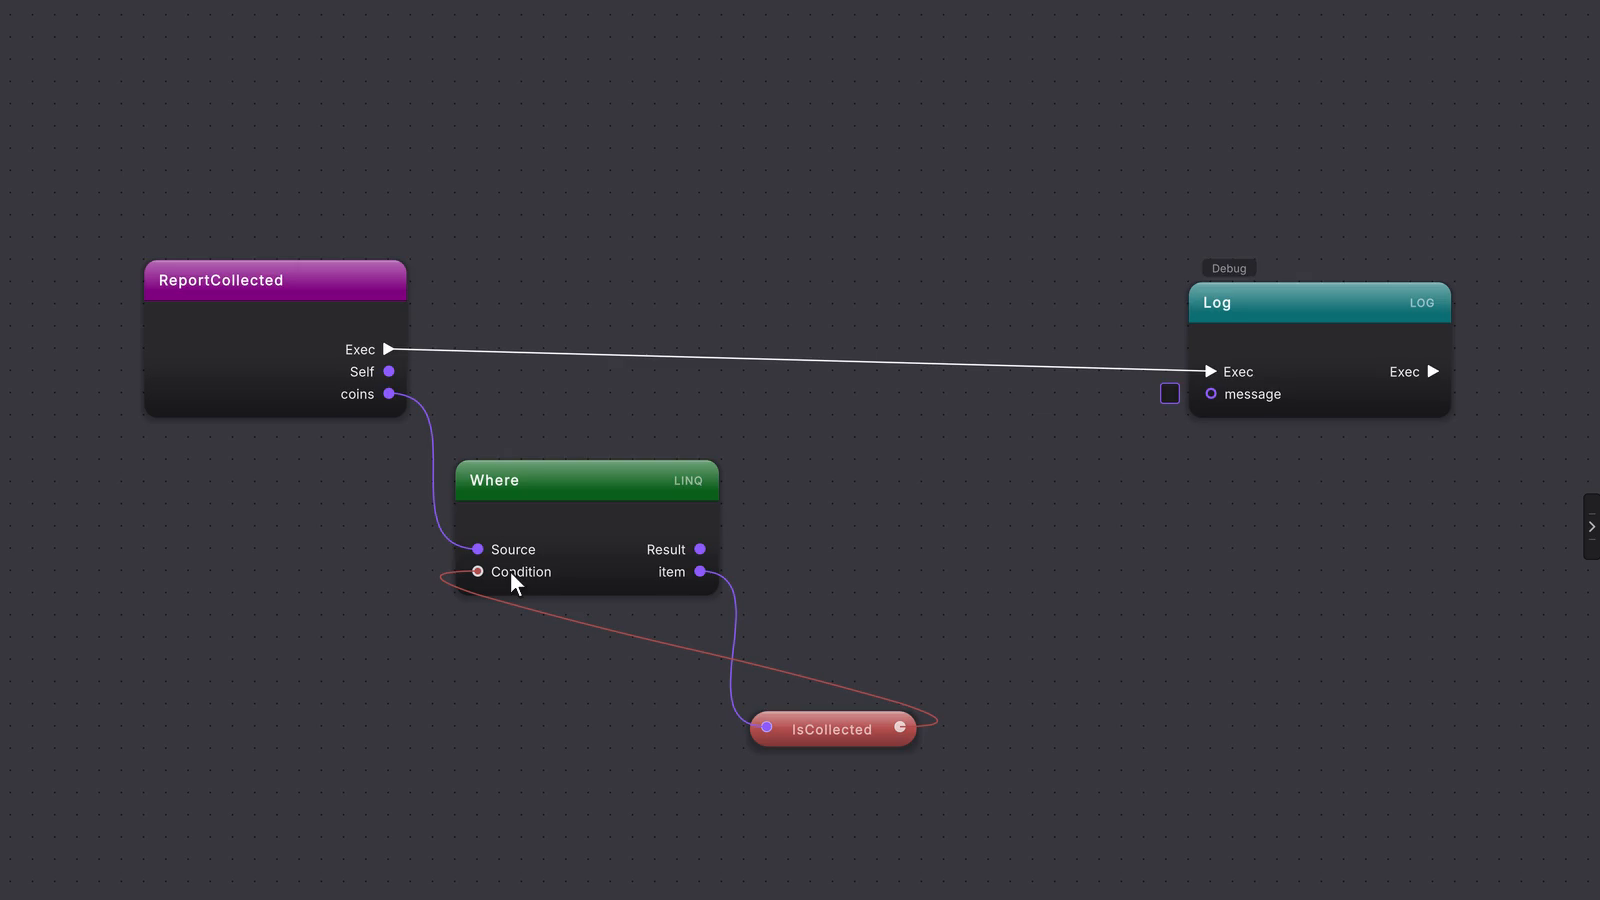 7 stepsFull size ↗
Count and print
Right-click blank canvas to the right of the Where node and pick Count in the LINQ group. The new green node reads LINQ · RUNS NOW on the right of its header, because it produces the number at once. Drag the Where node’s Result into the Count node’s source, then drag the Count node’s green Result into the Log node’s message pin. The message pin turns green, because it now receives a number.
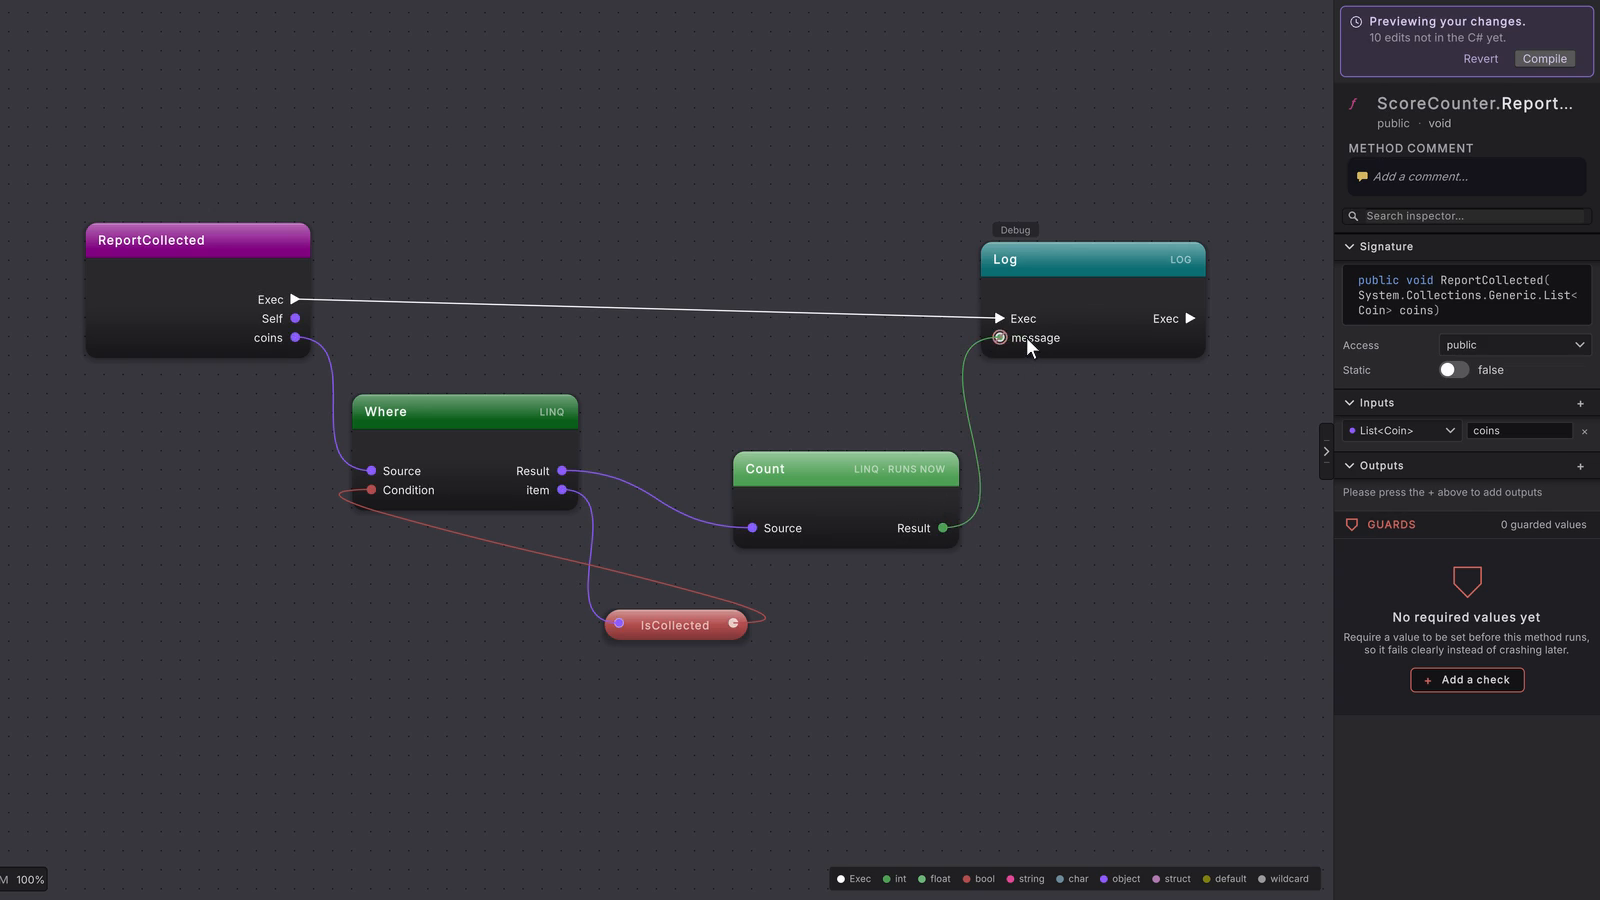 7 stepsFull size ↗
Compile and reload
Press Compile in the toolbar.
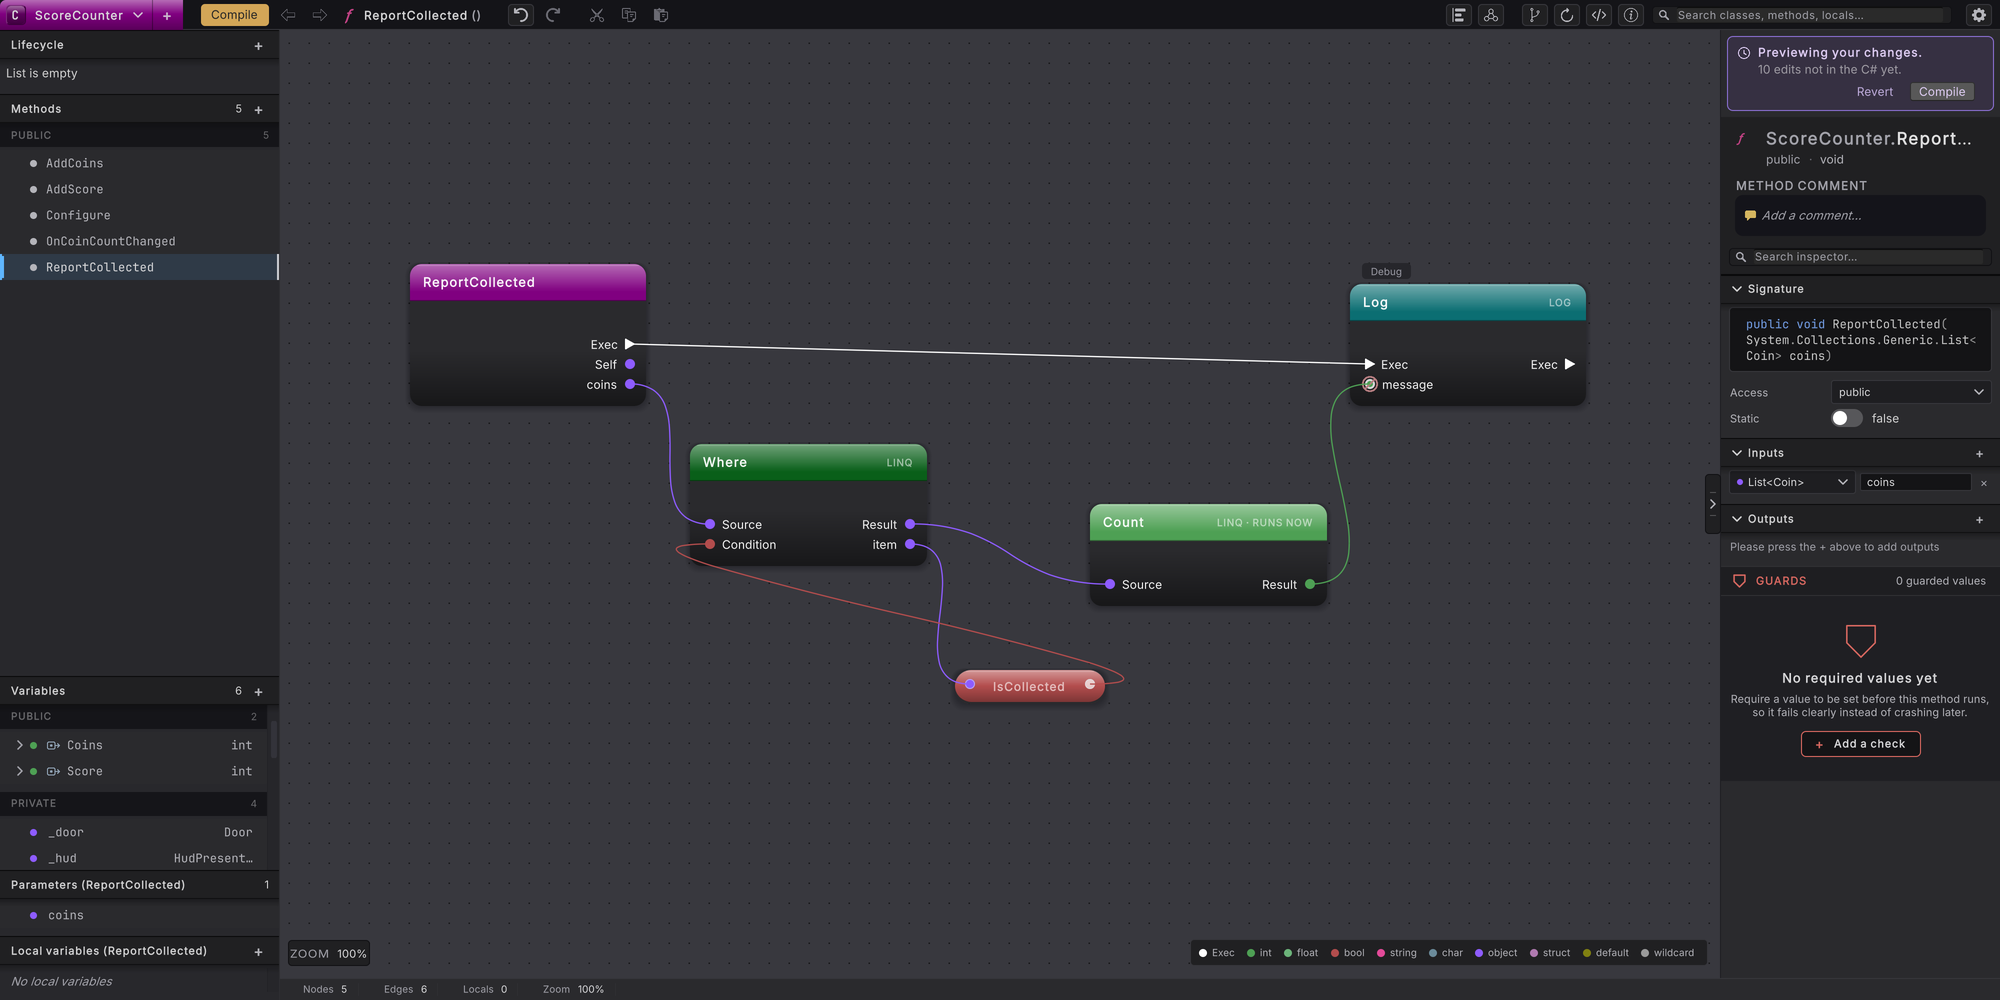
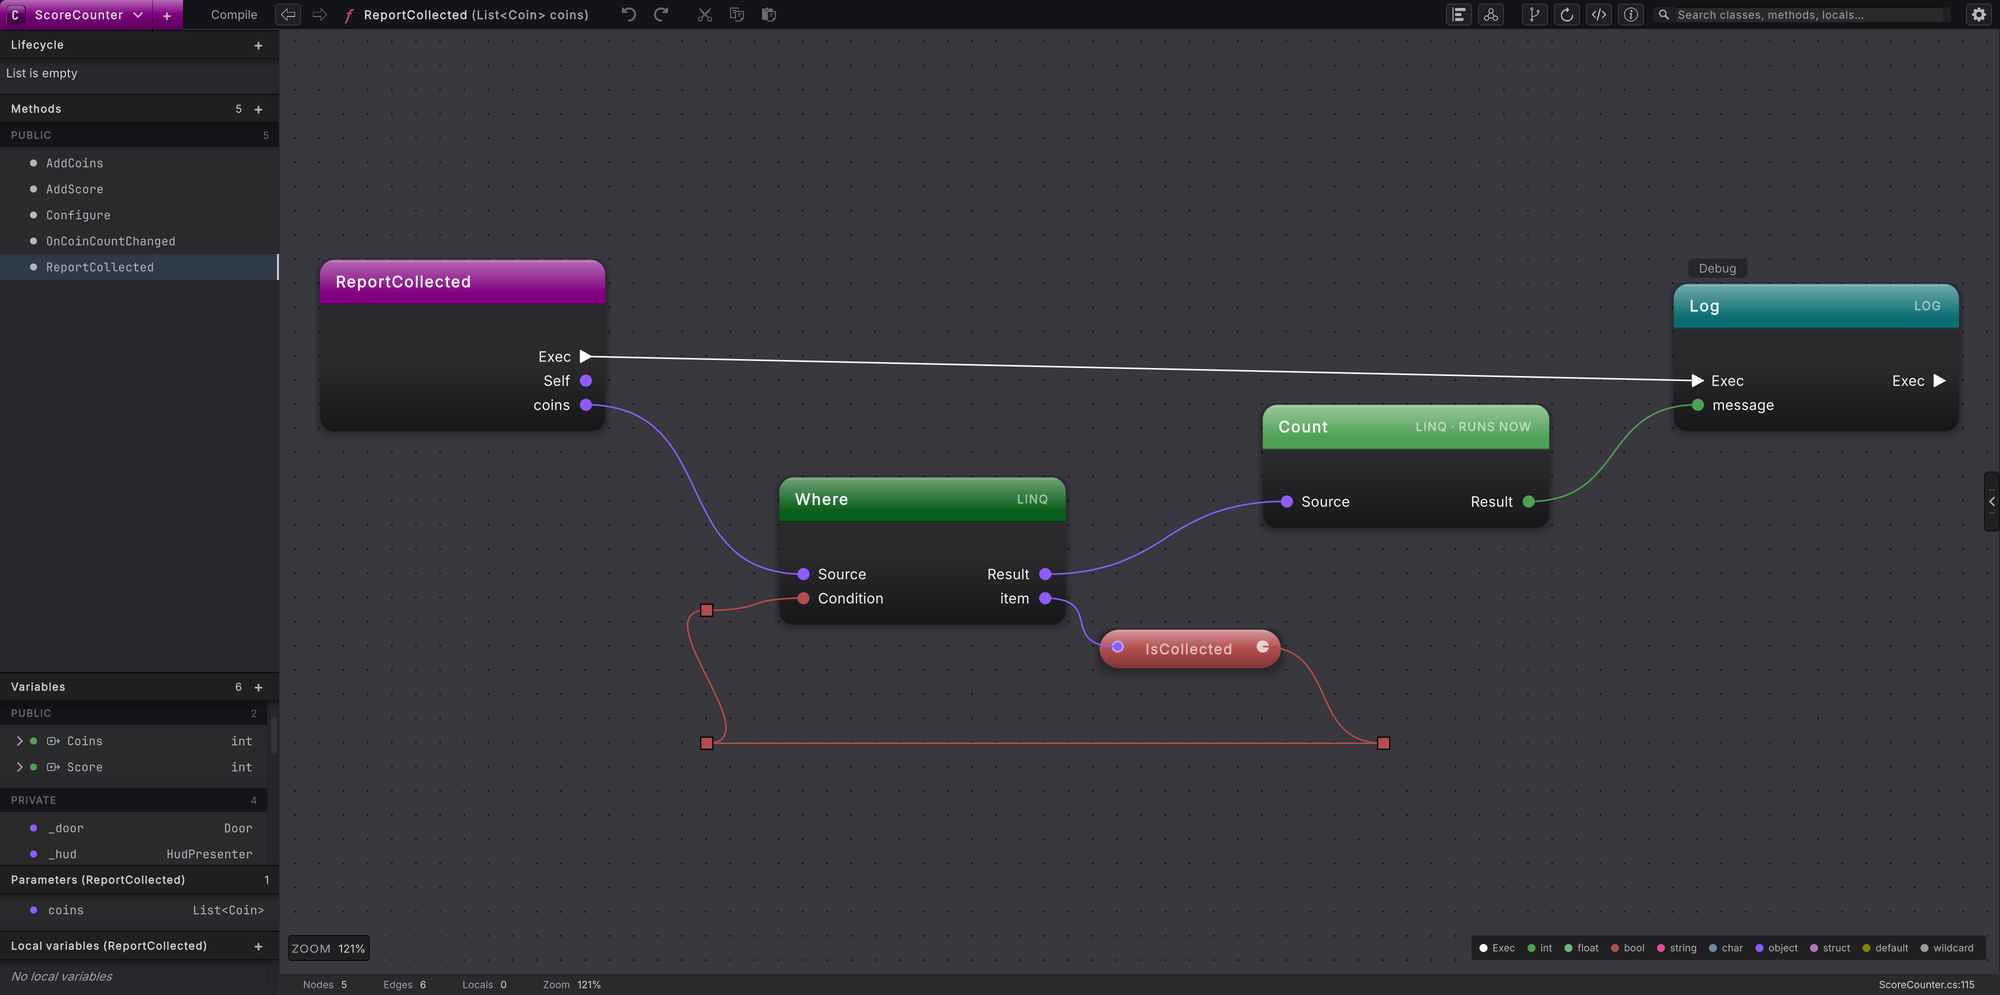
Dragging a data pin onto empty canvas opens its member menu, not a menu of LINQ operators, so place each LINQ node from the right-click menu and drag the wire into its source pin. The other operators in the group work the same way: Select has a value pin, Order By a key pin, and Take a count box you type a number into.
If you also work in C#, this is what Compile writes for the chain. ScoreCounter’s script had neither using System.Linq; nor using System.Collections.Generic;, so Compile added both after its existing using lines.
When it goes wrong
Section titled “When it goes wrong”When it goes wrong
| Symptom | Check | Fix |
|---|---|---|
| Only the first contact is ever checked. | Look at what feeds the GetContact node's index pin. | Wire the FOR node's green index output into it, and keep GetContact on the loop body route. |
| Touching a wall marks the player grounded. | Look at the comparison node between the y pill and GroundNormalThreshold. | Use Greater than with y on left and the threshold on right, feeding the branch's condition. |
| Contacts are still checked after ground is found. | Follow the white wire out of the _grounded SET node. | Wire it straight into a magenta EXIT node placed from return. |
- Loops: place for, foreach, while and do while nodes.
- Return and throw: leave a loop and its method early.
- Get and set: place the SET node for _grounded.