
Turn at the edge
Build a branch and an else-if branch on the canvas that turn a patrol around only when it is moving past an edge.
On this page
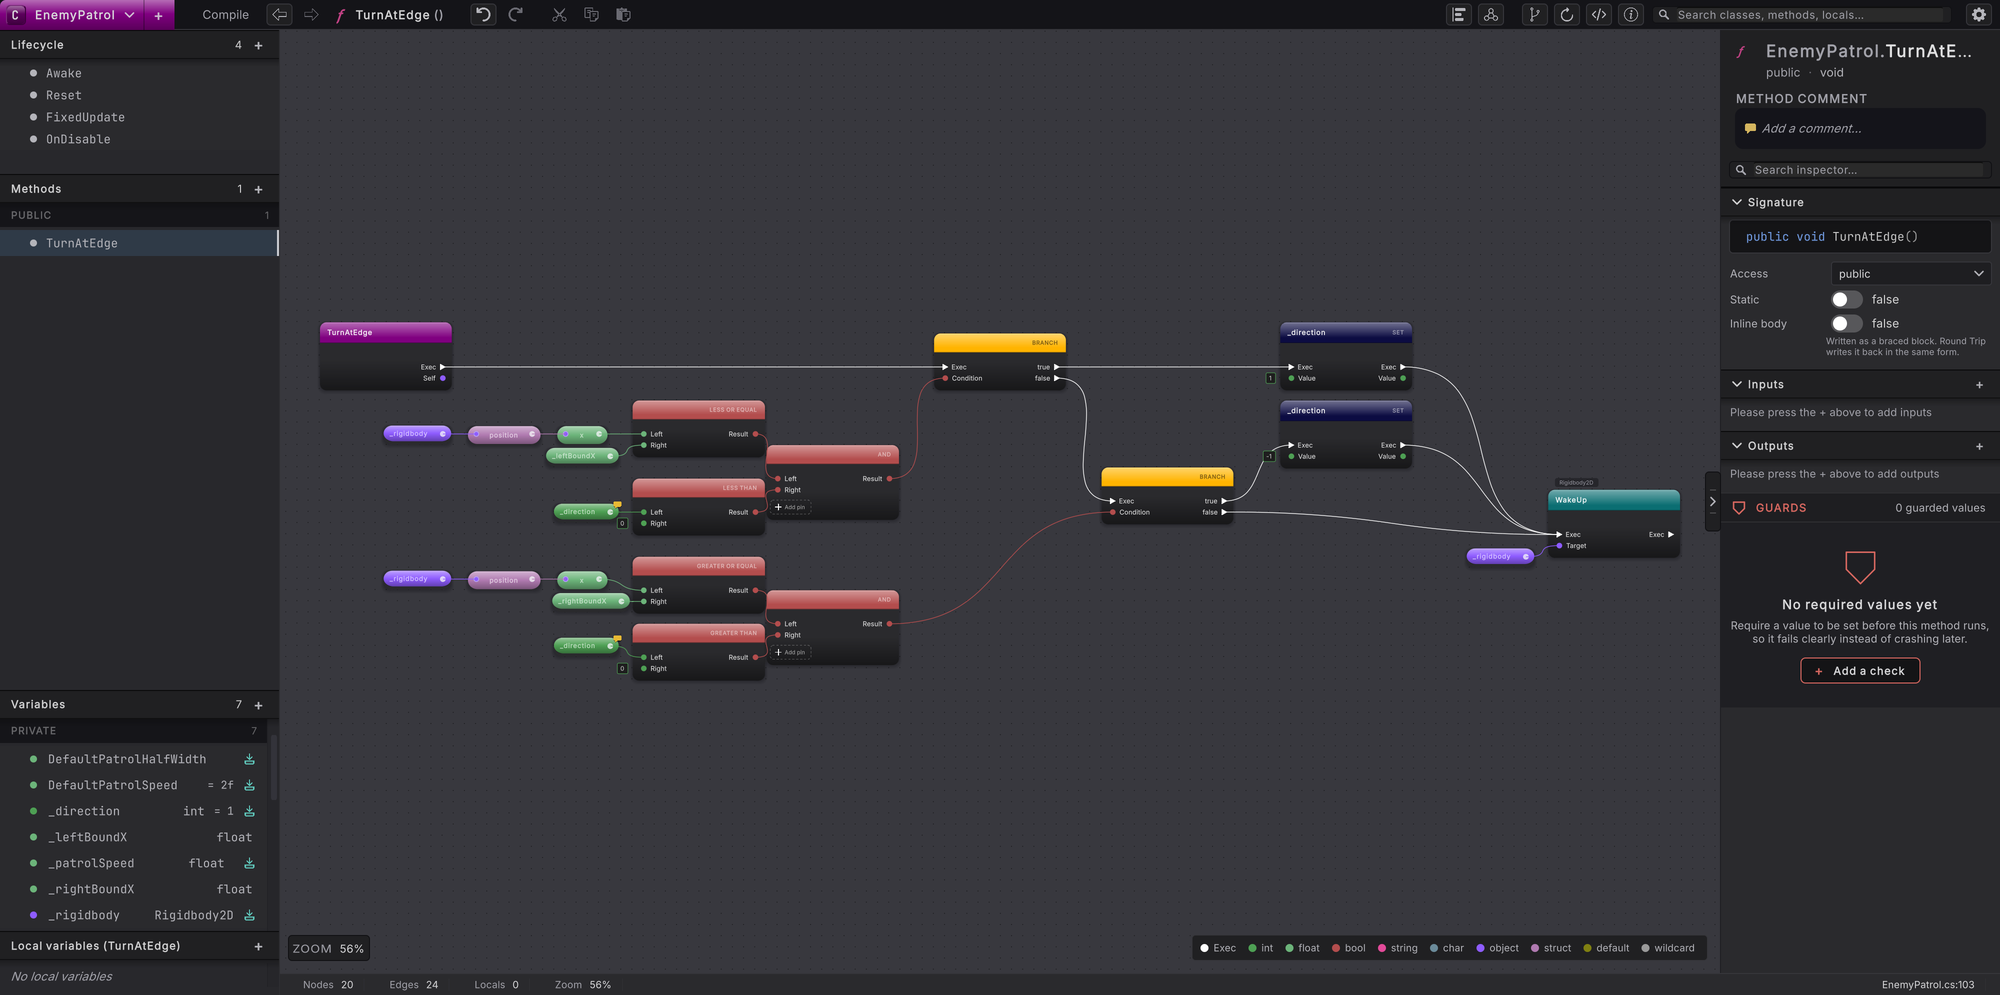
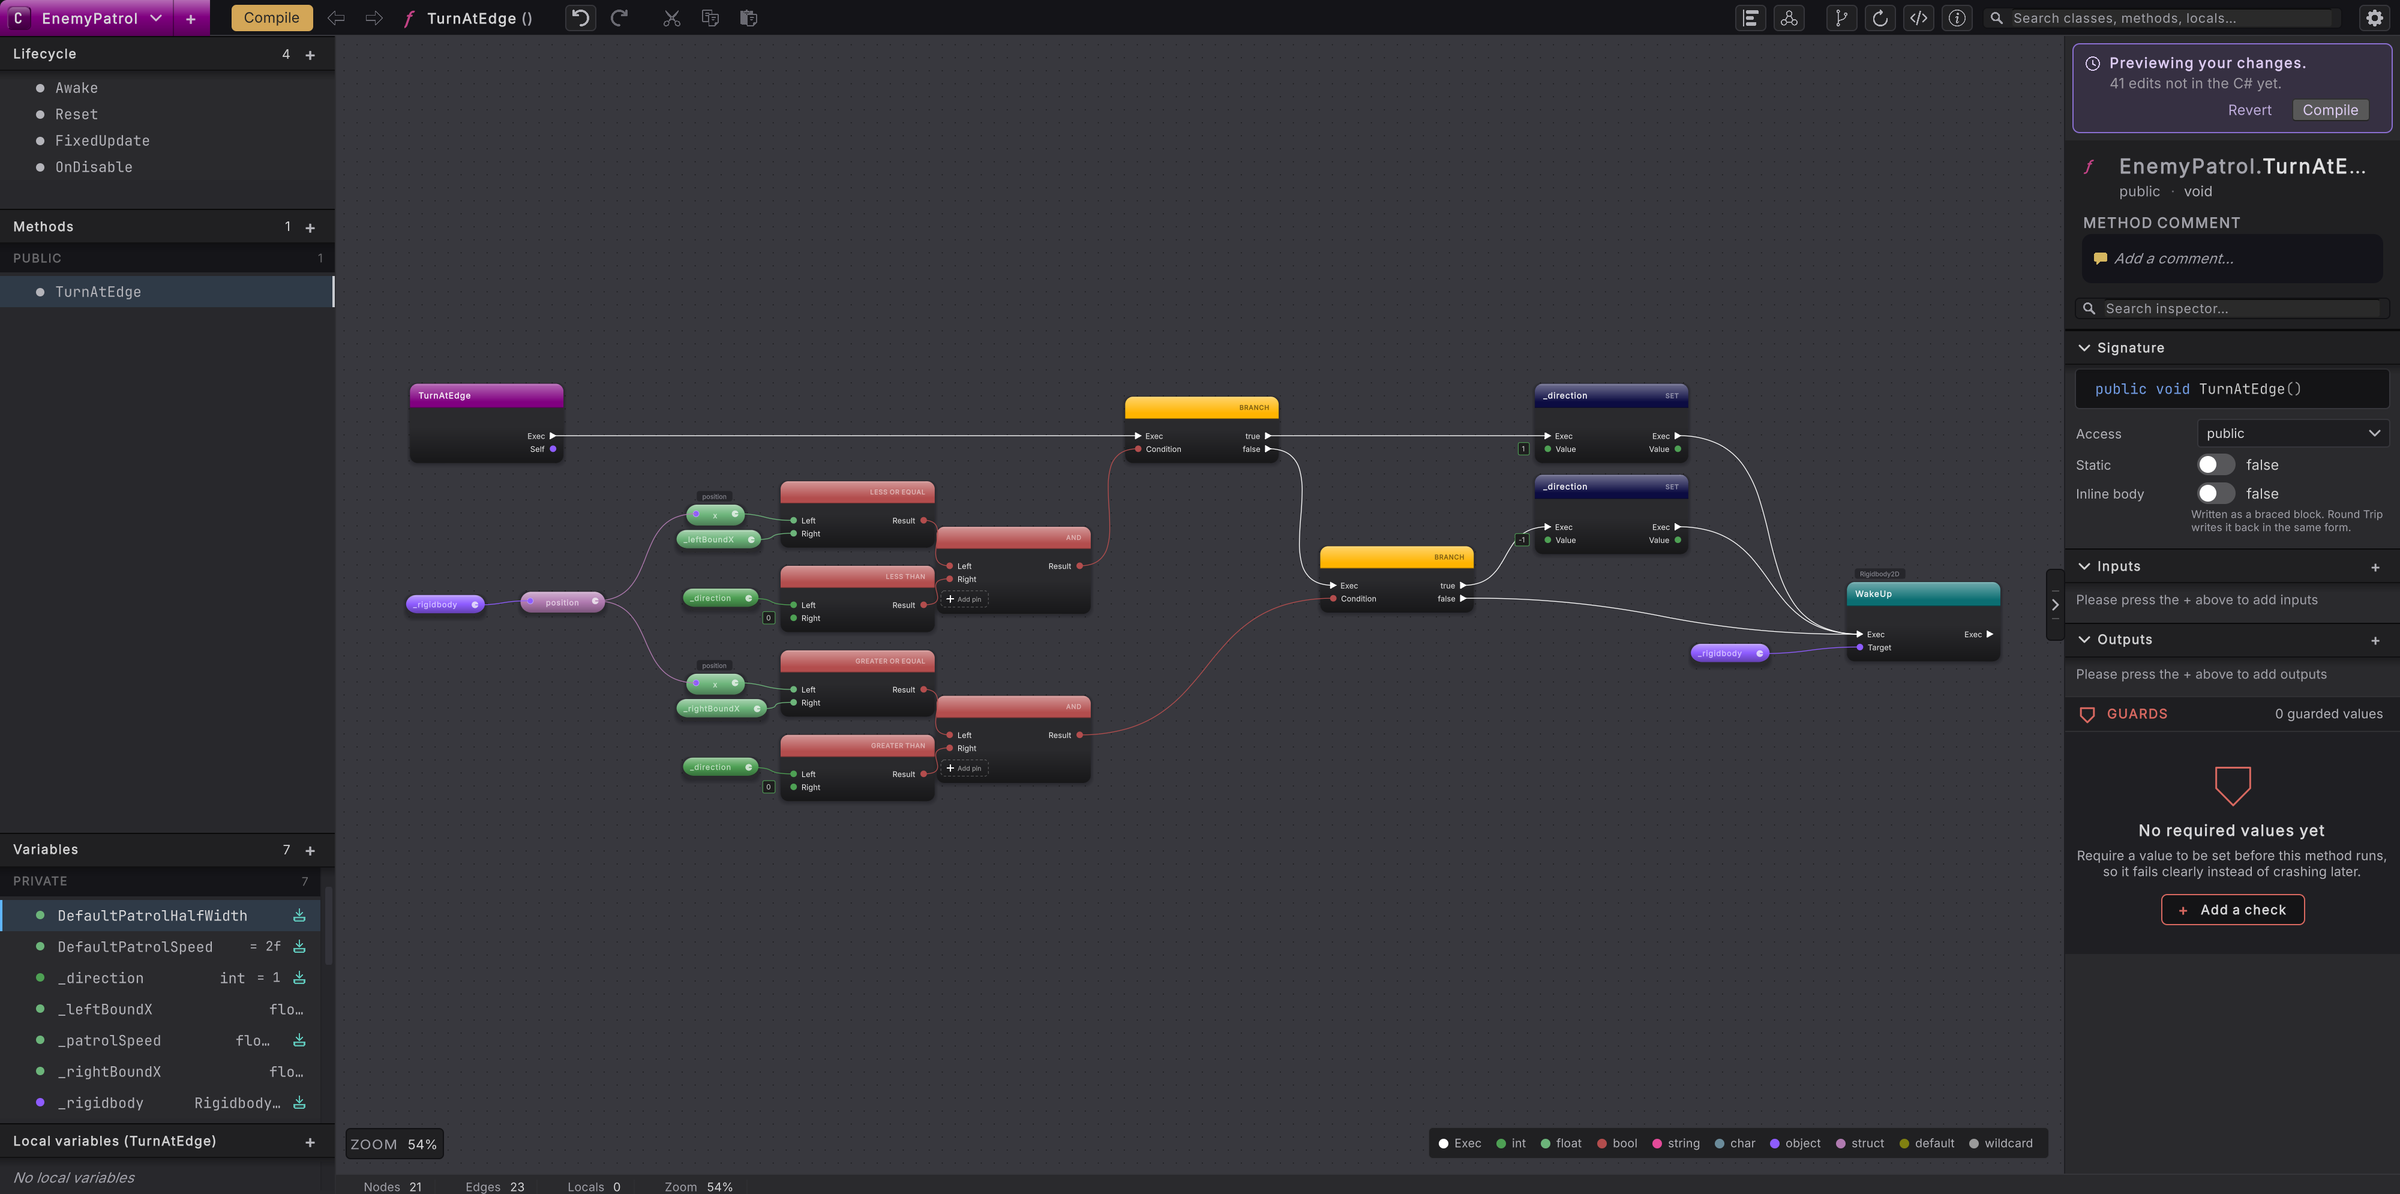
Reaching an edge is only half the reason to turn. This shape turns a patrol around when it is at an edge and still moving toward it, so it never flips back and forth while it rests on the line. On the canvas it is two yellow BRANCH nodes in a chain: the second one hangs off the first one’s false output, so it only asks its question when the first answer was no. In the Platformer sample, each enemy patrol checks its position and its direction before it turns around.
This page builds that shape from an empty canvas. It uses the sample’s EnemyPatrol class so every name on the nodes is real. In your own project, build the same shape in any class that reverses at a limit, once its folder is indexed.
In the sample
Section titled “In the sample”A patrol walks between a left X position and a right X position. At the left edge it should face right, but only if it was walking left. At the right edge it should face left, but only if it was walking right. Every other physics step keeps the current direction.
When this applies
Section titled “When this applies”- A patrolling enemy, a moving platform, or a sliding camera travels between two limits and turns back at each one.
- A value bounces between a low and a high mark, such as a pulsing light or a swinging door.
- Two checks can never both be true, and the second should only run when the first one fails.
Build the two-edge turn
Create TurnAtEdge
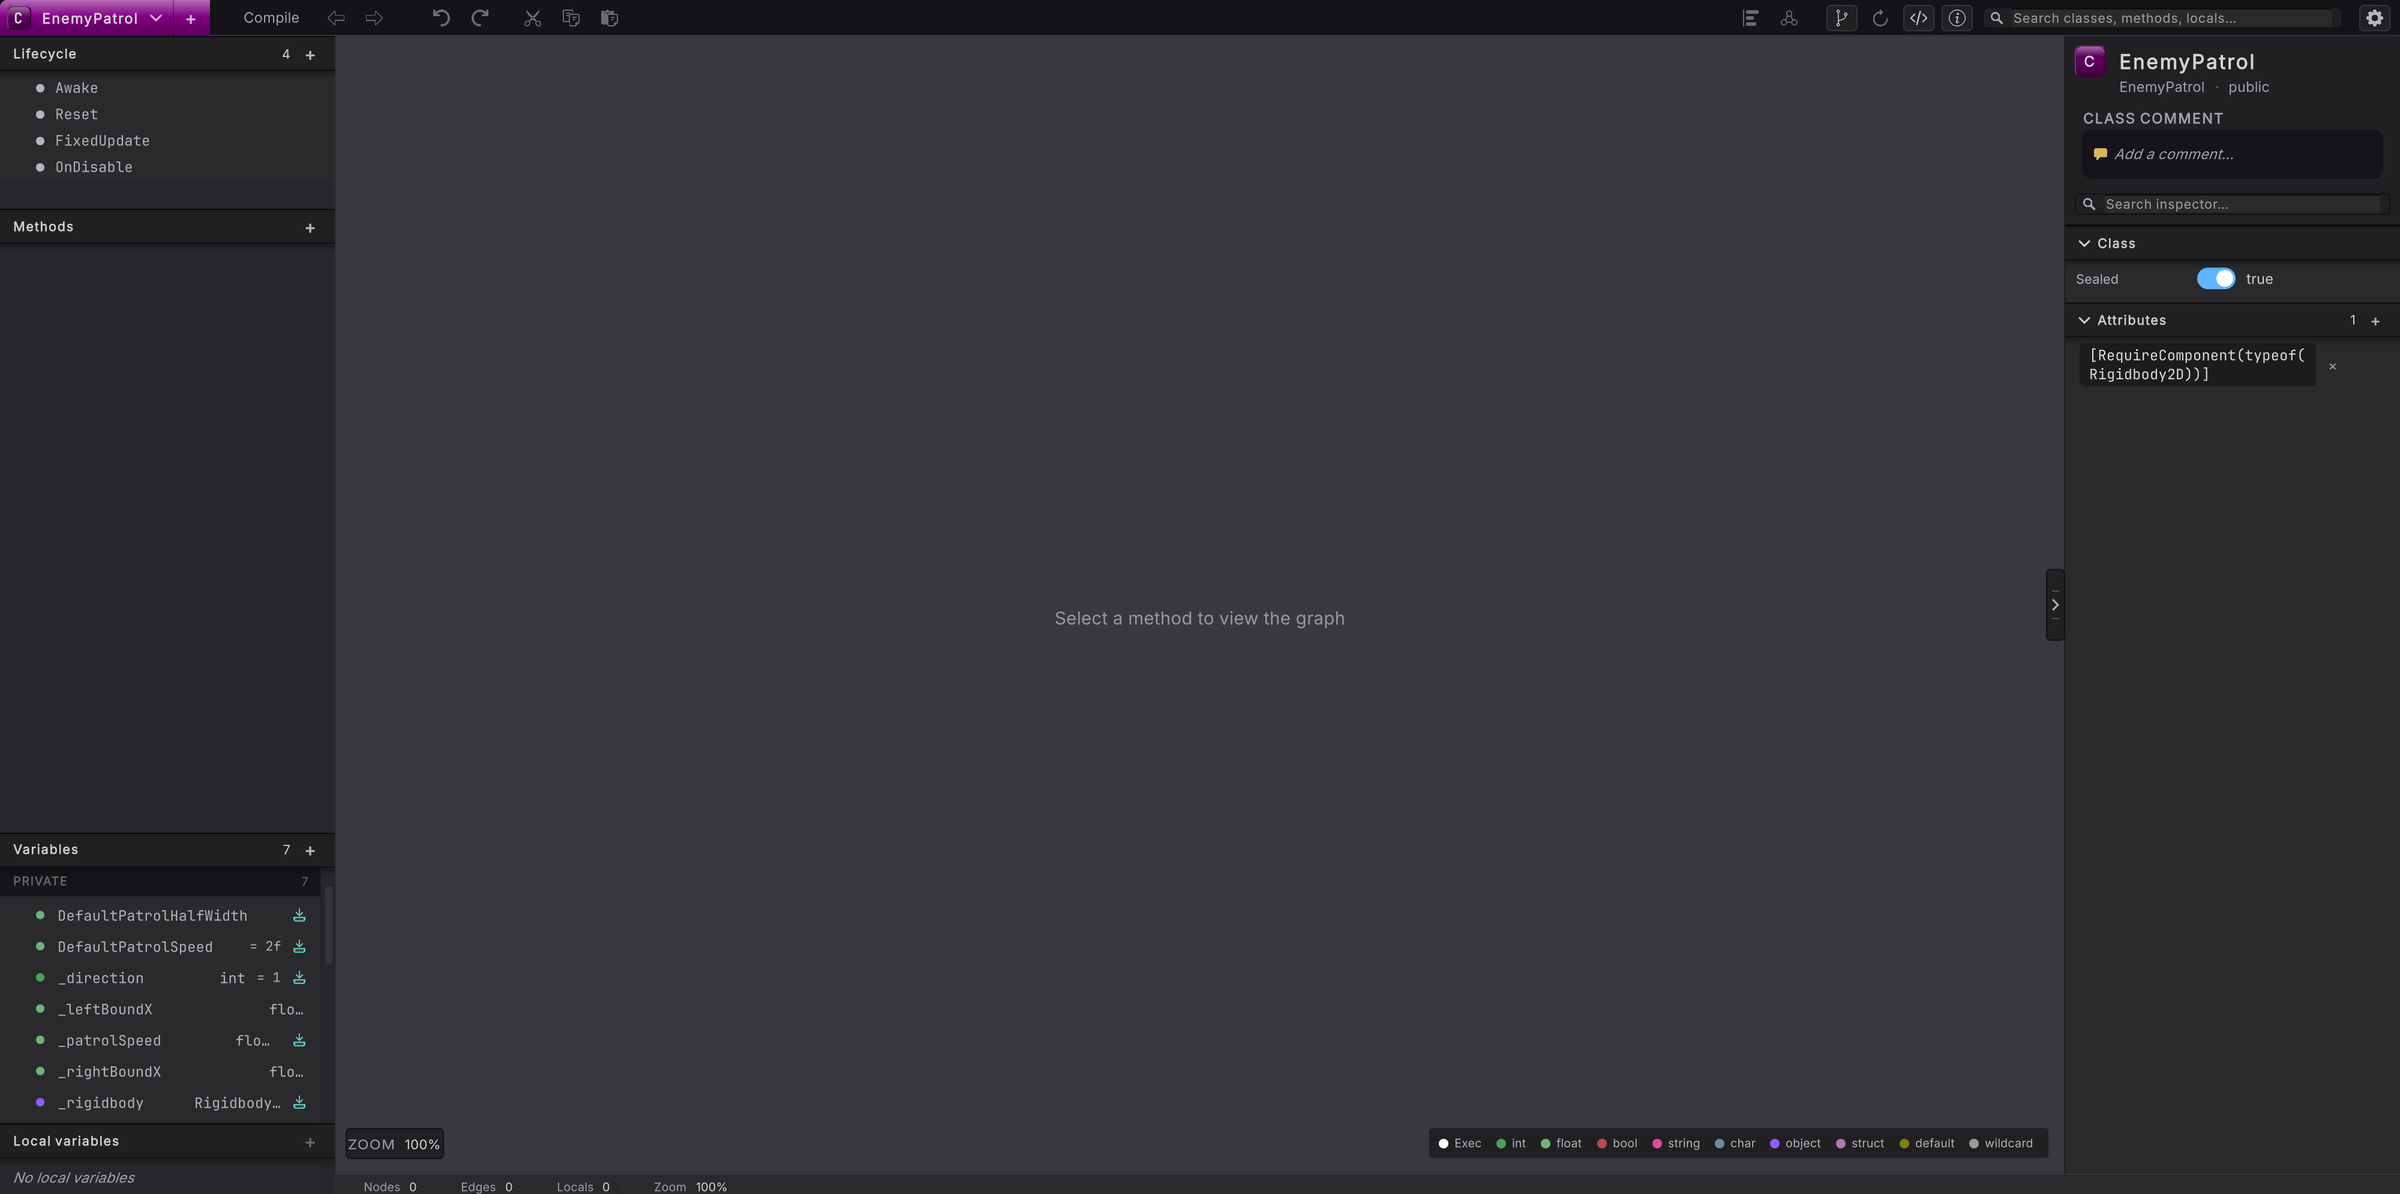
Open Tools > Round Trip > Graph view, press Cmd/Ctrl+O and choose EnemyPatrol. Press the + on the Methods section of the left rail, type
TurnAtEdgein the name box and press Enter. The canvas shows a magenta entry node titled TurnAtEdge with an Exec pin.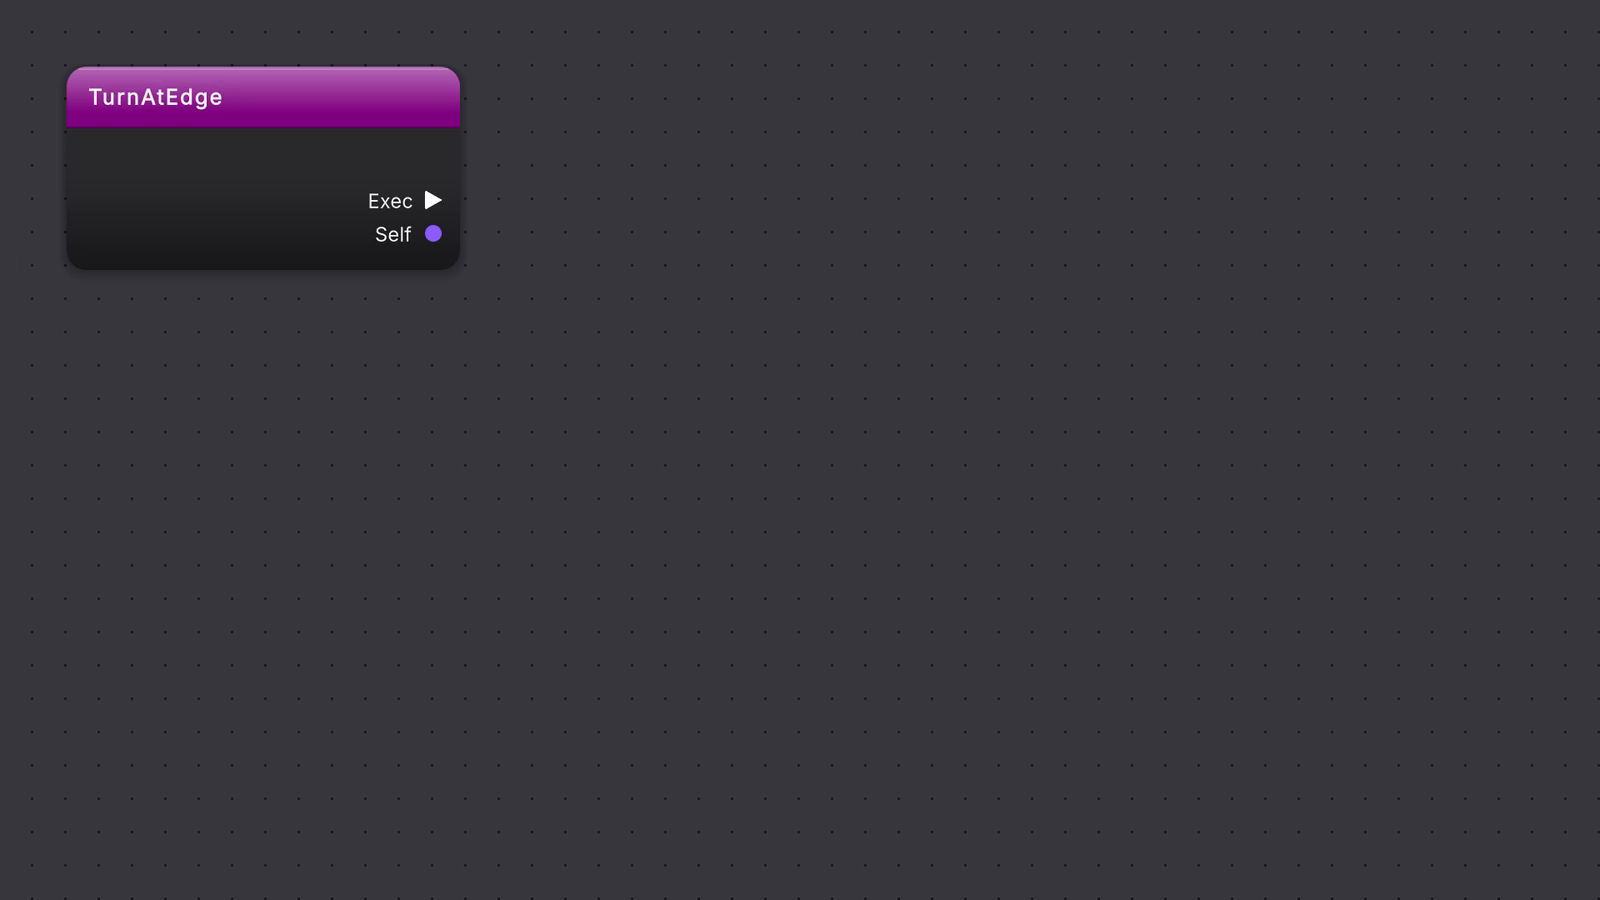 5 stepsFull size ↗
Read the position
Read the position once. Right-click blank canvas, type
_rigidbody, and press get. Drag from the purple pill onto empty canvas and press get on position. Drag from the new pill and press get on x. You now have a pill for the patrol’s X position.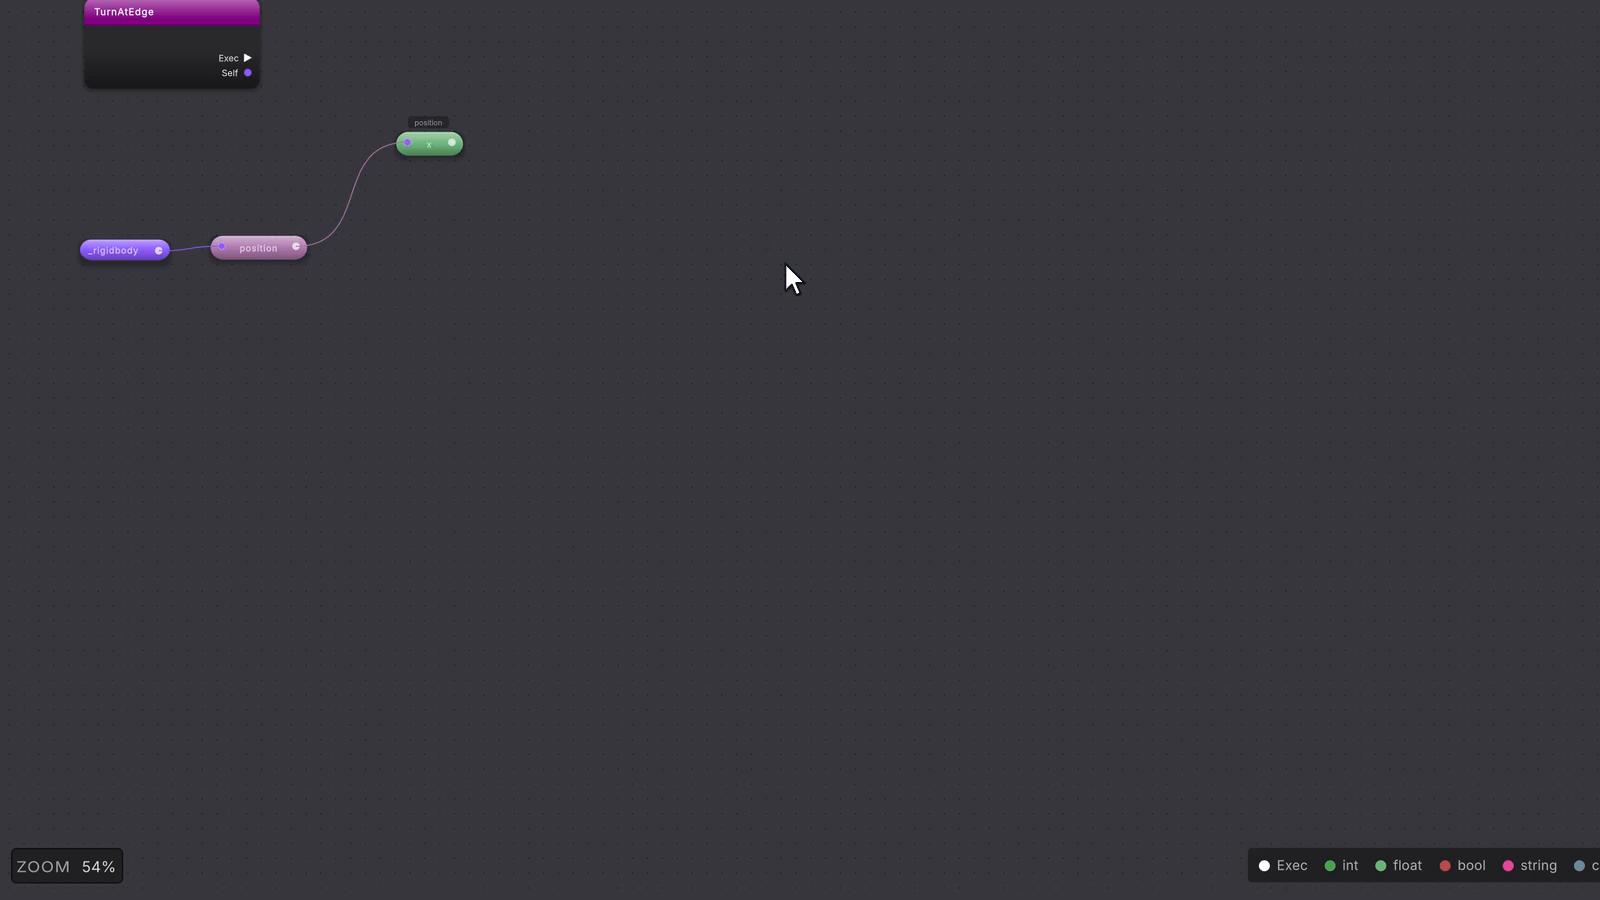 9 stepsFull size ↗
Place the first branch
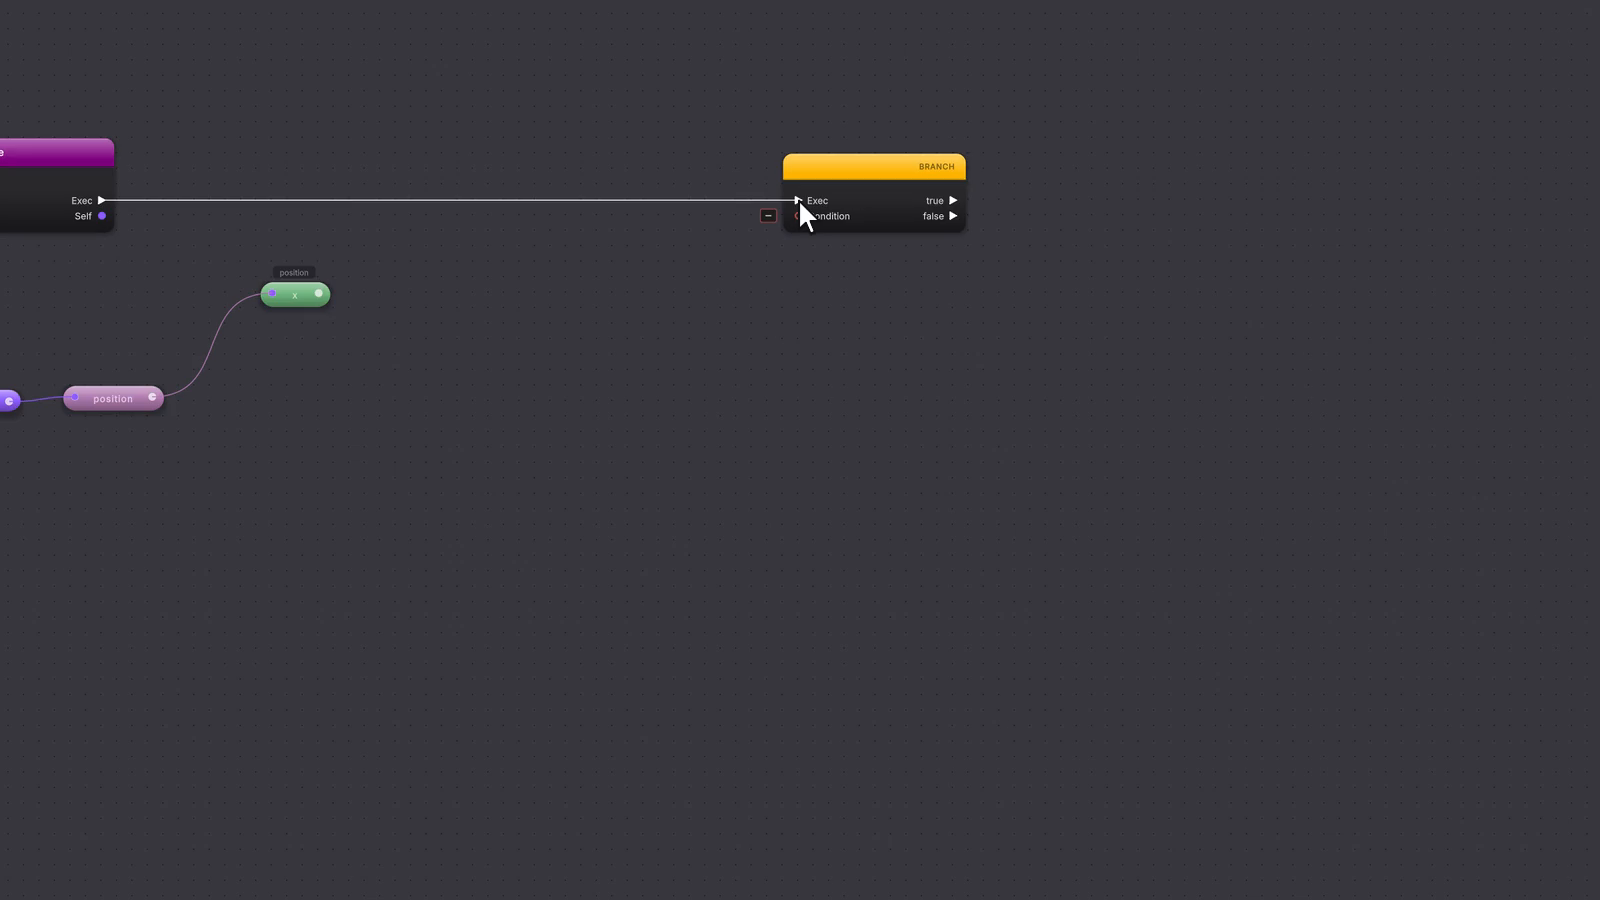
Place the first branch. Right-click and pick branch under flow control. Wire the entry node’s Exec into it.
 5 stepsFull size ↗
Build the left-edge test
Build the left-edge test. From operators, place Less or equal: wire the x pill into Left and a _leftBoundX pill into Right. Place Less than: wire a _direction pill into Left and type
0into Right. Place And and wire both red Result outputs into its Left and Right. Wire the And node’s Result into the branch’s Condition.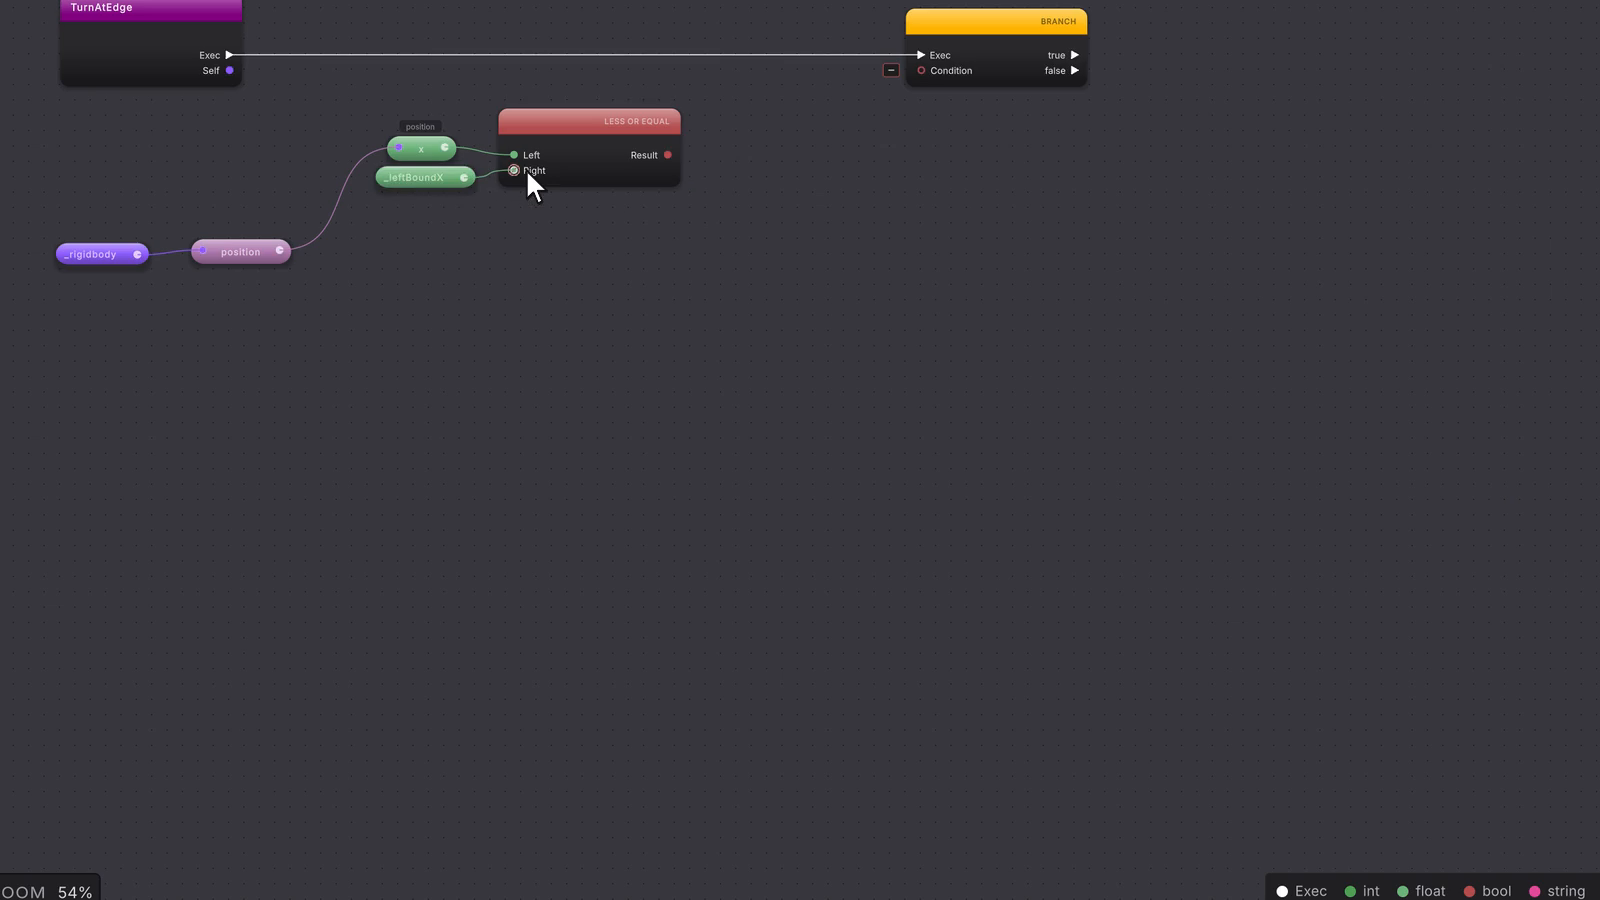 9 stepsFull size ↗
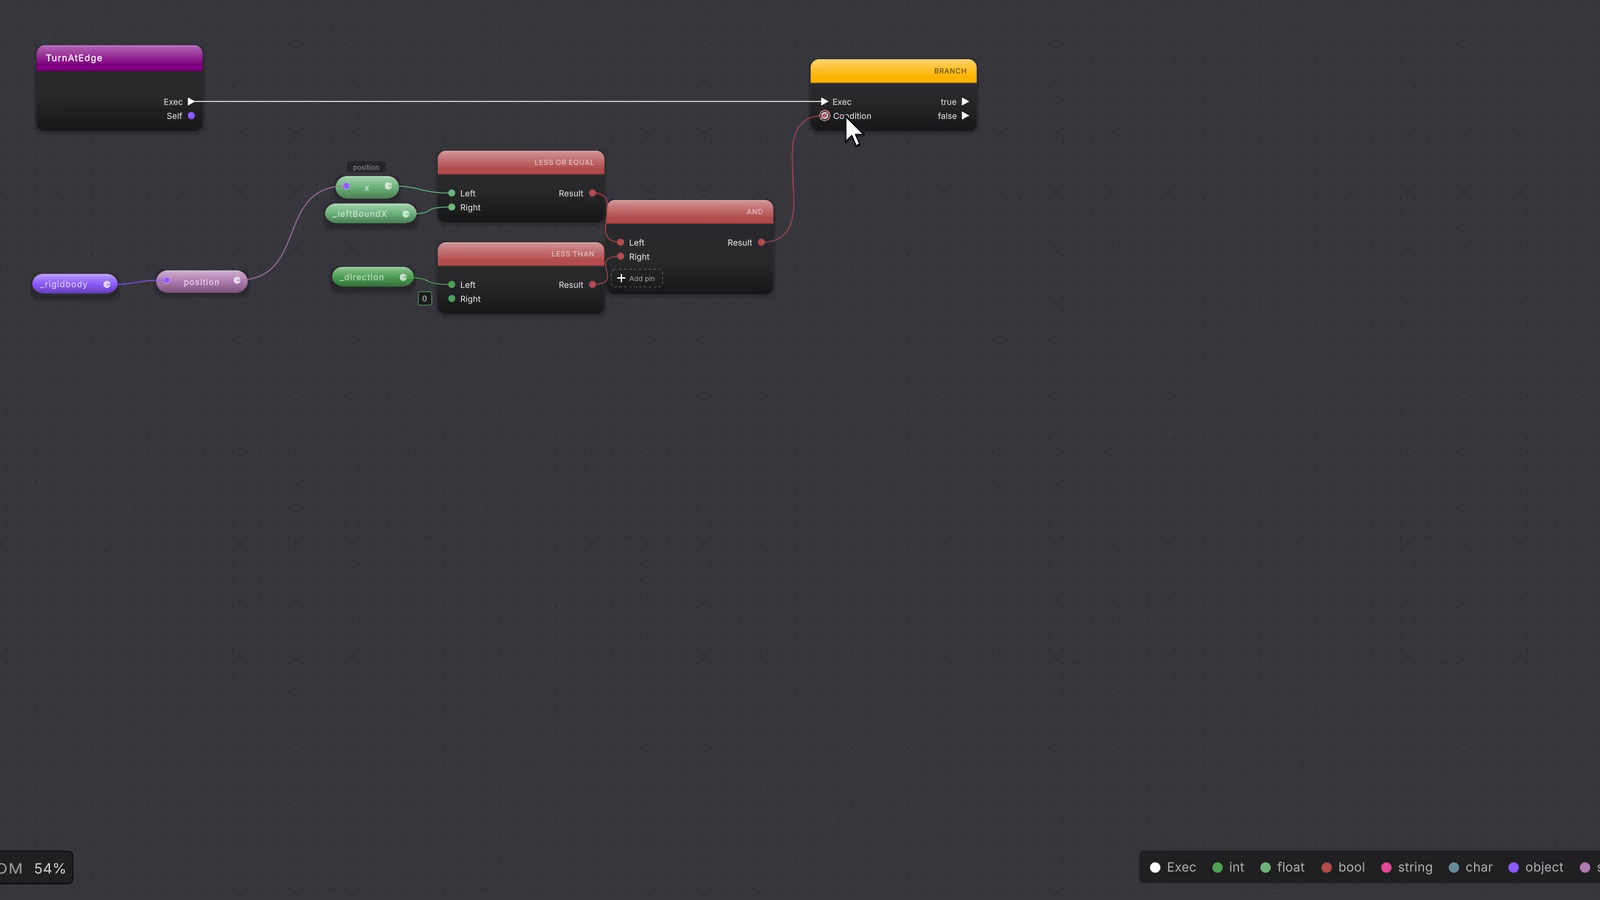 17 stepsFull size ↗
Turn right
Turn right. Right-click, type
_directionand press set. A navy SET node with a _direction pin appears. Click that pin and type1. Wire the branch’s true output into it.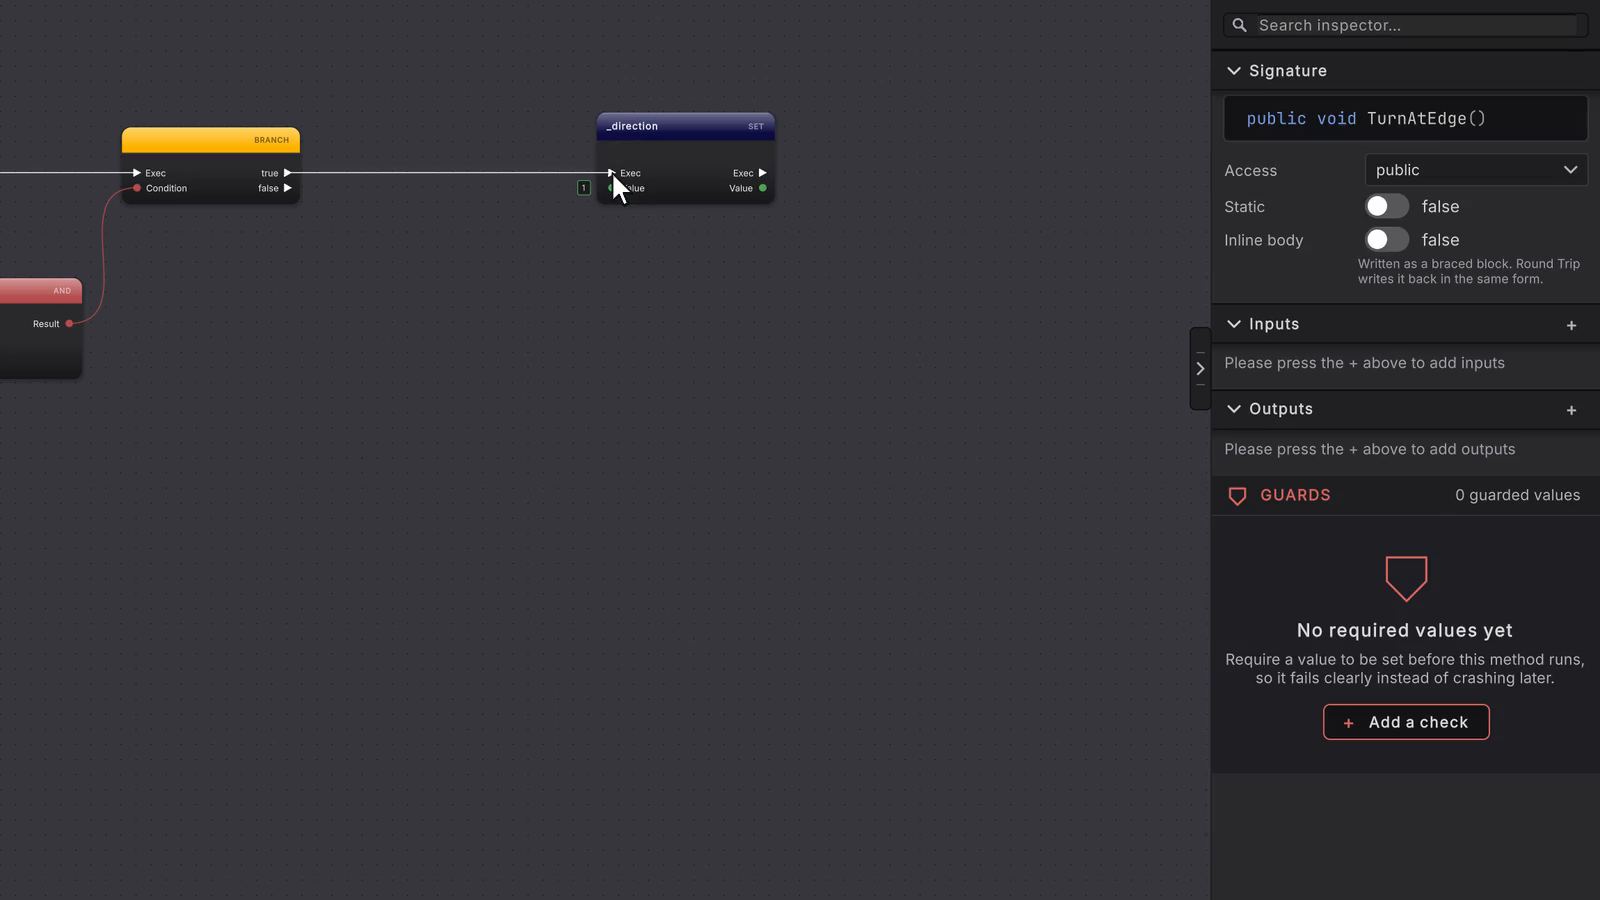 7 stepsFull size ↗
Add the else-if
Add the else-if. Right-click the branch node and choose Edit branch arms. The Branch arms panel lists the arm you have, numbered, with Wired shown where its condition comes from a wire. Press Add else if. A second yellow BRANCH node appears below the first, already joined to its false output by a white wire. Click outside the panel to close it.
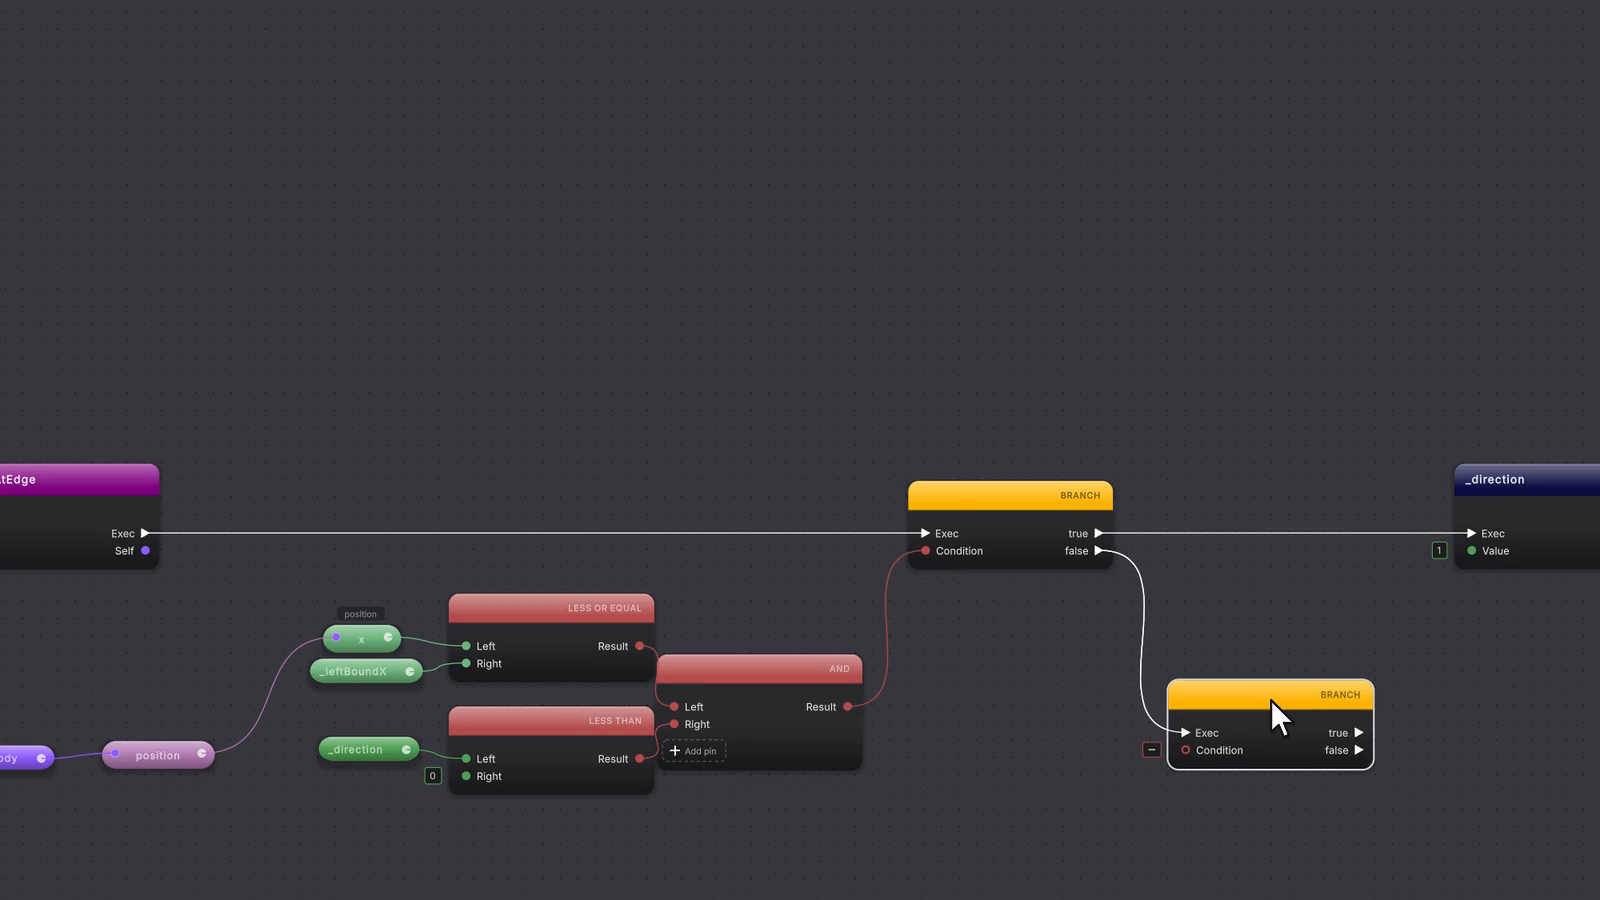 8 stepsFull size ↗
Build the right-edge test
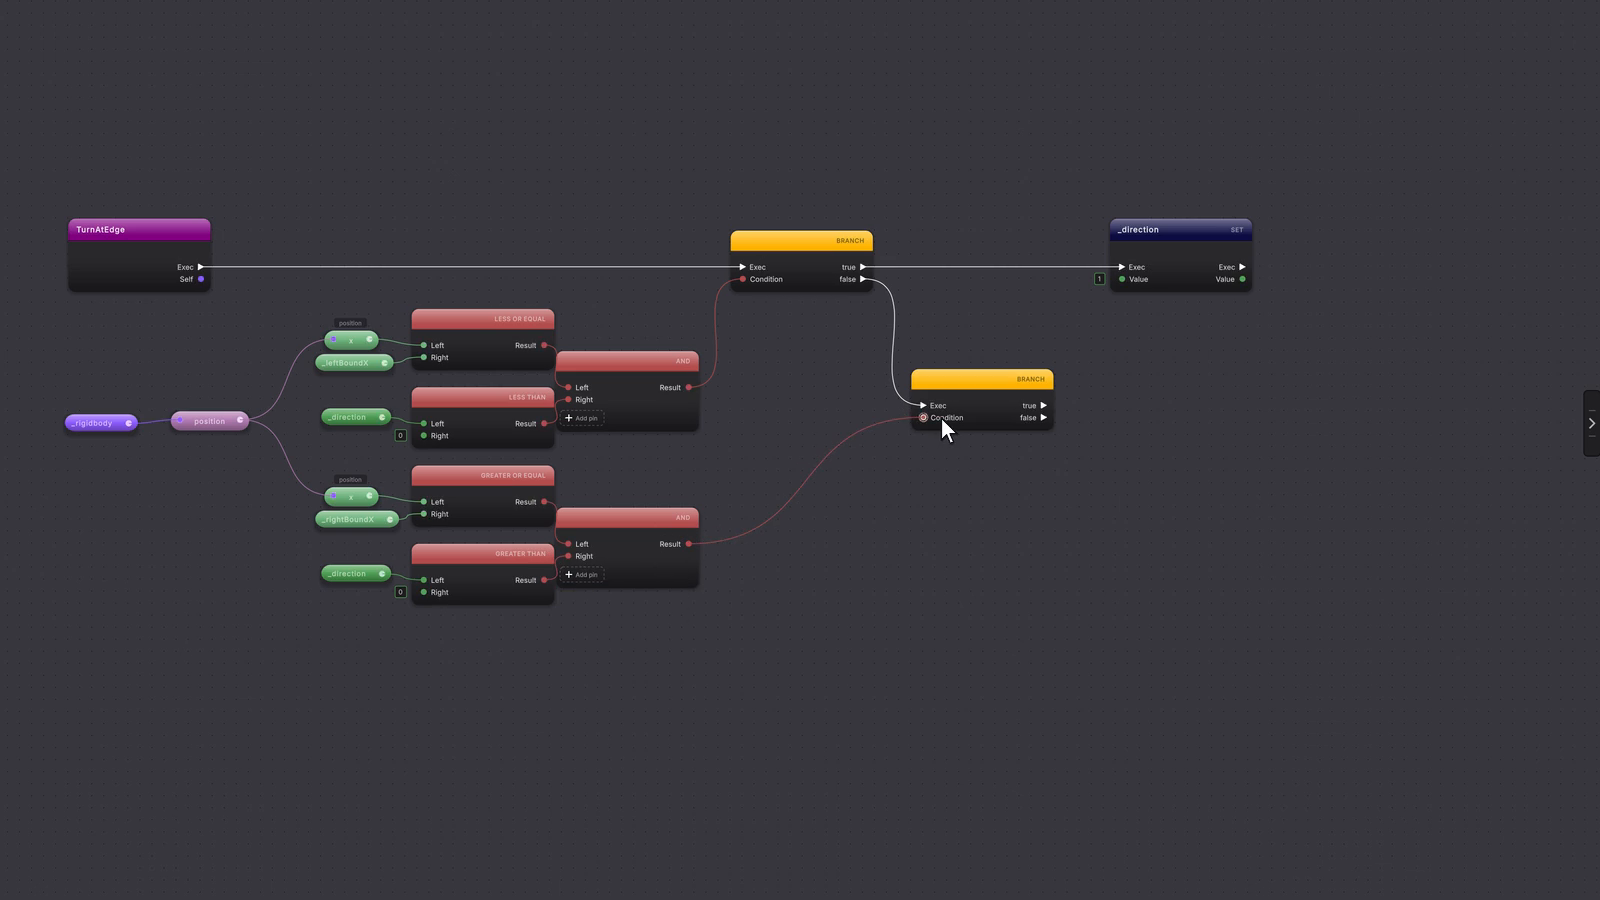
Build the right-edge test the same way. Place Greater or equal with the x pill on Left and a _rightBoundX pill on Right, place Greater than with a _direction pill on Left and
0typed on Right, join them on an And node, and wire its Result into the second branch’s Condition.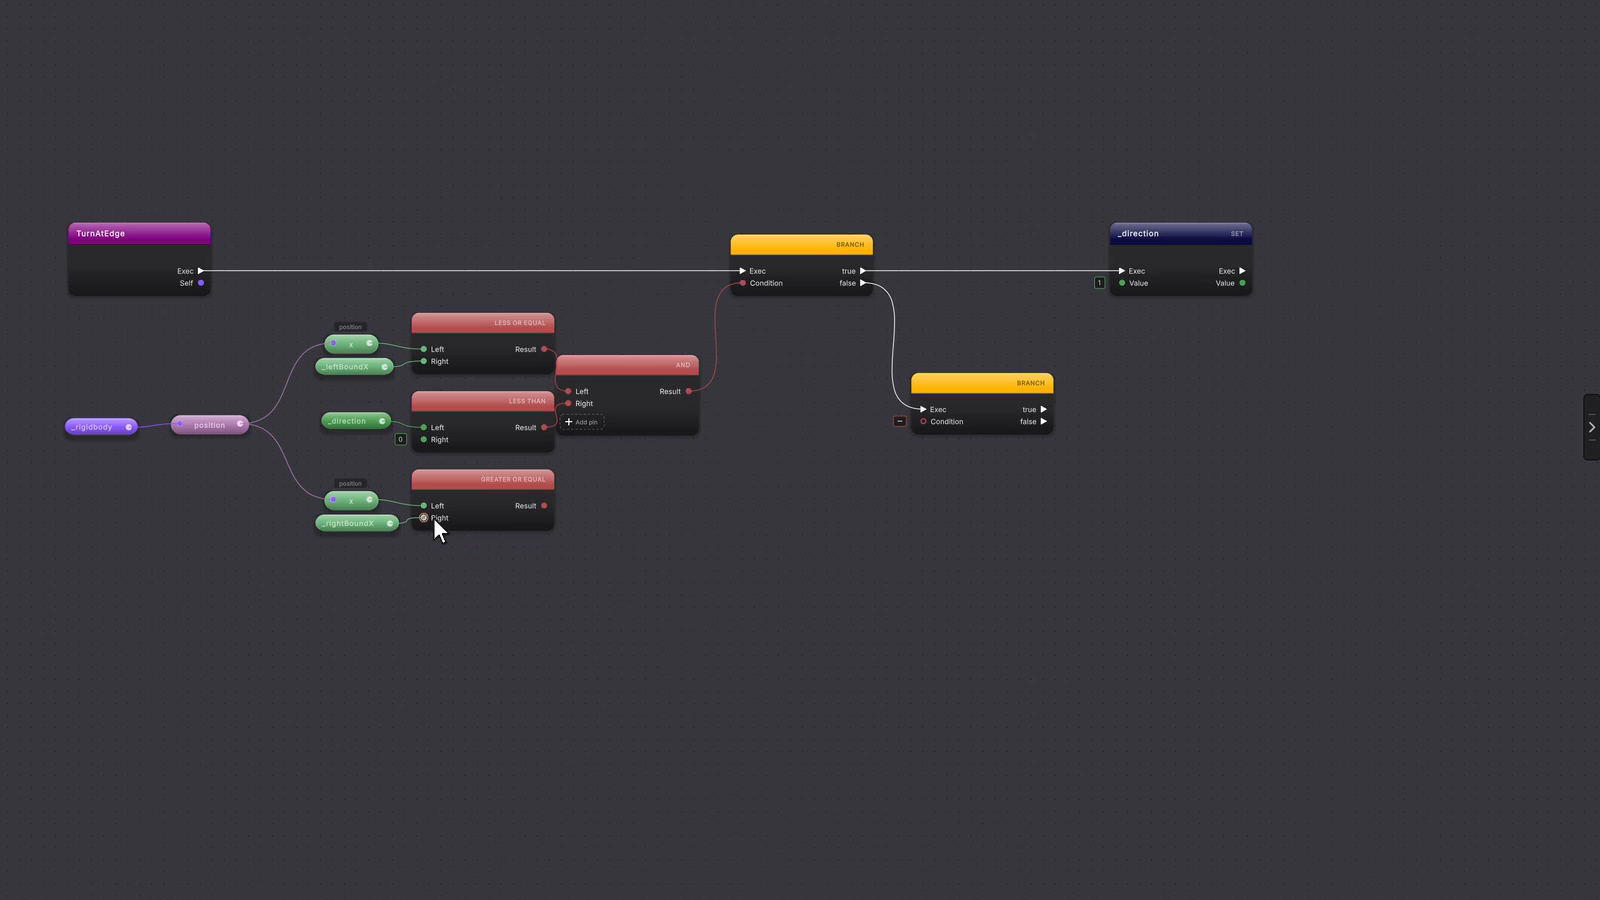 12 stepsFull size ↗
 17 stepsFull size ↗
Turn left
Turn left. Place another SET node for _direction, type
-1into its _direction pin, and wire the second branch’s true output into it.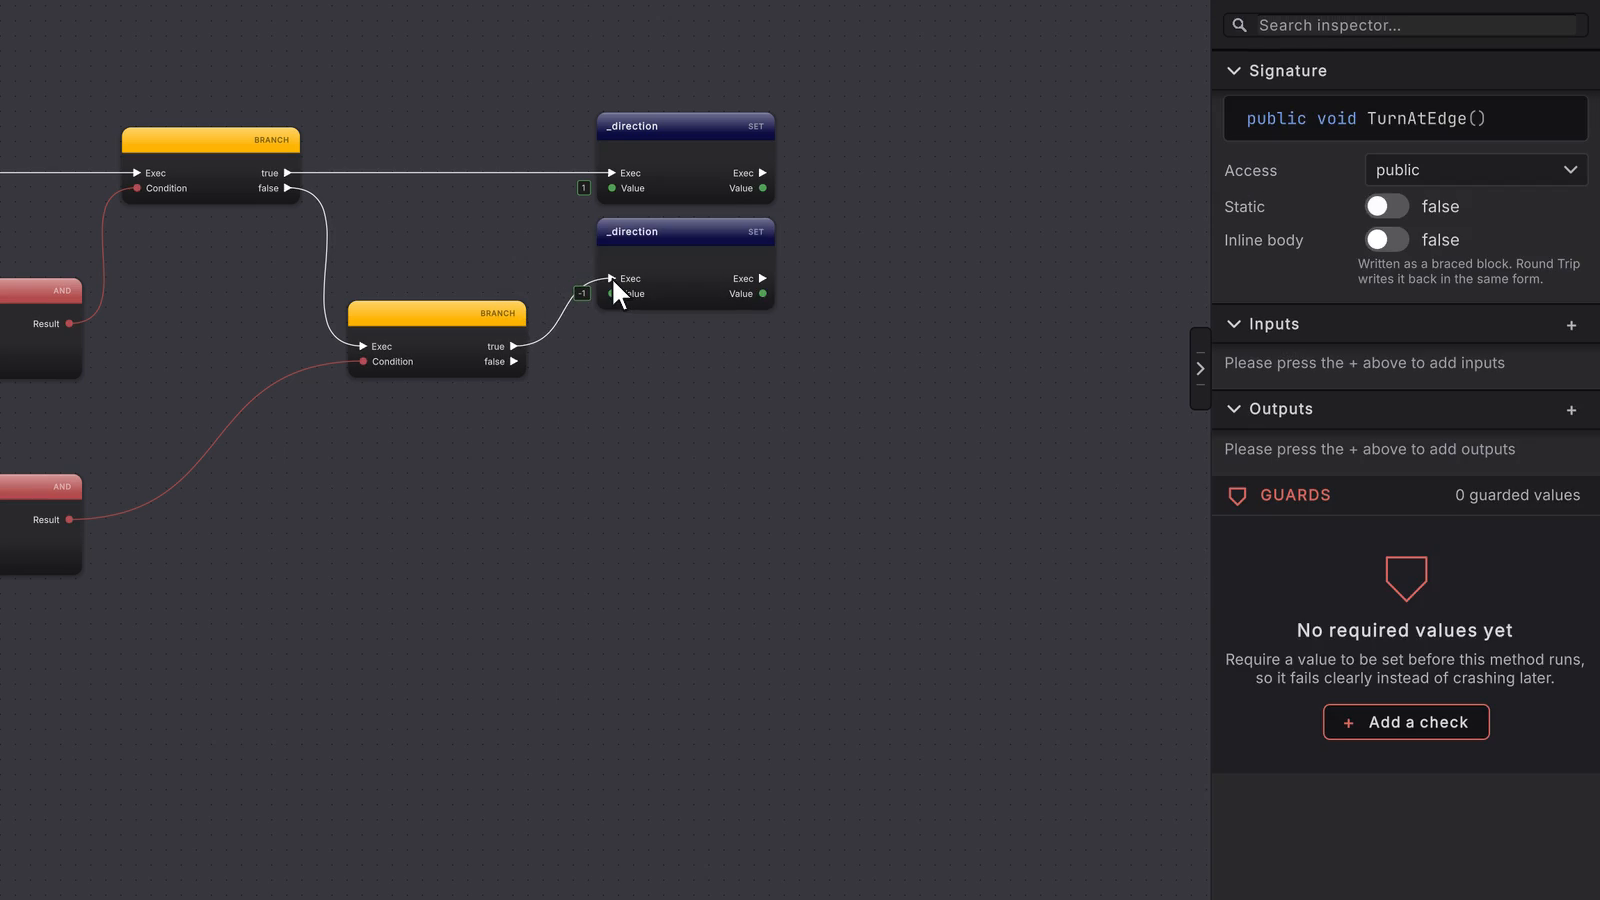 7 stepsFull size ↗
Meet at the next node
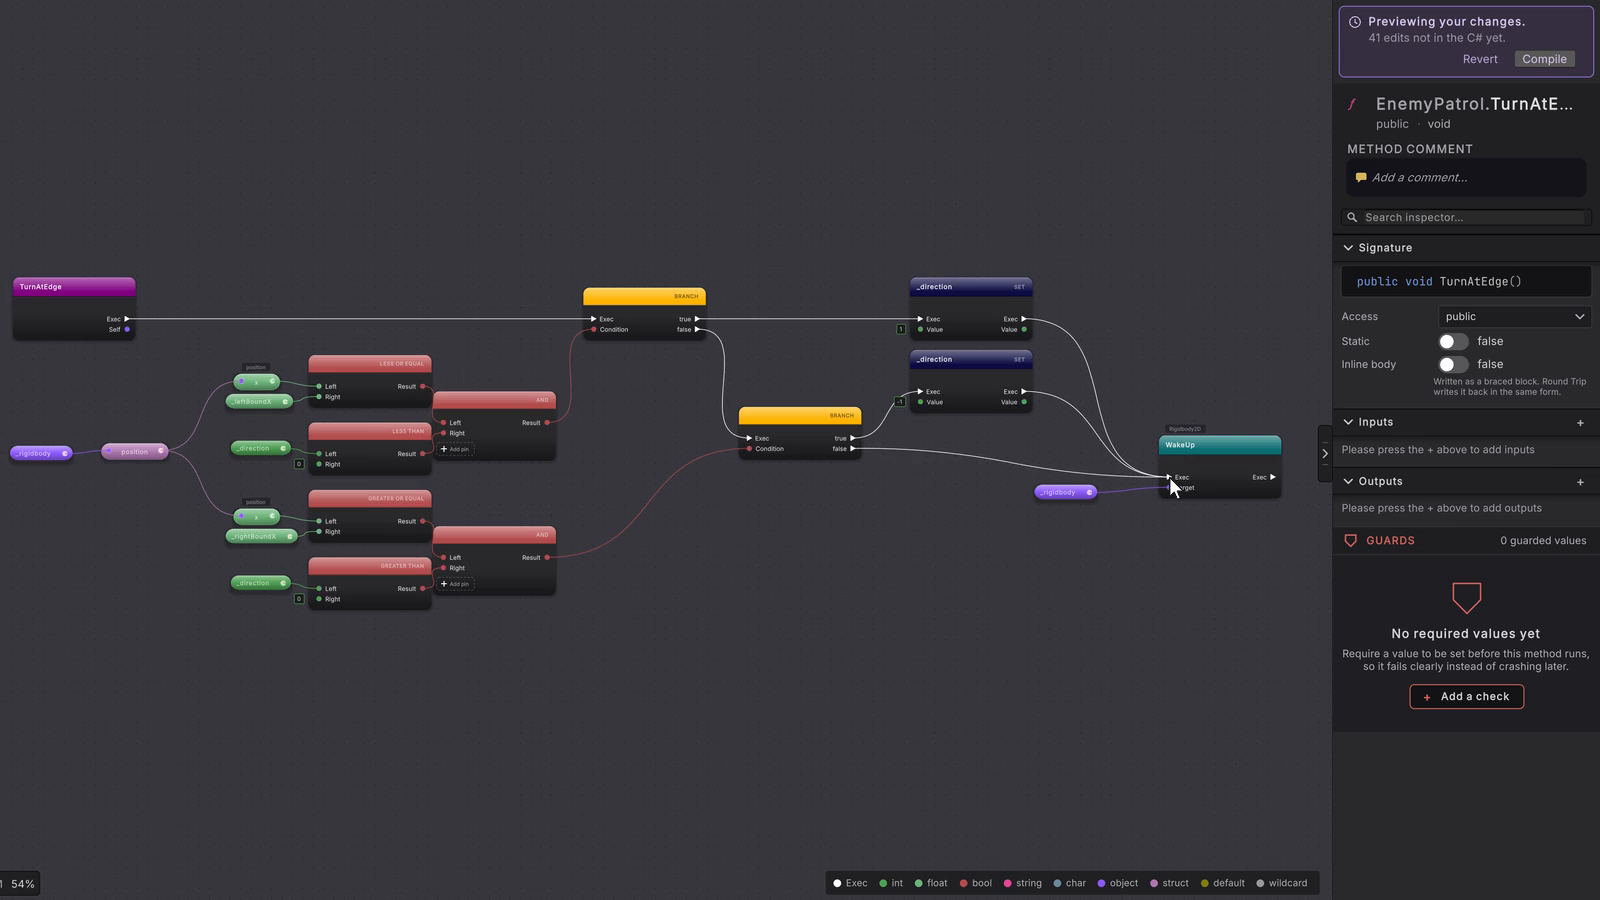
If work should run every physics step after the decision (the sample sets the patrol’s speed there), place that node and wire three white wires into its Exec: from each SET node’s Exec output and from the second branch’s false output. All three routes meet there.
 12 stepsFull size ↗
Compile
Press Compile in the toolbar.
What it writes
Section titled “What it writes”If you also work in C#, this is the sample’s FixedUpdate, drawn as the diagram beside the code. Your TurnAtEdge writes the same if and else if pair.
Work wired after the meeting point runs on every step. Work placed on only one true route would skip the other turn and every ordinary step.
When it goes wrong
Section titled “When it goes wrong”When it goes wrong
| Symptom | Check | Fix |
|---|---|---|
| The enemy jitters at an edge. | Look at each branch's And node: does it take a _direction comparison as well as a position comparison? | Add the Less than or Greater than node on _direction and wire it into that And node. |
| Both edge checks run on the same step. | Follow the white wire into the second BRANCH node. | It should come from the first branch's false output. Use Edit branch arms and add else if to rebuild the chain. |
| The patrol stops falling or jumping. | Look at the velocity nodes after the meeting point: do they replace the whole velocity? | Read the current velocity into a local, set only its x, then set it back on the rigidbody, as the sample does. |
- Branch: build if and else-if routes.
- Get and set: read and write _direction and velocity.
- Operators and expressions: combine comparisons on And and Or nodes.