
Wire knots
Add a wire knot to bend a wire around other nodes, move it by its ring or with Cmd/Ctrl from anywhere on it, branch a new wire that shares it, and remove it, all without touching the C#.
On this page
A wire knot is a point a wire passes through on its way from one pin to another. Double-click a wire to add one, then drag it to bend the wire clear of the nodes in its path. A knot is layout: it changes where the wire is drawn and nothing about the C#.
The problem
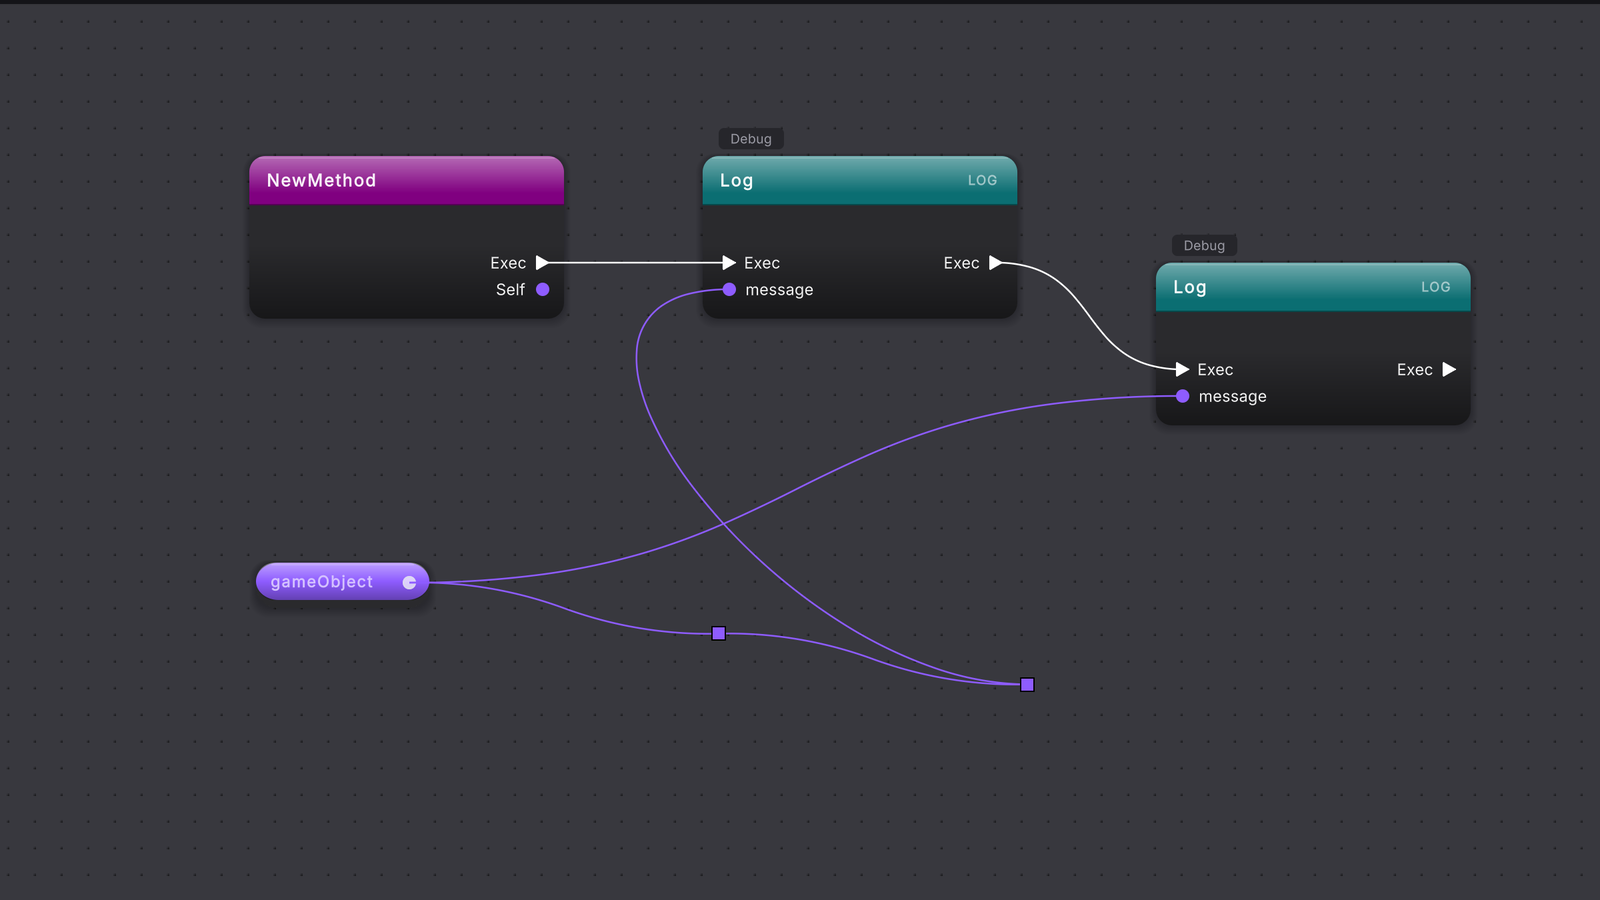
Section titled “The problem”One value often feeds a node far across the canvas. Its colored wire then runs behind the nodes in between and crosses the white path on the way, and following it by eye means tracing a curve that starts beside another one and disappears under a node. Moving the nodes to untangle it would spoil the left-to-right order that makes the white path readable. In the Platformer sample’s UpdateGrounded diagram, the purple collision wire into GetContact does exactly this, crossing the white wire into the loop.
When to reach for it
Section titled “When to reach for it”Add a wire knot when one wire, rather than a node, is in the wrong place: a long data wire that runs behind a node, two wires that cross where they need not, or a wire you want to route along the edge of a group of nodes. Move nodes first if the nodes are what is out of order, and use Snap to grid and Align nodes to tidy them. Knots work on white exec wires and colored data wires alike.
See it
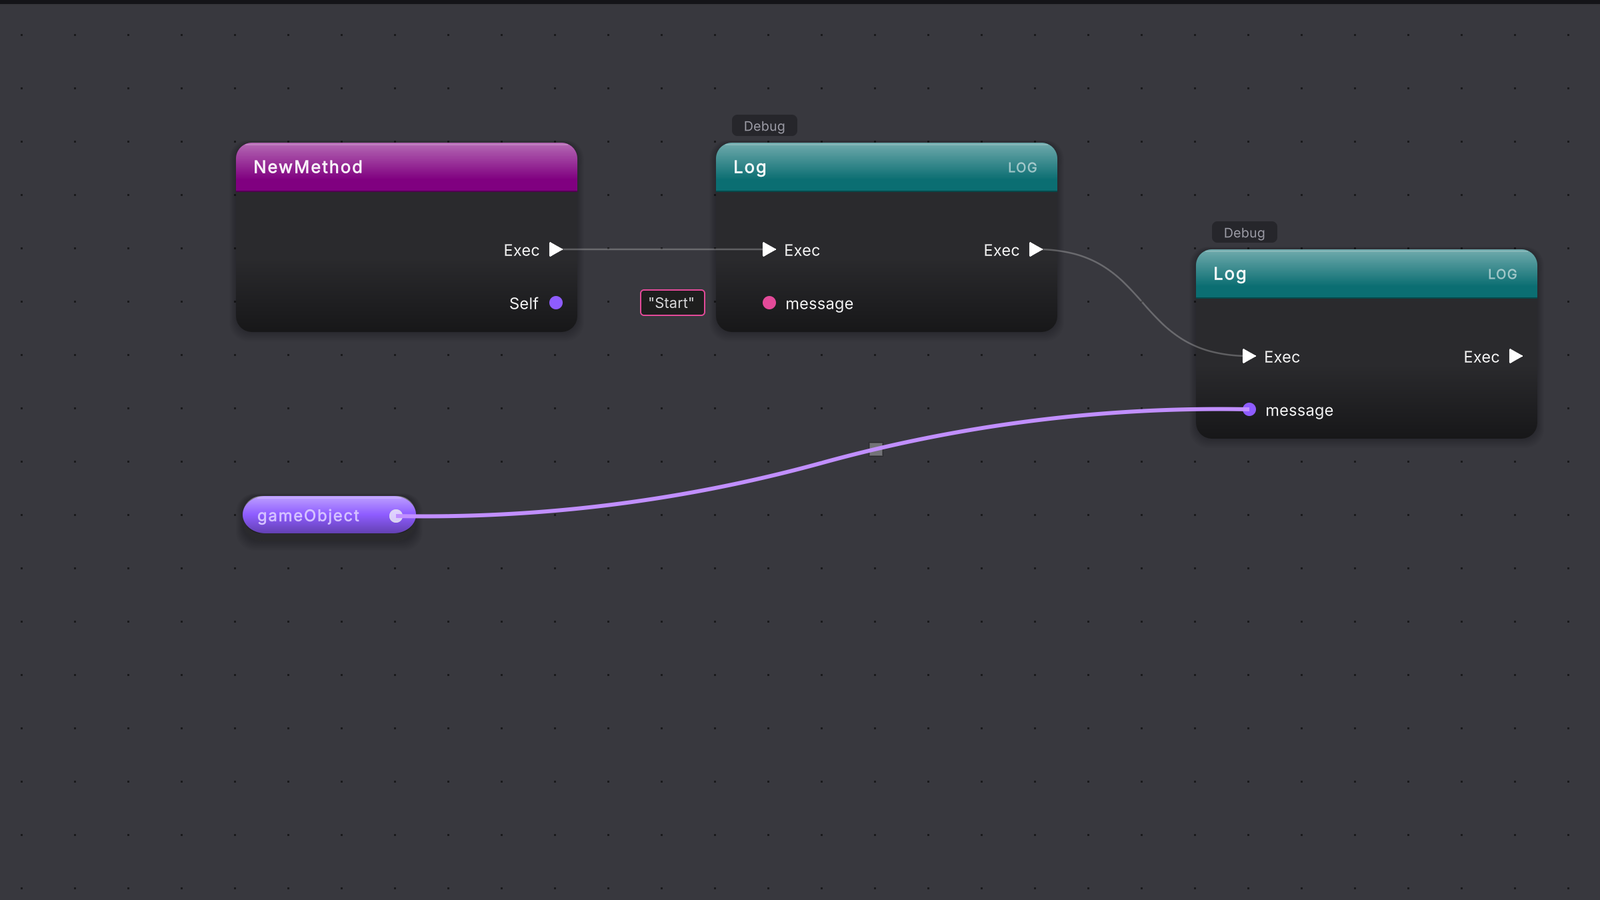
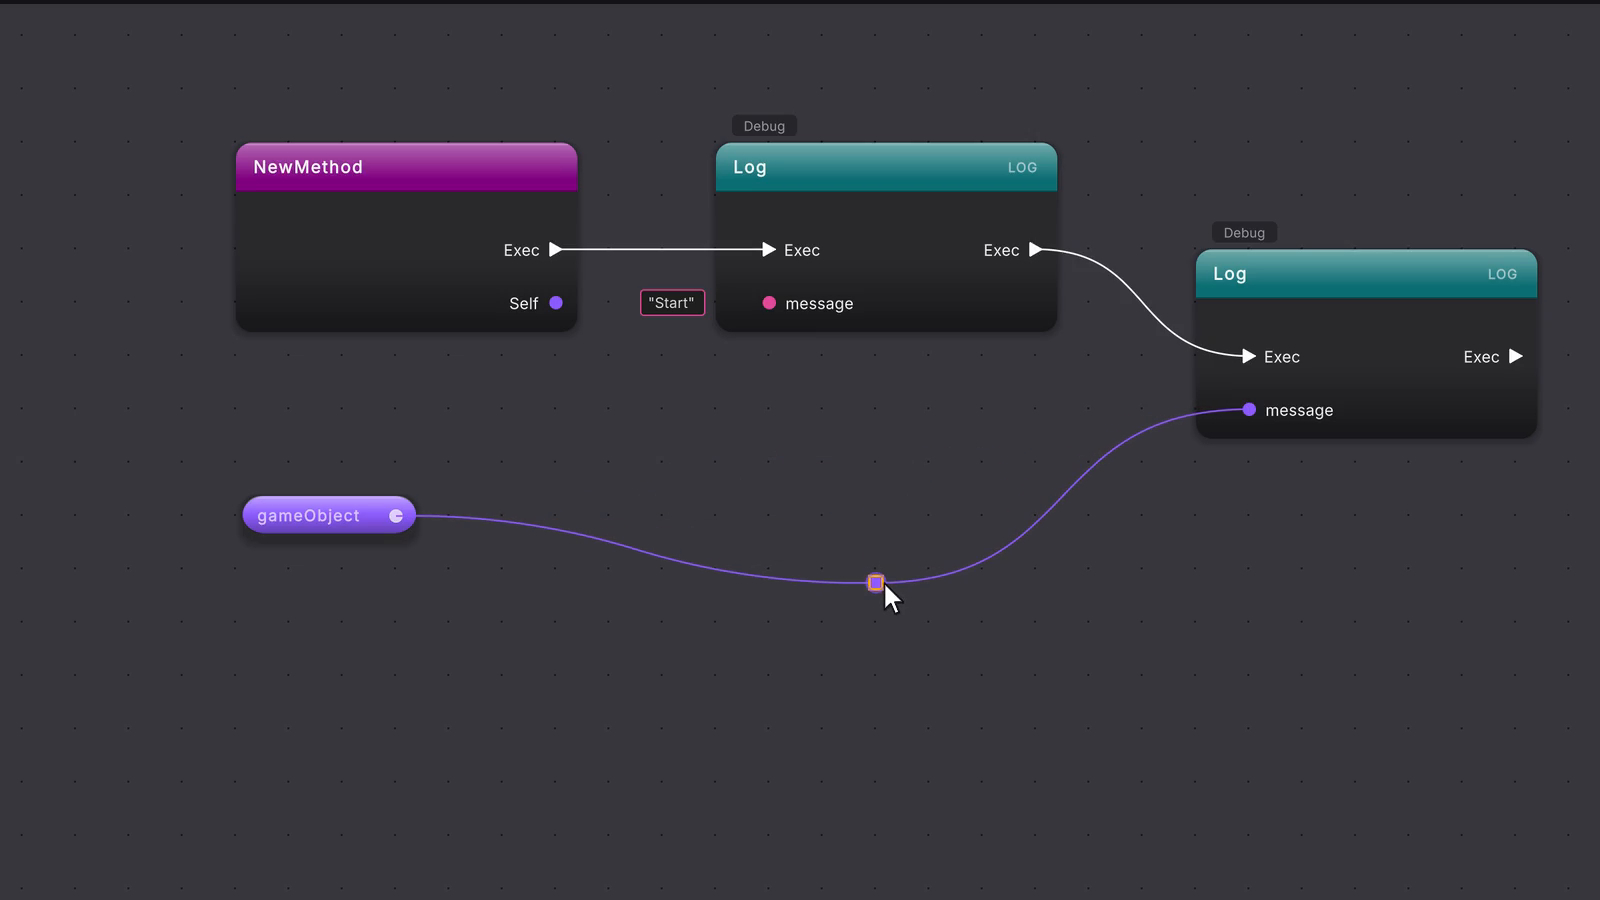
Section titled “See it”Move the pointer near a wire and the wire brightens, while a faint ghost knot slides along it under the pointer to show where a double-click would put a knot. A placed knot is a small square in the wire’s color. Hover it and a ring appears around it, and the cursor tells you what a press will do: the move-arrow over the outer ring, the link cursor over the center. Hold Cmd/Ctrl and the move-arrow covers the whole knot, center included. It is the same key that means move everywhere else on the canvas: Cmd/Ctrl-drag from a pin moves a wire’s end, and Cmd/Ctrl-drag a wire’s pill end splits a pill.
Route wires with knots
Build the visual script
Build a visual script with one long wire. In the left rail, click + on the Methods header and press Enter: a magenta entry node appears. Right-click empty canvas to its right, type
Debug.Loginto search and click the Log row. Place a second Log node the same way, further right. Drag a white wire from the entry node’s Exec pin to the first Log node, and another from the first Log node’s Exec output to the second. Type"Start", quotes included, in the box beside the first node’s message pin.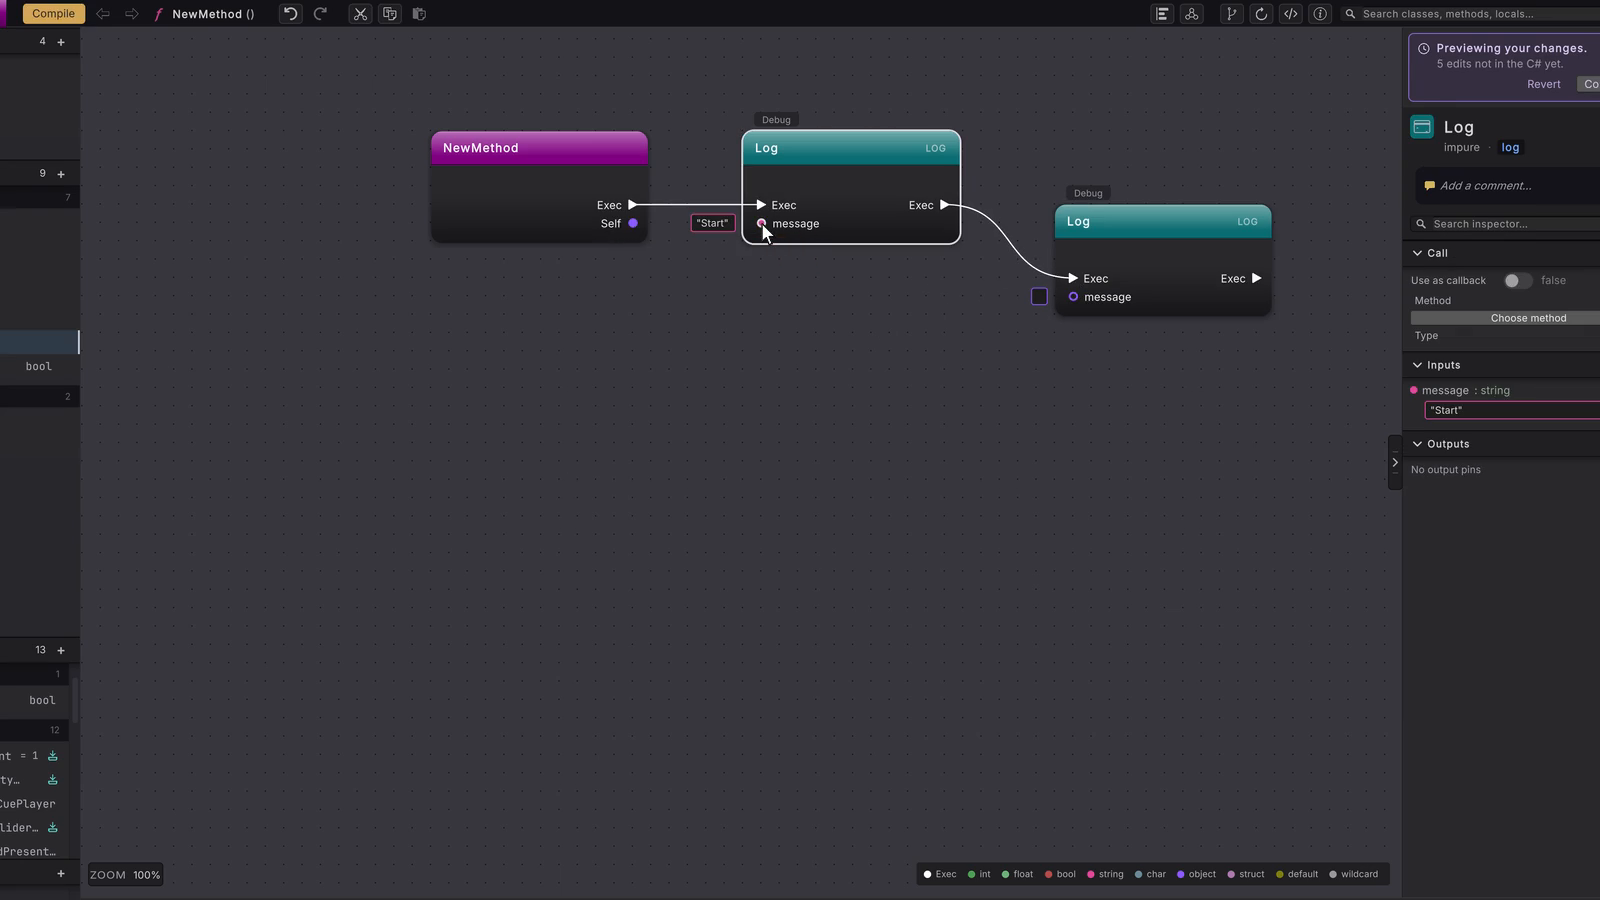 15 stepsFull size ↗
Wire gameObject to the second Log
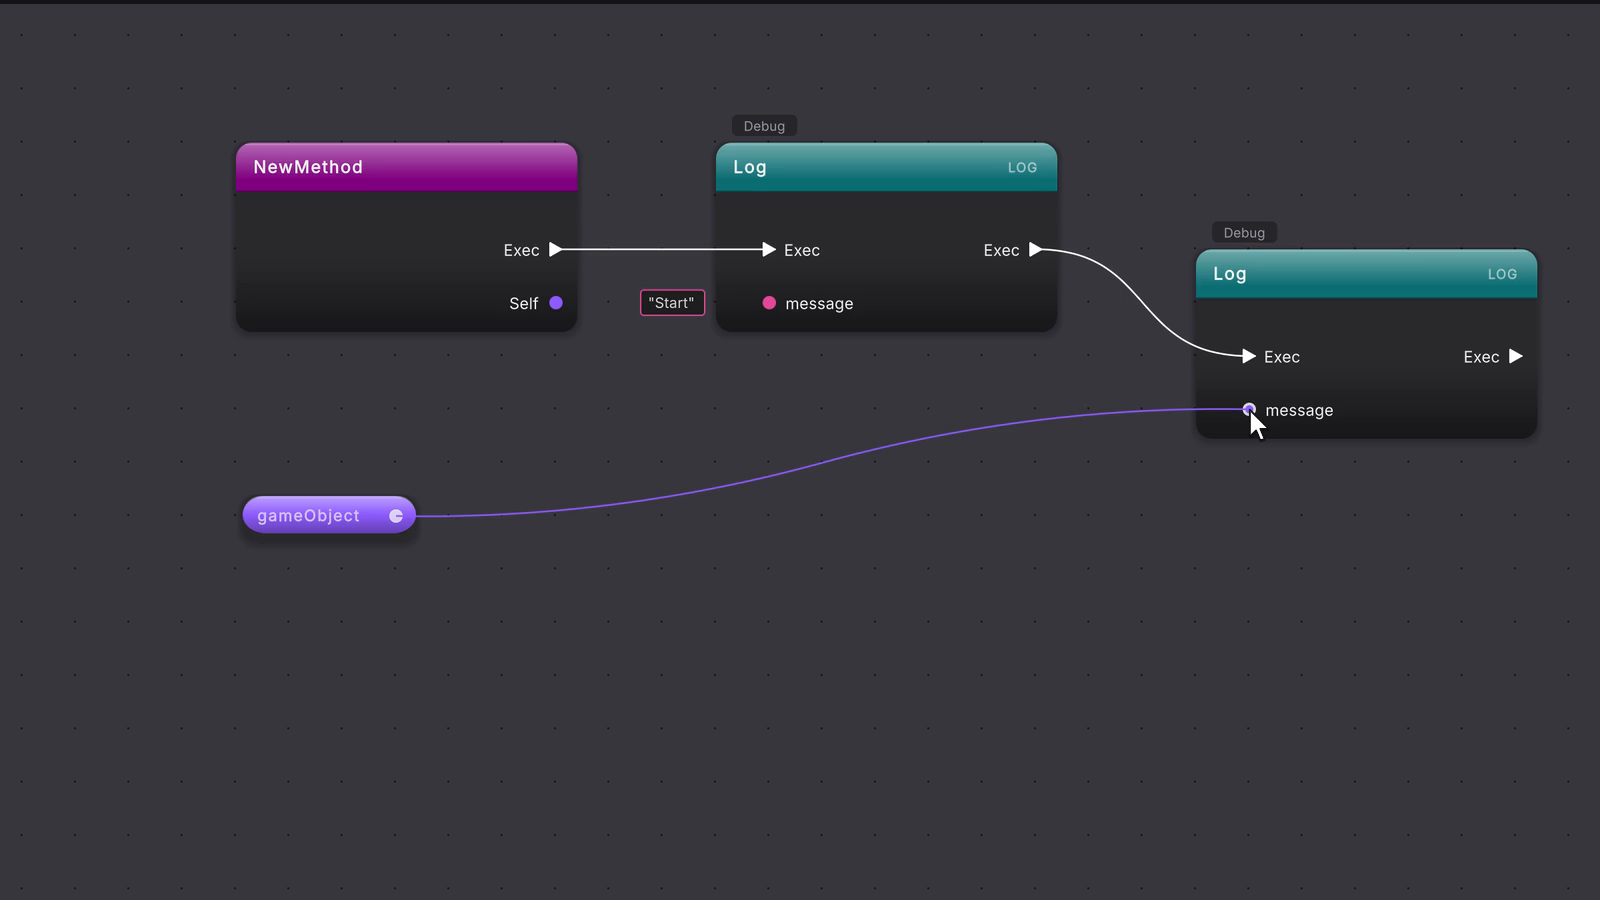
Right-click empty canvas below the entry node and, in the VARIABLES section, click get on gameObject. Drag from the purple pill’s dot to the second Log node’s message pin. A long purple wire runs under the first Log node to reach it.
 6 stepsFull size ↗
Find the ghost knot
Move the pointer close to the long purple wire.
Place a knot
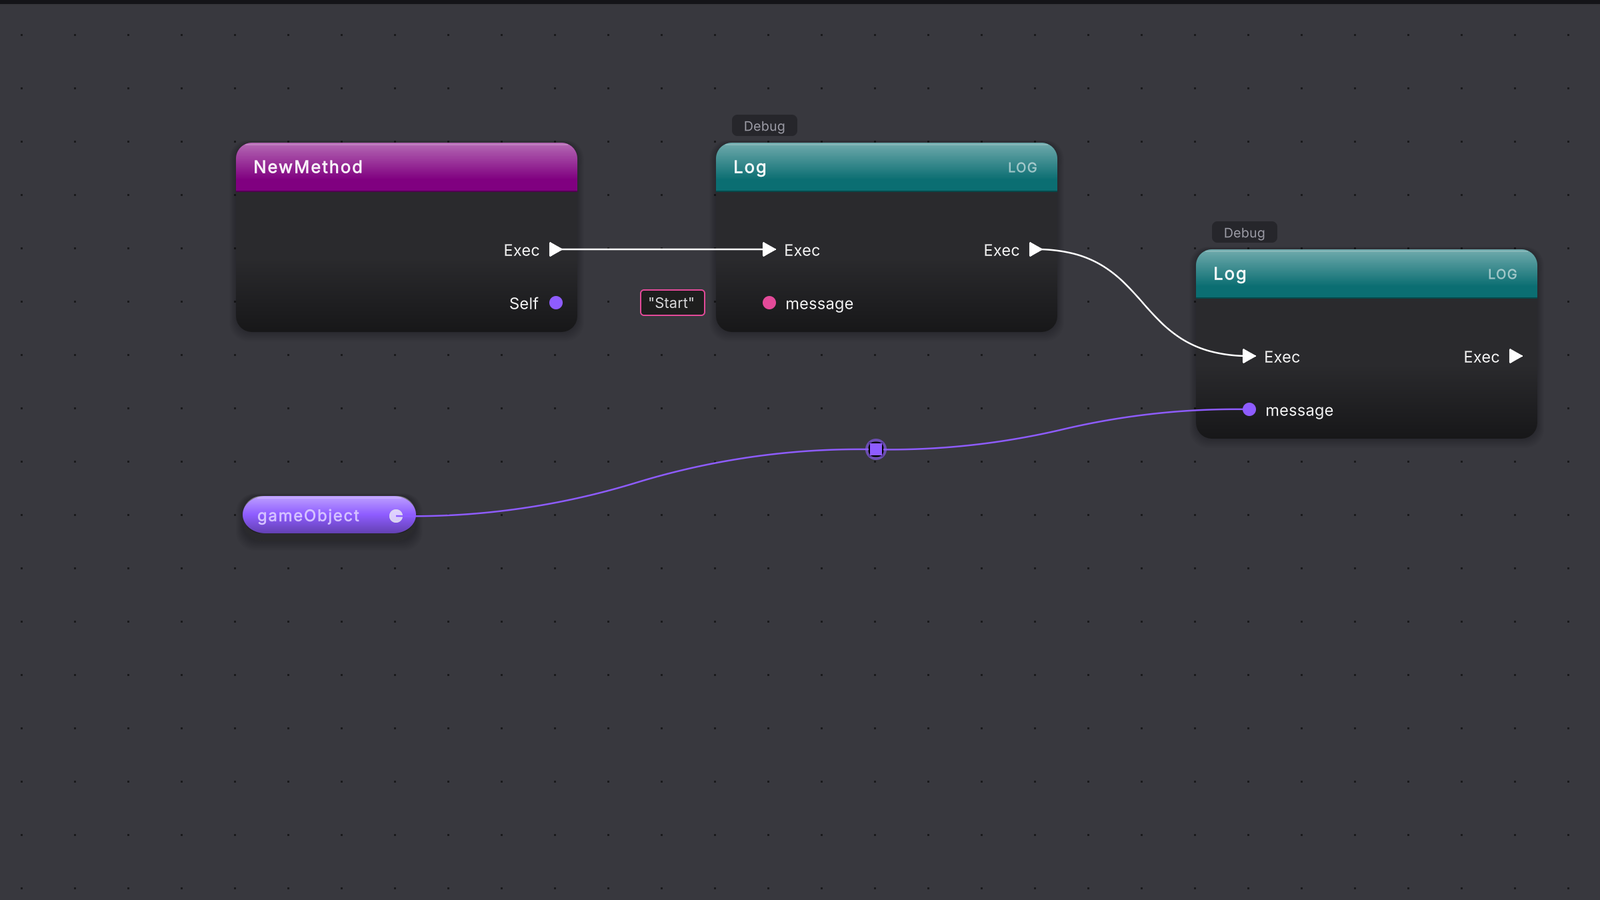
Double-click the wire where it passes under the first Log node. A wire knot, a small purple square, appears at that spot and the wire now runs through it.
Drag the ring
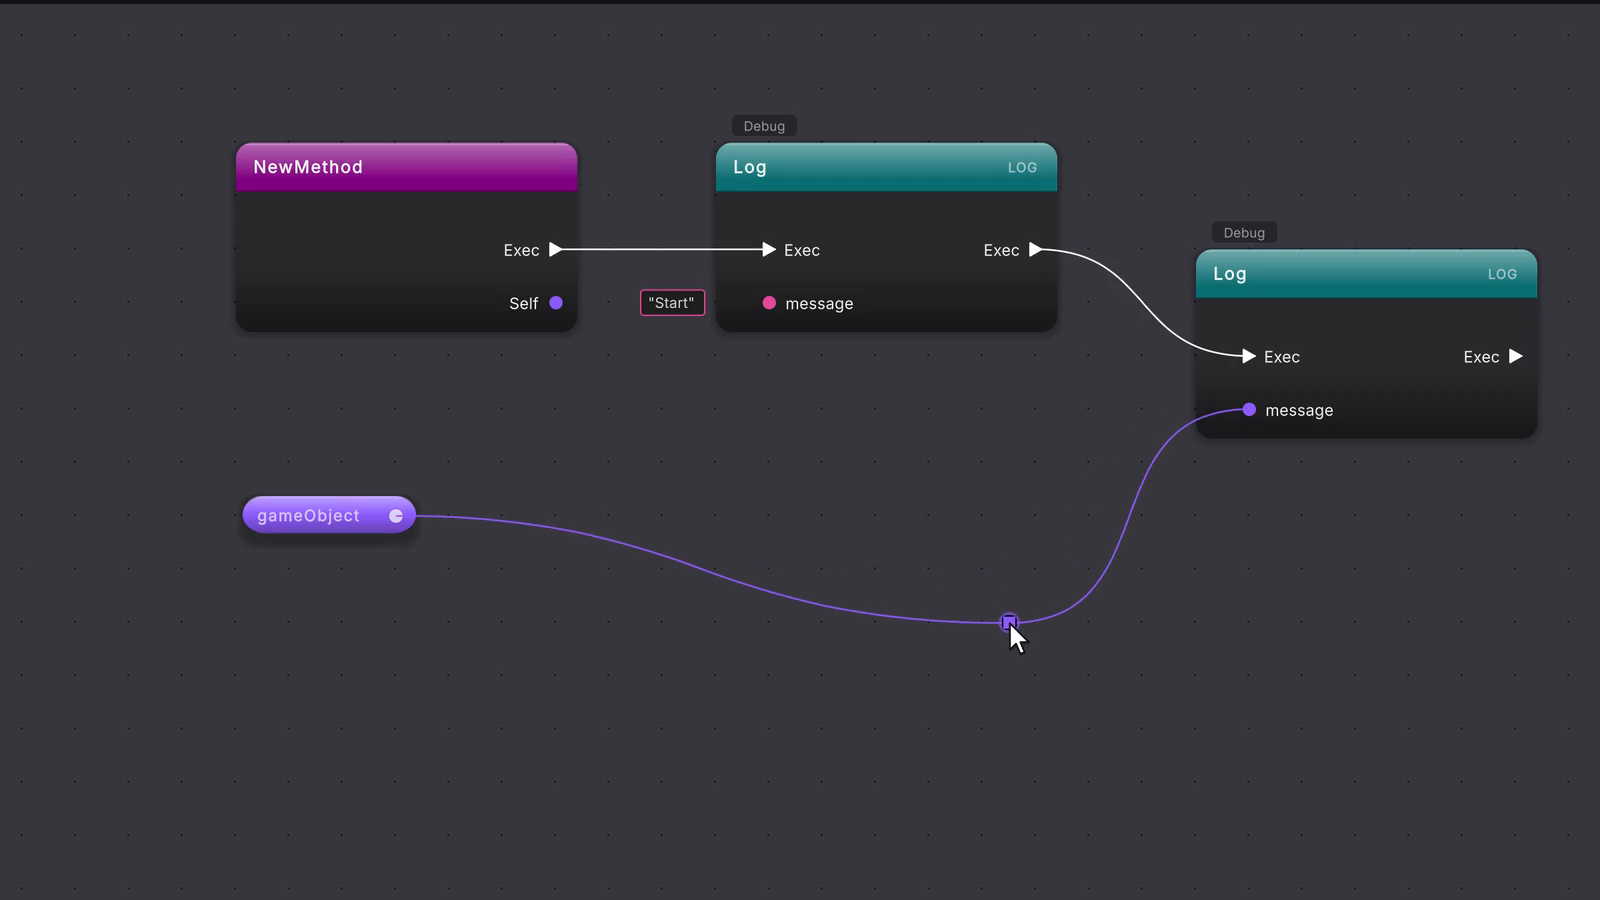
Hover the knot. Its ring appears. Press on the outer ring, where the cursor is the move-arrow, and drag the knot down, clear of the first node. The wire redraws as you drag, and every wire that shares the knot follows it. Release, and the move is one undo step. A drag that ends where it started records nothing.
Move from the center
Hold Cmd/Ctrl and point at the knot. The cursor is the move-arrow over the whole knot. Cmd/Ctrl-drag from its center and it moves, the same as a drag on the ring, with no need to find the ring first.
Branch from the knot
Let go of Cmd/Ctrl, press in the knot’s center, where the cursor is the link cursor, and drag onto the first Log node’s message pin. A new purple wire follows the pointer out of the knot. Release on the pin. Press Escape during such a drag to cancel without connecting.
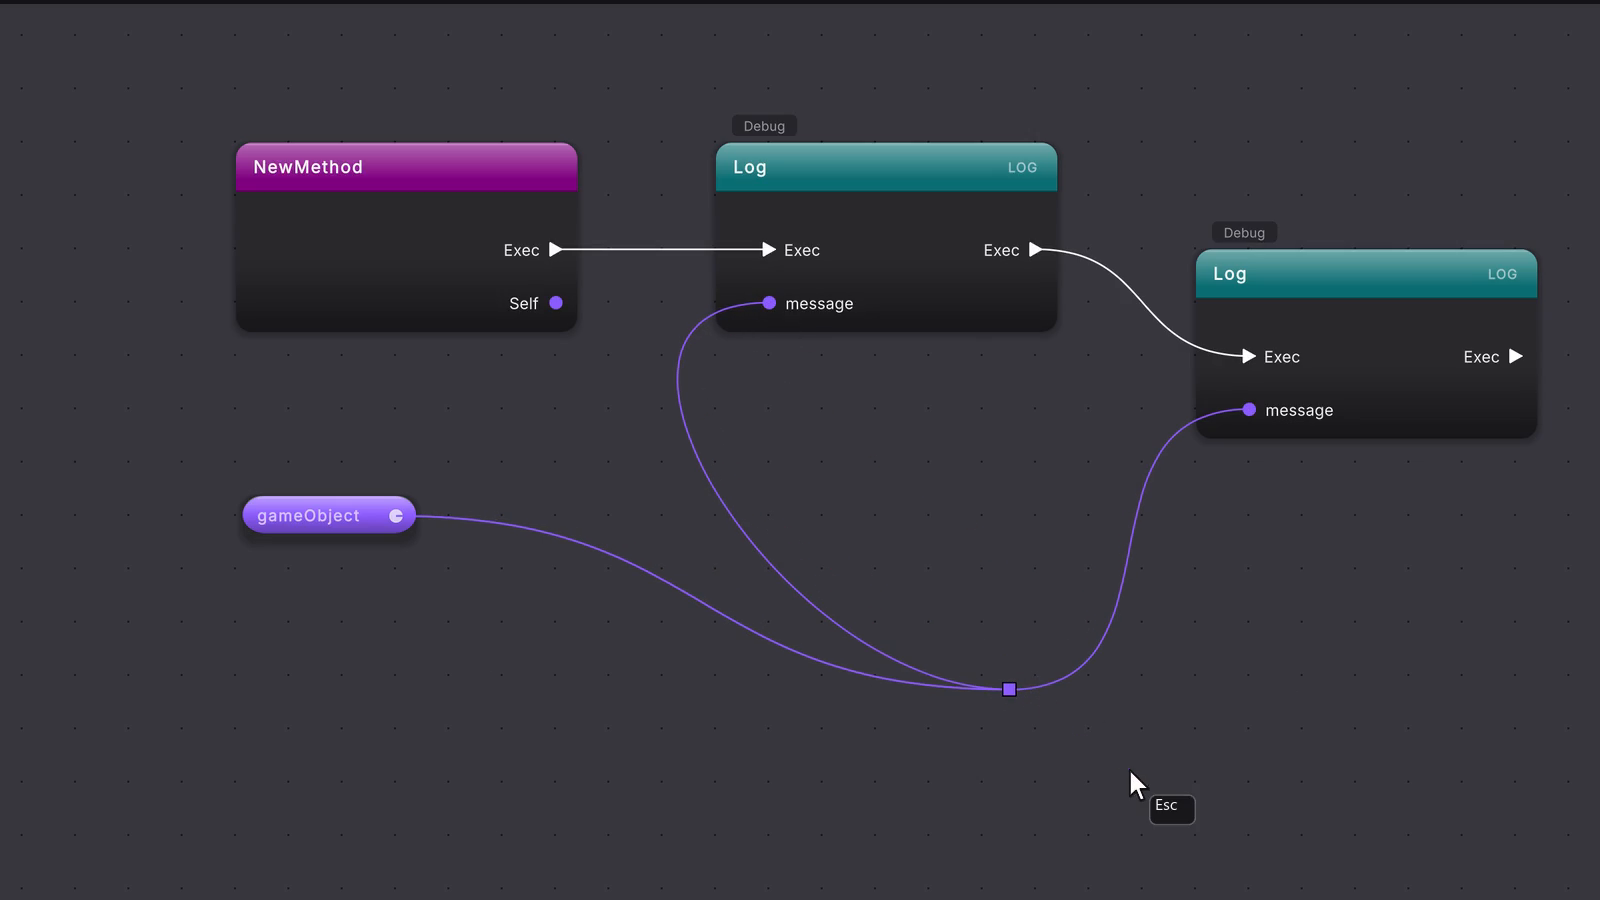 5 stepsFull size ↗
Select and delete
Click the knot, then press Delete or Backspace.
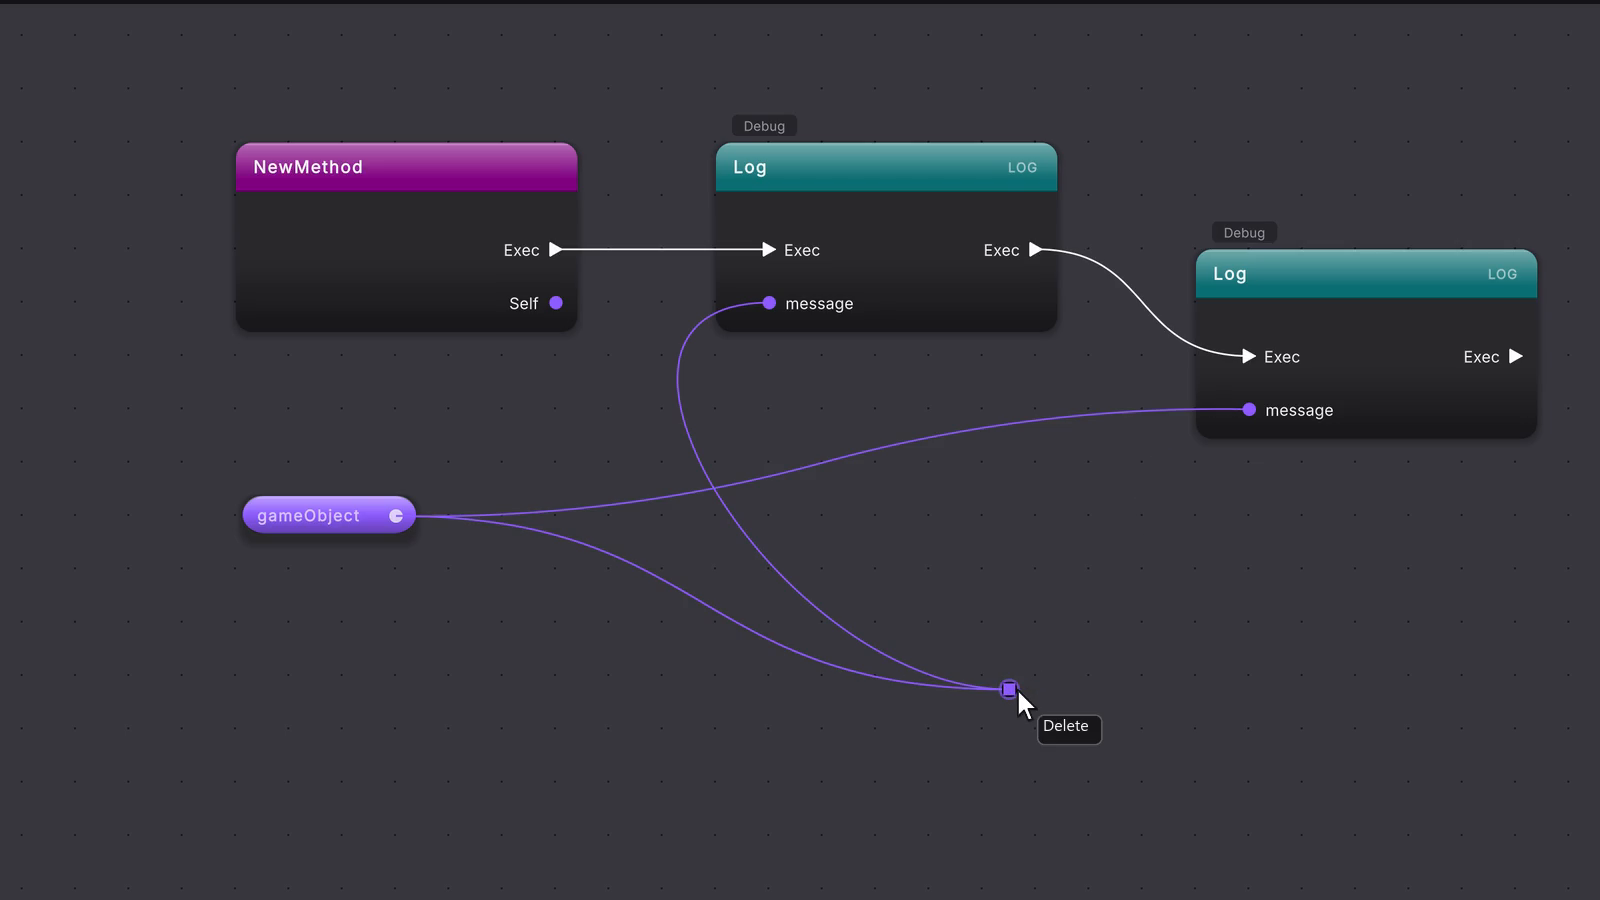 2 stepsFull size ↗
Remove a knot from the menu
Double-click the wire again to add a knot, then right-click the knot and choose Remove wire knot. On a shared knot this takes the knot off one wire; the other wire keeps its own copy in the same place.
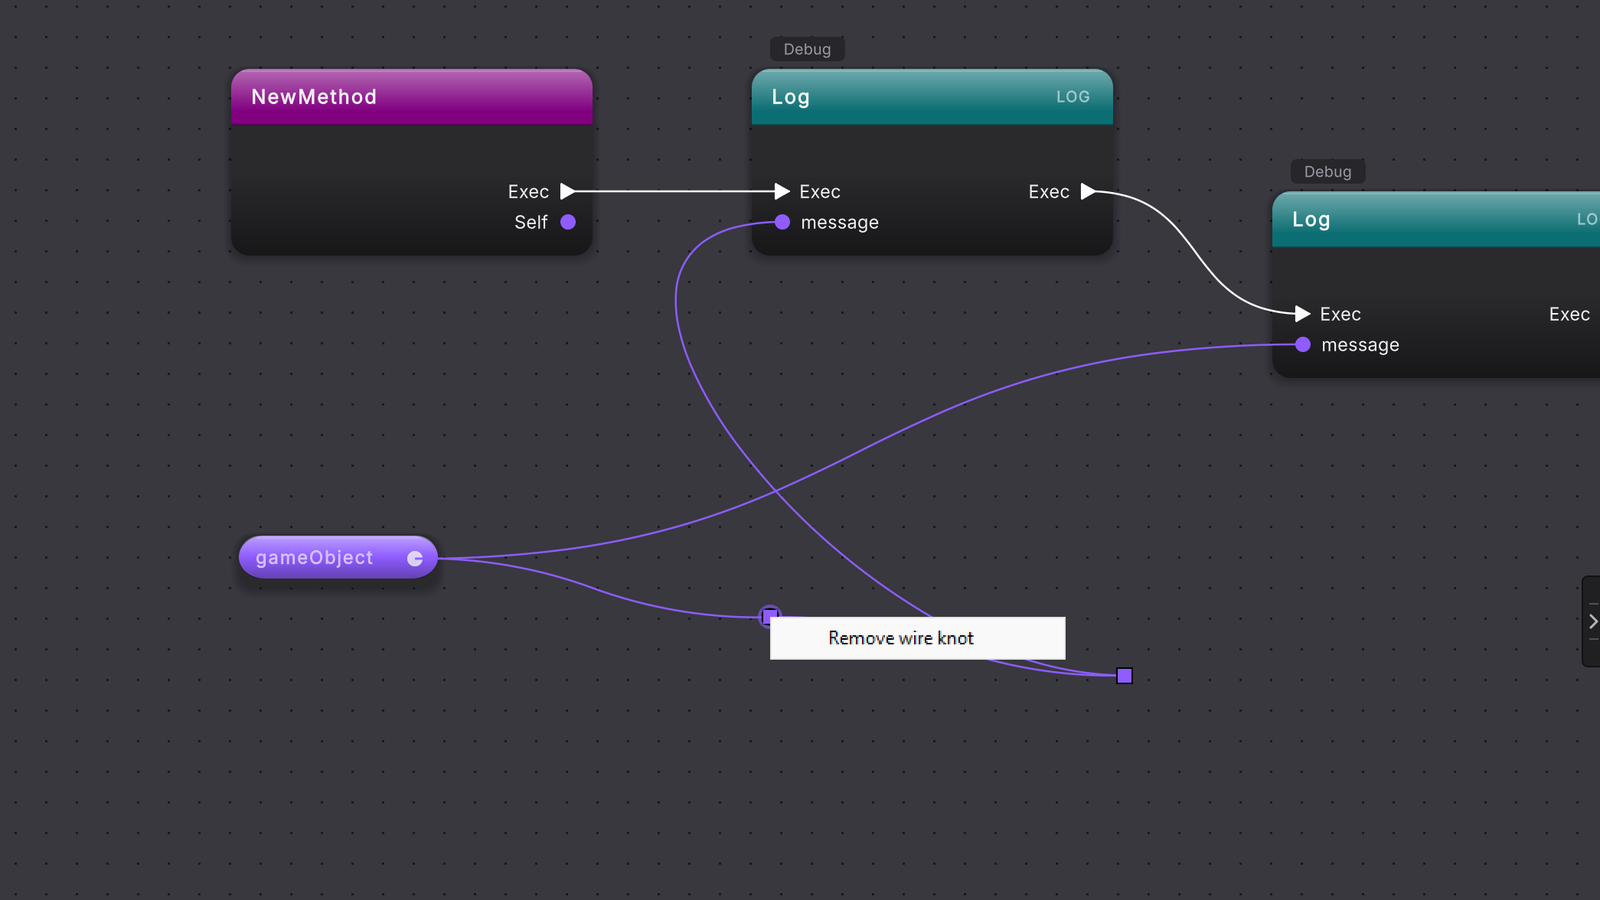 5 stepsFull size ↗
Undo the removal
Click the other visible knot to give the graph keyboard focus, then press Cmd/Ctrl+Z. Each knot you add, move or remove is its own undo step, so undo puts the removed knot back exactly where it was.
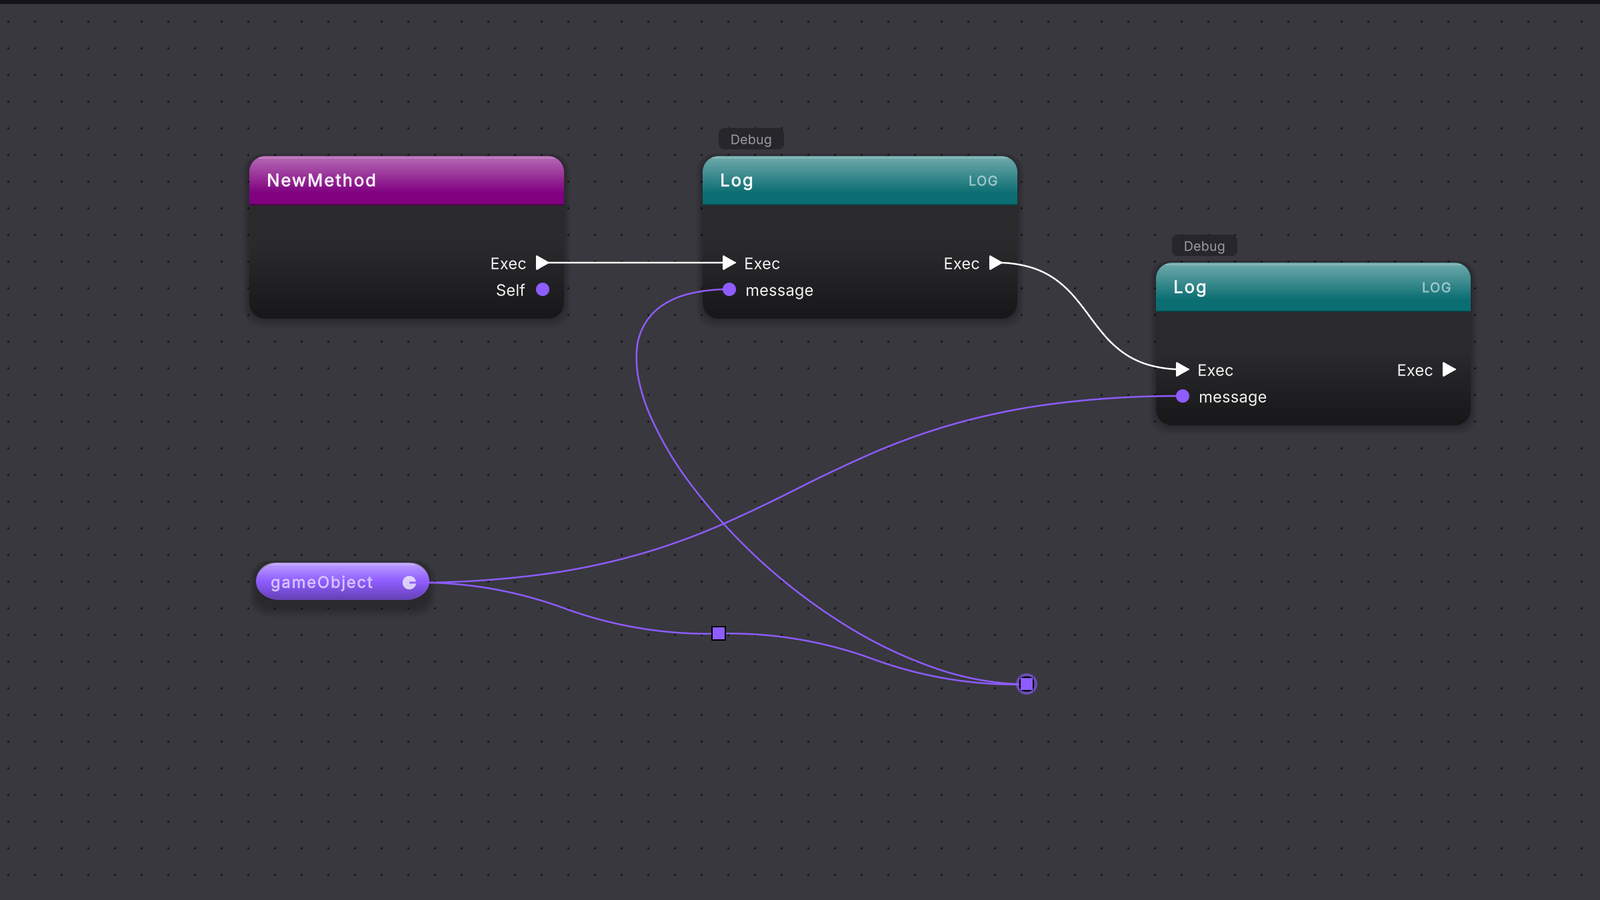
Compile and reload
Press Compile in the toolbar.
What it writes
Section titled “What it writes”Nothing in the script. A wire knot is layout, saved in the method’s .rt.json layout file on the entry for the wire it sits on, under edges for a white wire or dataEdges for a colored one. Each knot has a position and an id:
This is the whole saved entry for the long purple wire after step 5. The wire’s id is a stable identifier derived from the nodes and pins it connects, so the knots stay on the right wire after Round Trip rereads the script, a Compile or reopening the project. A shared knot is one knot id listed on both wires, each wire with its own copy of the position, which is why removing it from one wire leaves the other intact.
The class’s .cs file is unchanged by adding, moving or removing a knot, and Compile has nothing to write for them. The exception is a wire you branch out of a knot in step 7: the knot is layout, but the new connection is a real edit to the method, so it waits as a draft for Compile like any other wire you draw. Auto layout clears the knots you placed in that diagram, and you can undo it during the session. Knots stay at the exact point you release them; Snap to grid places nodes and pills.
When it goes wrong
Section titled “When it goes wrong”When it goes wrong
| Symptom | Check | Fix |
|---|---|---|
| Dragging a knot drew a new wire instead of moving it. | The press landed in the center of the knot, where the cursor is the link cursor. | Press Escape to cancel, then drag the outer ring, or hold Cmd/Ctrl and drag from anywhere on the knot. |
| Double-clicking a wire added no knot. | The pointer was too far from the wire: the wire did not brighten and no ghost knot showed under the pointer. | Move closer until the ghost knot appears on the wire, then double-click. |
| Moving one knot moved two wires. | One of the wires was branched out of the knot, so the two wires share it. | Right-click the knot and choose Remove wire knot to take it off one wire, then give that wire its own knot. |
| Delete or Backspace left the knot in place. | The knot has no orange outline, or a text box has keyboard focus. | Click the knot so it shows the orange outline, then press Delete or Backspace, or use Remove wire knot from its menu. |
| A knot is gone after reopening the method. | Confirm where layout files are stored and that layout saving is available for this method. | Choose the intended storage location in Layout and configuration files, add the knot again and leave the method normally. |
| Auto layout removed the knots on a carefully routed wire. | Auto layout resets the whole diagram, including every knot you placed. | Undo during the current session, or add the knots again after the reset. |
- Layout, wire knots, and comments: the rest of the arrangement tools and source comments.
- Nodes, pins, and wires: draw and break the wires a knot sits on.
- Shortcuts: every key and gesture, knots included, in one table.
- Layout and configuration files: choose where saved knots live.